Quantcast
How to Grow Shallots: The Complete Guide | Almanac.com

How to Grow Shallots: The Complete Guide

shallots
Photo Credit
Joanna Tkaczuk
Botanical Name
Allium spp.
Plant Type
Sun Exposure
Hardiness Zone
Special Features

Sign up for our daily newsletter to get gardening tips and advice.

No content available.
Subhead

Planting, Growing, and Harvesting Shallots

Print Friendly and PDF

What are shallots? Are they wee little onions? Funny-looking garlic? Neither! Shallots are prized in the kitchen for their mild flavor and smooth texture. Learn how to plant shallots (in late fall or early spring) with our growing guide.

About Shallots

Shallots are members of the Allium genus, just like onions, leeks, and garlic. The bulbs grow in a manner more similar to onions but look closer to garlic, growing in clusters.

Small in size with papery, copper-pink skin, shallots are a staple for your kitchen and a tasty addition to many dishes. Shallots break down and caramelize easier than onions, producing smoother textures and more velvet sauces.

Learning to grow shallots expands your options from the typical sparse selection in the grocery store, and they’ll keep for months. There are three main varieties of shallots: French gray, Jersey (sometimes called pink), and Echalion. Of course, you’ll also find yellow shallots, banana shallots, and many others. 

How Shallots Grow

A biennial, shallots will make a bulb one year, then flower and seed the next. While most gardeners grow them from sets, similar to onions, they also grow from seed. Shallots grown from sets usually produce between 4-12 new bulbs, while those grown from seed often produce only one. However, many varieties are available that will produce one larger shallot bulb instead of several small ones, which can be easier to use in the kitchen.

Shallots, like onions, are day-length sensitive. They grow best in areas suitable for growing long-day onions, generally in the northern half of the country. Gardeners in the South may find trouble getting them to bulb when grown from sets. Breeders have developed day-neutral shallots, which are worth looking into for gardeners in the country’s southern half.

Planting

Shallots like neutral soil, with a pH of 6.0 to 7. Loose beds rich in organic matter and full sun are the recipe for growing shallots. They will grow, albeit a little slower and smaller, in partial sun and prefer slightly moist soil, but not wet. Shallots still need good drainage to prevent root rot.

Shallots can be grown in containers as well. Choose a larger container at least ten inches deep. You’ll need to closely monitor the soil moisture level–don’t let them dry out. 

When to Plant Shallots

Shallot bulbs can be planted in the late fall or early spring. Only where winters are extreme should a fall planting be avoided.

In the early spring, plant sets or sow seeds from 2 to 4 weeks before your average last spring frost date. 

  • If growing from seed, start shallot seeds indoors about 8 to 10 weeks prior to your last frost date so they’re ready to transplant in spring. 

In the fall, plant about the same time as garlic. When to plant varies, but generally, bulbs can be planted week or two after your first fall frost date.

They mature in 100 to 120 days after planting, depending on variety. A late fall harvest is ready in early summer. An early spring harvest is ready in late summer.

How to Plant Shallots

Planting shallot bulbs is easy and quick. If your soil is soft, they can be poked in instead of digging a trench or hole.

To plant shallot cloves:

  • Work the soil with a garden fork to about six inches deep and mix in an inch-thick layer of compost.
     
  • Separate shallot bulbs into individual cloves.
     
  • Plant each clove roots down–top up, about six inches apart in rows one foot apart. The top of the clove should show above the soil if planting in spring. If planting in fall, bury the clove one shallot deep.
     
  • Water in. A light covering of straw mulch will hide them from birds and squirrels without hindering their sprouting. 

Tip: Shallots planted in the fall need a deep mulch covering–about four inches worth. Remove some of the mulch after the snow melts to help the sprouts find the light in spring. Overwinter, mulch can pack down. A thick, dense, wet layer can be difficult for new shallots to poke through. Leave just enough for weed control. 

Shallots growing in soil. Credit: S. Pimpo
Growing

Shallots are easy to grow but don’t like to get dry, and they don’t do well with competition from weeds.  

  • Mulching shallots is the key to keeping soil moisture levels even. Check the soil moisture by working your finger 2 to 3 inches deep. The soil should be cool and a little damp. Mulch will also keep the weeds down.
     
  • Check your rain gauge and provide extra water if needed. Shallots like about an inch of water per week, more in hot or dry weather. 
     
  • Hand-pull weeds near the base of the plant. Don’t hoe or use a tined cultivator. 
Harvesting
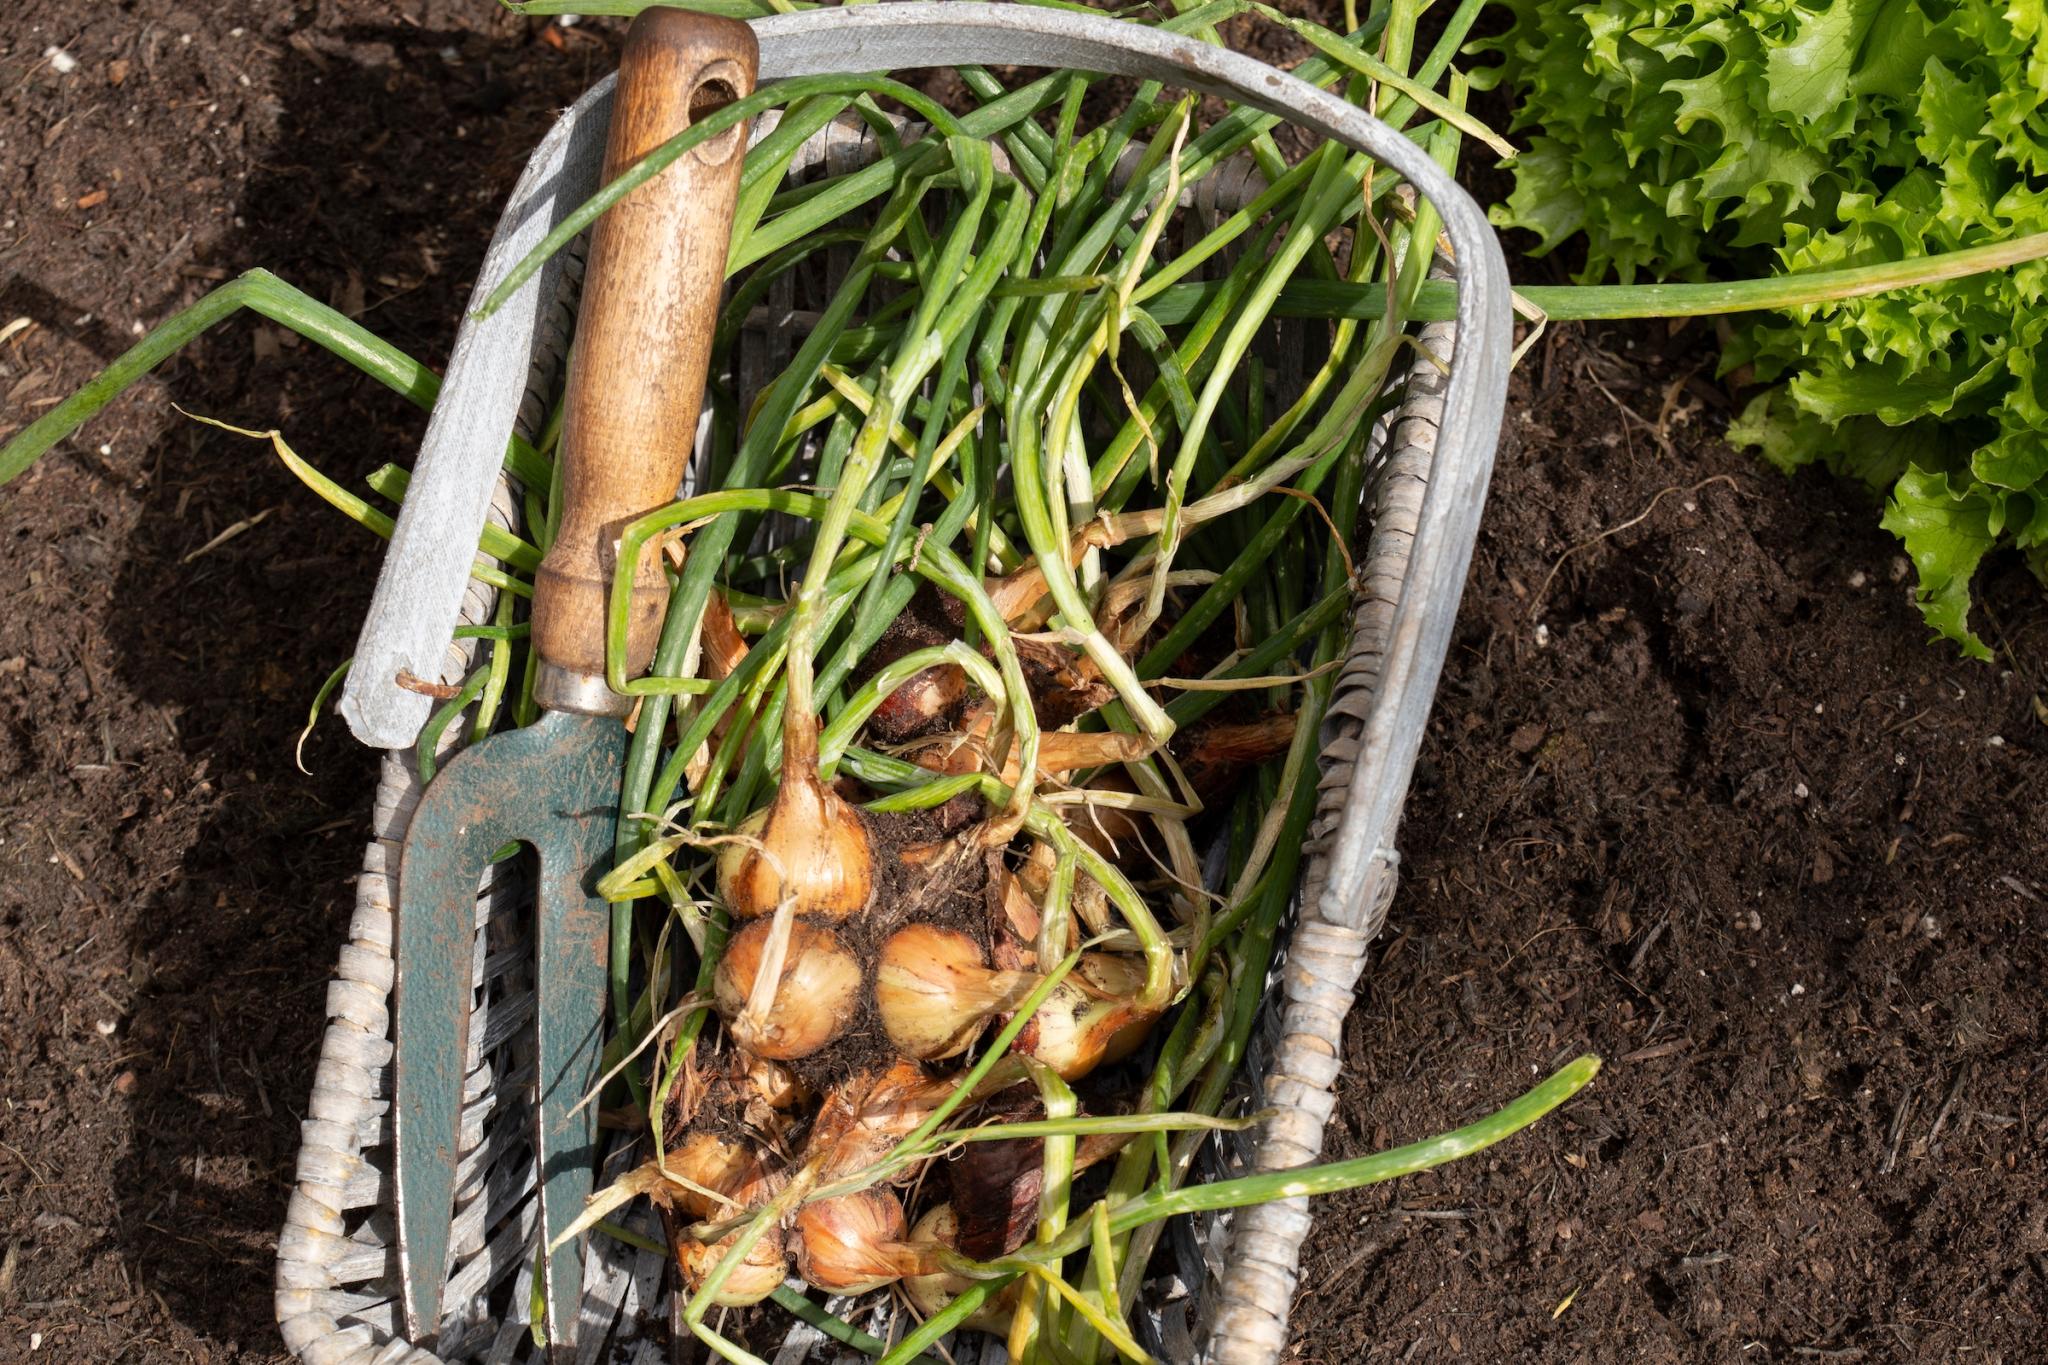
  • Shallots are ready to harvest when most of the tops have bent over and started to die back.
     
  • Gently pull shallots from the ground (ideally, using a garden fork) and lay them out in a sunny spot to dry for several days. 
     
  • Brush off excess soil and bring them inside to a dry location to finish drying.
     
  • When ready for storage, the tops should be thoroughly dried and brown. Either braid the tops like garlic or cut the tops off about two inches above the bulb. Store like onions.
Shallots, Red Sun variety, freshly dug with a garden fork. Credit: rigsbyphoto
Gardening Products
Wit and Wisdom
  • Like most Alliums, shallots are usually left alone by deer and rabbits, so save your fenced-in garden space for other crops and plant shallots in a bed outside your fence.
     
  • Shallots with thick necks won’t store as well, so use those first. 
     
  • Shallots can be forced indoors in a container during the winter to have a crop of onion greens.
Pests/Diseases
About The Author

Andy Wilcox

Andy Wilcox is a flower farmer and master gardener with a passion for soil health, small producers, forestry, and horticulture. Read More from Andy Wilcox

2023 Gardening Club