
Sign up for our daily newsletter to get gardening tips and advice.
Planting, Growing, and Caring for Daylilies
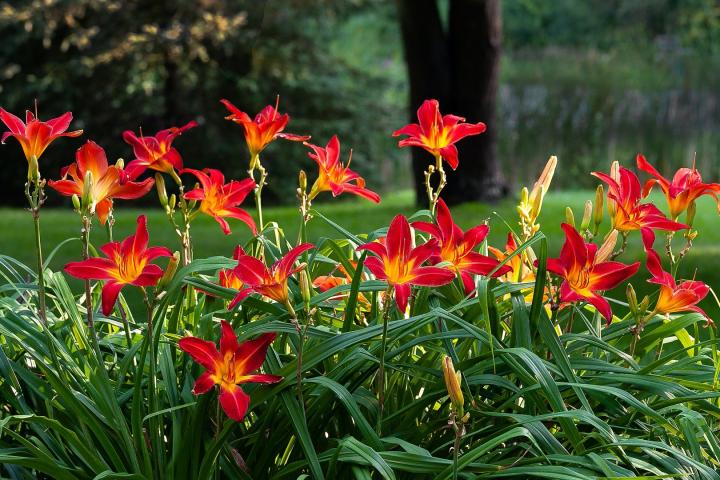
The daylily is an amazingly low-maintenance perennial. It’s virtually disease-free, pest-free, and drought-resistant; it’s also not picky about soil quality. Plus, the flower has a long bloom period! Here’s how to plant and care for daylilies in your garden, as well as how to easily propagate them for more plants!
About Daylilies
The daylily’s botanical name, Hemerocallis, comes from the Greek hemera (“day”) and kallos (“beauty”). The name is appropriate since each flower lasts only one day! However, each scape has 12 to 15 buds on it, and a mature plant can have 4 to 6 scapes, which is why the flower seems to bloom continuously.
Originally from Asia, these plants have adapted so well that many of us think of them as natives. Imagine the excitement of a 16th-century explorer cruising the Orient and finding these gorgeous plants! European gardeners welcomed daylilies into their gardens, and when early colonists sailed for the New World, daylilies made the crossing with them.
Despite their name, daylilies are not “true lilies” and grow from fleshy roots. True lilies grow from onion-like bulbs and are of the genus Lilium, as are Asiatic and Oriental lilies. In the case of daylilies, leaves grow from a crown, and the flowers form on leafless stems—called “scapes”—which rise above the foliage.
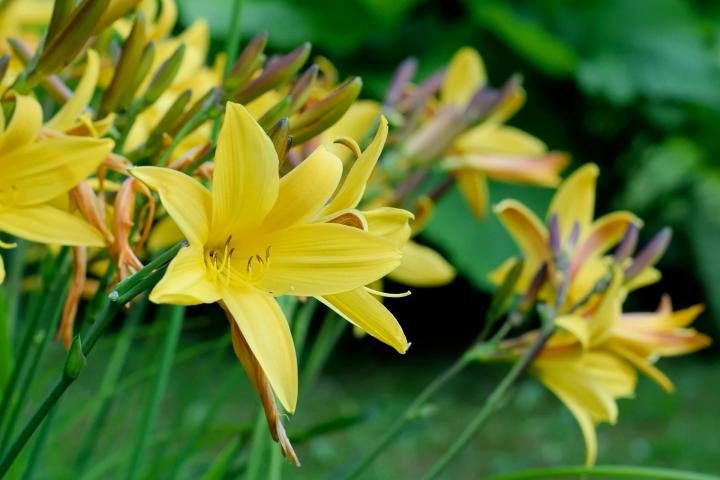
There are thousands of beautiful daylilies to choose from. Combine early, midseason, late blooming varieties, and repeat bloomers to have daylilies in flower from late spring through the first frost of fall. If you see a height listed alongside a daylily variety, this refers to the length of the scape. Some can reach 6 feet tall!
How to Care for Daylilies
Daylilies require little to no care and can even survive with neglect, but if you want these flowers to thrive and perform at their best, here’s how to give them a little TLC.
- Water newly planted daylilies once a week until established.
- Daylilies are fairly hardy and drought-tolerant, so they can survive without watering. However, they prefer about an inch of water per week; normal rainfall will supply much of that amount. If you’re suffering from a dry spell or live in a drier climate, water them, and they will reward you with more blooms. Add mulch around the plant to keep it moist and to help minimize weeding.
- Daylilies do not require fertilization as long as the soil is reasonably fertile. However, you can encourage stronger bloom performance with a little general-purpose fertilizer (10-10-10) once a year in early spring as new daylily top grow emerges. Spread a handful at the base of each daylily clump and water if dry. If you wish, you could fertilize daylilies a second time after they are finished blooming to help your plants multiply faster in the future.
- Deadheading is not necessary but you can remove spent blooms to prevent seed production and to encourage more blooming. Just snip off their blossoms as you see them wilting. Most daylilies do not self-sow; you need to divide daylilies to create new plants (see how below).
- Once all of the flowers have blossomed on a daylily scape, you can cut the entire scape back to the ground right away or in the fall or not at all. If you do not cut it back, it will simply turn brown and remain standing.
- However, in early spring, remove the dead foliage from the previous year’s growth before new growth resumes in the spring.
- Add aged manure or compost to the soil around the plants in the spring.
Dividing and Transplanting Daylilies
Daylilies can be aggressive spreaders and will likely require dividing at some point (usually every 3 to 5 years). In addition to controlling their spread, dividing will also reinvigorate plants, resulting in better and more frequent blooms.
To propagate them, divide the daylily clumps in early spring (February through April) or in the late summer to fall after flowering (late July through mid-September) prior to the autumnal equinox. The plants need at least six weeks to get re-established before winter.
Here’s how to divide daylilies:
- Though dividing can be done any time the soil is workable, it is best done right after the daylily has finished blooming. Note: The plants need at least 6 weeks to get re-established before winter.
- Dig up the entire root clump.
- Remove as much soil from the roots as possible. Soaking the roots in a bucket of water helps to get rid of excess soil.
- Locate the crown of the plant. Starting from the outer edge, break it into smaller clumps (usually 3 to 4 per plant). Each clump should have healthy roots and at least a few leaves.
- Cut the leaves back to approximately one-third of their original length (5 to 6 inches, generally).
- Replant and water thoroughly.
Daylilies are edible and have a long history in the kitchen. The tender foliage was eaten as a spring green, the buds and flowers were eaten raw and added to soups, and the swollen portions of the root were boiled and eaten. All parts have a mild peppery taste and act as a thickening agent when cooked in stews, soups, or sauces.
- Try sautéeing daylily buds in some butter and garlic. They taste like a cross between green peas and asparagus.
- Dip daylily buds in a light batter and deep-fry them. Sprinkle with salt, and you have a special summer treat!
Catherine Boeckmann


ADVERTISEMENT
Daylilies are on the list of invasive plants in our area (Ontario Canada). It’s a good idea to check to make sure any non-native is invasive in your area, before planting. There is a lot of good information out there about how invasive plants are a real problem. There are also many beautiful native alternatives to these invasive lilies - the Michigan lily, for instance. Native plant species tend to benefit a much wider range of native fauna without harming the environment.
Enjoyed the read! Planting my first day lilies soon
How do you winterize day lillys? Do you have to cut them back?
Hi Nancy,
There is not anything you need to do for your daylilies before winter. Once the flowers have died back, you can cut the stems and foliage to the ground in the fall or in the spring. There is no benefit to leaving the foliage until the spring, so if you want a more tidy look to your garden area, cut back in the fall. The foliage just needs to be removed before new growth emerges in the spring.
I have a huge variety of daylilies, and this year with all the wet weather, they have a lot of dead leaves. As I pull out those dead leaves, I find nests of snails and lots of slugs on the base, and up the leaves. Probably should have pulled out the dead leaves earlier. Any idea how to deter those creatures? I have an abundance of slugs and snails, on everything from veggies to flowers, and taking all my time in picking them off.
Depending if you are in an area that would allow them, ducks will eat a large number of slugs daily, and will get rid of other pests too!
Check out this helpful guide for removing slugs and snails from your garden.
The first photo of the orange lily is a HORRIBLE invasive lily, the ditch lily or roadside lily! DO NOT plant! This is a poorly written article that leaves out critical information that it an invasive nightmare choking out Native American plants and in my garden it took over EVERYTHING and I spent years trying to dig it out. If you do not get each root or ends, it will regenerate into a new plant. AVOID FULVA lilies!
Thank you for your comments; we appreciate the critique. Be sure to check out our article about non-native plants, including Daylilies for more information.
In late summer a tiny plant is produced at the top of a scape. It can be planted and will produce a viable plant.