
Preserve Your Garden’s Harvest With a Root Cellar That Keeps Crops Fresh All Winter
Want to store vegetables like carrots, beets, potatoes, and turnips all winter, without a fridge? A root cellar is nature’s refrigerator, keeping crops cool, moist, and fresh for months. This classic homesteading method was used by our ancestors to survive long winters, and you can build one too, whether you’re digging into the earth or retrofitting your basement. Here’s how to build a root cellar and prepare your vegetables to last until spring (and beyond).
What Is a Root Cellar?
There are many types of root cellars, but they generally consist of a space dug into the ground that is cooled by the ambient temperature of the Earth. They are utilized to store root vegetables such as beets, carrots, turnips, potatoes, as well as canned and pickled goods through the winter.
Even before the snow begins to fall, the ground outside freezes up like compact concrete in the fall and pretty much remains this way until spring. There isn’t likely to be much sustenance out there. We need to harvest our crops while we still can and tuck them into accessible spaces that don’t freeze.
Read Next
When I bring a carrot, beet, or potato into the kitchen from my root cellar, you’d think that I had just dug it up from the garden. And they really keep well. Last year, I ate my last beet from the previous year’s garden the second week of July, and it was still perfect. It’s better than a fridge—naturally cool, humidified, insulating, and spacious.
How to Build a Root Cellar
So, how do we create such a space? There are various ways to do just that.
My root cellar was created when we decided to put an addition onto our house. Before a board was nailed or a sonotube poured, my husband dug down to the ledge (about 5 feet) and cleared out a space approximately 3 feet by 4 feet. He then poured a concrete slab on the bottom, leveled it, and let it set up for a few days. Once the floor hardened, he built up the walls with standard concrete blocks to the height where the future room’s floor was going to be. He then shoveled as much dirt as possible around the outside of the blocks to insulate the chamber from future frosts. As the addition was completed, a trap door was placed in its floor. To complete the root cellar, dense foam was sprayed into any cracks and crevices in the seams and corners to critter-proof the space.

Not planning an addition anytime soon? No problem! Most people can create a root cellar out of their existing structures. If you have a cellar that’s not heated and doesn’t freeze, you already have a root cellar, though you may need to find a way to critter-proof a section. The corner of a solid, concrete foundation can provide the first two walls. If you have a heated cellar, this is exactly the place to begin. Build a room with the other two walls exactly parallel to the corner walls. It can be as big or as little as you desire. Typically, it’s best to build this in the northeast corner of your cellar, as it will stay the coolest throughout the year.
Standard construction using two-by-fours and plywood works fine. In a heated cellar, you will need to add insulation to these additional walls to keep the space cool. And, don’t forget that you will need a door to get into and out of your space. Shelves can be added for easy storage, although they are not absolutely necessary. I just stack my buckets of beets and carrots on top of one another as well as the crates of potatoes.
Some farmers prefer to leave their root crops right in the ground for the winter. A truly thick blanket of hay can keep the frost at bay, but also be sure to put a tall mark where to dig, as the snow will hide anything short. I leave my parsnips in the ground until spring because the frost actually improves their flavor, and it’s wonderful to have a big crop to harvest in April.
Learn more about types of root cellars.
Preparing Vegetables for the Root Cellar
Once the root cellar is ready to go, how do we prepare the vegetables? I put my beets, carrots, and turnips in 5-gallon buckets. These can be inexpensively purchased from the hardware store, or sometimes places like Dunkin Donuts will sell their used filling buckets quite cheaply. Be sure to the get the lids as well. I re-use the buckets from year to year, but I clean, bleach, and dry them thoroughly between uses.
Next, you need to get some clean sand; this has to be replaced every year, and it should be very dry. I generally put it on my August “to-do” list and show up with several buckets and a shovel at a local sand pit after three or four days without rain. I shave the sand off the top of the pile as an extra assurance of dryness.
After my materials have been assembled and the frost is near, I’m ready to go. You want to leave the crops in the ground as long as possible, but it’s important that they don’t get nipped with frost. Check the frost dates for your area here. Again, I pick a nice, dry day to do the harvesting. I gently pull the beets, carrots, and turnips and spread them out to dry a bit in the Sun.

After 20 to 30 minutes, I turn them over to let their other sides dry. There are a couple of important things to remember here. First, while the veggies need to be dry, they cannot be left in the Sun too long. Carrots left out all day will turn green—they become inedible, because this veggie will give you indigestion. Sometimes, a portion of a carrot will be green from rising up out of the Earth on the plant. This crop can be saved: just cut off the green part before cooking. The vegetables need to be absolutely perfect to be keepers. Nicks, scratches, and bruises (as well as multiple stems) will cause them to rot, endangering all of the other roots in the bucket.
Once the veggies are dry to the touch, I bring them to my homemade processing center. This consists of a chair, a table, a brush, scissors, and a compost bucket. The bigger the vegetables are, the better they keep, so the big guys go into the buckets first. I begin by pouring a layer of sand into a clean bucket. Then, I gently brush the excess dirt off the veggie and cut off most of the top (leaving about an inch on), placing the top in the compost bucket. This is also where I carefully inspect them for perfection. Any that fail that test get put aside to eat sooner rather than later. Next, I arrange the beets or carrots flat on their sides in the bucket so that they don’t touch each other. I then cover them with sand. I repeat the process until the bucket is full, whereupon I close it up with the lid and place it in the root cellar.

It might be a good idea to test the bucket a couple of times before it is completely full, because it can get heavy. It’s better to put a half or three-quarters full bucket in the root cellar than hurt your back.
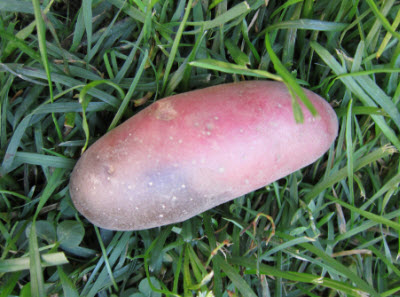
Potatoes are even easier to keep (the same rule about green areas applies). They also need to be dry, dusted, and perfect. Once they are ready, they are placed in milk crates and put in the root cellar. Just be sure not to try to stack them too high; the weight can cause the ones on the bottom to start to mush, thereby ruining the entire crate.
.jpg)

Should You Wash Vegetables Before Storage?
I never wash vegetables that are headed for the root cellar. Some people, I have heard, use peat moss or wood chips to keep their roots. Discover the benefits of using wood chips in your root cellar. I have dug up my gladiola and dahlia bulbs and kept them in sealed jars or cans with wood shavings. I also find that the root cellar is not the right place for onions or squashes. They both prefer a dry environment, so after curing, they are kept in the warm house. Get more tips for storing your vegetables perfectly.
A truly simple root cellar can be made on top of the ground using bales of hay. Place the bales around an inner “courtyard” where the vegetables are and cover with bales of hay on top. I love the convenience of getting to my beets, carrots, turnips, and potatoes without having to go outside. Nothing tastes as good as homegrown, and it’s nice to be able to eat this stuff year-round. Good luck!
Tell us about your root cellar below! If you don’t have a root cellar, don’t worry—there are other options for storing your vegetables.
Celeste Longacre

I grew up with my grandparents having a michigan basement (a cellar in and of itself). They stored their potatoes in a corner with pallets as sides and carrots were right next to them. Grandmas gladiolus were there too. Canned goods against one wall and a couple of freezers filled it out. Scary to a young kid going down into the cobwebs and creaking steps. Lol.
We have an old wellhouse at our current home that I want to turn to cellar. First we want to put up a seed starting and flower/greenhouse shed on top. Making it easier to get to the trap door in winter and awfully useful to have. The bottom is water that seeped in but id deff like to finish off the floor with gravel and a sump pump. I figure I can still manage to store some buckets of veggies or whatever down there before then. Probably hanging from the concrete ceiling/top and or some wire shelving. We also have the crawl space under the house that some things could be stored. My partners mom used to keep her calla lillies just inside the crawl hole to get in there.
Thanks for sharing your experiences with me.. I have a cellar that I tried to store some root vegies but it is not critter proof soooo.... also didn't know that squashes and pumpkins don't like the damp so I'll try putting them upstairs in the coolest room in the house... I have not yet tried dehydrating but that's on my wish list for next year!!
Whenever I harvest beets,carrots turnip they go limp and soft in a day. I am not sure if they are safe to put in root cellar. What am I doing wrong. Please help I would love to have a root cellar. Thank You
Hi Linda,
I'm not quite sure what's going wrong with your veggies, but it could be a soil issue. I think that you may have some mineral deficiencies. The best way to deal with that is to have your soil tested.