
Testing Soil pH and Soil Health (Right at Home!)
Success in the garden starts with healthy soil. Soil—as much as water and sunlight—determines whether plants thrive or die. Test your soil in spring or fall for a productive season. Learn more about soil testing—plus three DIY soil tests.
Why Get a Soil Test?
Your soil needs to be able to provide nutrients to plants. Otherwise, your plants won’t grow well. Having the right soil pH (level of acidity) means your plants can take up the necessary nutrients in the soil. If your pH is too high, many nutrients such as phosphorus and iron may become less available; if your soil pH is too low, it can be toxic to plants. Without healthy soil, it is challenging to have a successful garden.
Another reason we test the soil is because we won’t need to rely on fertilizing the soil too much. If you start with healthy soil, you won’t need so much “fixing.” Before you start dumping on the lime and fertilizers, your first step should be taking a soil sample to send off for testing.
Read Next
What Will a Soil Test Measure?
A good soil test will evaluate the basic texture of your soil—sand, silt, or clay—and determine its acidity—the pH level. The available nutrients, including magnesium, calcium, phosphorus, and potassium, will be calculated, and recommendations will be made for raising each to the correct levels for optimum plant growth. Armed with this knowledge, you can make the proper improvements. Too much of a good thing can be just as harmful as too little, so let your soil test be your guide.
How Often Should You Do a Soil Test?
For optimum plant growth, it is recommended to test your soil pH and nutrient status every 3 to 5 years. You can take soil samples any time of the year, with fall preferable. That way, you can get your results and make any fixes in time for spring.
Where to Get a Soil Test
Home test kits are available at gardening centers; they are not as accurate or thorough as professional testing through your local county extension office. The good news is that your county extension soil test is usually free or low-cost. Here’s a list of cooperative extension services by state.

How To Take a Soil Test
- To take a representative sample, scrape away any surface litter, plant residues, leaves, etc.
- Avoid sampling in a spot where ashes have been dumped, manure or compost stored, or brush burned.
- Cut straight into the soil with a shovel or trowel 6 to 8 inches deep, making a V-shaped hole.
- Cut a 1-inch wide slice of soil the length of the hole from one side. Take a 1-inch strip from the center of this slice to use in your sample.
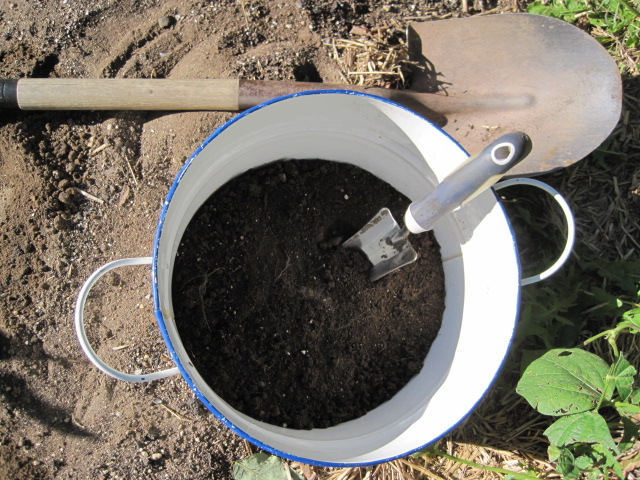
- Repeat sampling randomly around the garden and mix the samples together in a clean glass jar or bucket. Since we use raised beds, we take a slice from each bed and mix them all together.
- Measure out a cupful of soil, dry it indoors for a few days, and seal it in a plastic bag with your information on it.
- Send it in with the proper forms and fees, then wait for your results!

Reading Soil Test Results
When you get your test results, the fertilizer recommendations will be specific and speak to three elements: nitrogen, phosphorus, and potassium.
Nitrogen
Nitrogen: N stands for nitrogen, which helps plants make leafy growth. For nitrogen, they will tell you how much manure or compost to use. If you are using fresh manure, spread it on in the fall so it can break down over the winter and be safe for spring planting. If you prefer, dried blood, alfalfa, soybean, or cottonseed meals can be substituted. Nitrogen is released quickly from them, so it is best to wait until spring to add these to your soil. Ten pounds of blood meal supplies the same amount of nitrogen as 10-20 bushels of manure but without the added benefit of all the organic matter that manure contains.
Phosphorus
Phosphorus: P stands for phosphorus, necessary for germination, strong root growth, flowers, and fruit. It helps plants absorb minerals, grow strong stems, and withstand disease. Rock phosphate provides phosphorus, magnesium, and trace minerals. Rock powders are wonderful soil enhancements. They are slow-acting but long-lasting, so they need to be applied only every 3 to 4 years. Bone meal and bone char are more readily available sources of phosphorus.
Potassium
Potassium: K stands for potassium or potash. It regulates water flow in plant cells and is necessary for flowering, fruiting, and disease resistance. A lack of potassium will cause plants to have weak stems and stunted growth. For added potassium, you can use granite dust or greensand, which is made from glauconite, an ocean mineral high in potassium and iron. Wood ashes are also high in potash.
→ See more about NPK Ratios and what this means.
3 DIY Soil Tests
To learn more about your soil and its health, here are three DIY soil tests covering 1) your soil’s texture, 2) soil pH, and 3) soil health.
Soil Texture: The Peanut Butter Jar Test
Find out what kind of soil you have! Healthy soil typically consists of 20 percent clay, 40 percent silt, and 40 percent sand. This should take about 1 hour to set up and a full day to conclude. Find an empty straight-sided jar, such as a peanut butter or mason jar, with a lid, and have a ruler handy. Dig down to root level—about 6 inches—in the area that you want to test and remove enough soil to fill the jar to between one-third and one-half full. Next, fill the jar to the shoulder with water, then set the jar aside to let the soil soak up the water. Put the lid on the jar and shake it hard for about 3 minutes.
- Set the jar down and look at your watch. In 1 minute, measure (with the ruler) the amount of sediment that has collected at the bottom. This is the sand in your soil.
- Wait 4 minutes more. Measure the sediment again: The difference between the two numbers will be the amount of silt in your soil.
- Take a third measurement in 24 hours. The difference between the second and third numbers will be the amount of clay in your soil.
Calculate the percentages of sand, silt, and clay, which should add up to 100 percent. Nice, loamy soil will be 20 percent clay, 40 percent silt, and 40 percent sand. This simple test can help you to decide what to grow: If your soil is high in sand, it will be well-draining. Silt and clay are hard to get wet, but they stay wet; plants that like “wet feet” would be happy here. Choose your plants accordingly and/or amend the soil:
- If you have sandy soil, add humus or aged manure, peat moss, or sawdust with some extra nitrogen. Heavy, clay-rich soil can also be added to improve the soil.
- If you have silty soil, add coarse sand (not beach sand), or gravel and compost, or well-rotted horse manure mixed with fresh straw.
- If you have clay soil, add coarse sand (not beach sand), compost, and peat moss.
→ Learn more about soil amendments and preparing the soil for planting.
Soil Acidity or Alkalinity: The Pantry Soil pH Test
- Place 2 tablespoons of soil in a bowl and add ½ cup vinegar. If the mixture fizzes, you have alkaline soil.
- Place 2 tablespoons of soil in a bowl and moisten it with distilled water. Add ½ cup baking soda. If the mixture fizzes, you have acidic soil.
- If it does not react to either test, the soil has a neutral pH.
- A very high or very low soil pH may result in plant nutrient deficiency or toxicity.
- A pH value of 7 is neutral; microbial activity is greatest, and plant roots absorb/access nutrients best when the pH is in the 5.5 to 7 range.
Once you figure out your soil pH, you can change or adjust it. Acidic (sour) soil is counteracted by applying finely ground limestone, and alkaline (sweet) soil is treated with ground sulfur.
→ See a list of Soil pH levels for different plants.
Soil Health: The Earthworm Test
The best time to check for earthworms is in the spring when the soil’s temperature has reached 50°F, and its surface is moist. Use a shovel to dig up about 1 cubic foot of soil. Put the soil on a piece of cardboard, break it apart, and look for earthworms.
If your soil is healthy, you should find at least 10 earthworms! If your soil has fewer than 10 worms, add more organic matter—compost, aged manure, leaf mold. Organic matter improves structure, slowly releases nutrients, and increases beneficial microbial activity.
→ Learn more about the wonderful world of earthworms.
Use these DIY tests to gauge the overall health of your soil, but for more granular information, be sure to order a proper soil test as described above!
Robin Sweetser


Fall Flowers and Foliage
Fall Vegetable Gardening
Fall Garden Cleanup
Garden Soil Preparation
Fall Nature


What if it kind of reacts to both? I noticed some bubbles on both, more with the baking soda (but both barely noticeable) and both you could hear fizzing if you got close. Is it neutral?
I am curious if this article is in reference to European gardens. If it is for those of us in North America, saying that a cubic foot of soil with ten worms in it is healthy could be very misleading, especially for those of us that live near the woods. Most earthworms are not native to North America. And North American woods are extremely rich and healthy if left alone. Suggesting that we add more mulch could be fine for those that live in the cities. But again, for those of us that live in the wooded suburbs, or in rural areas need to be cautious. A lot of mulch now contains a very dangerous worm for gardens: the Asian jumping worm. It’s exotic, invasive and will ruin your soil.
Asian jumping worms have changed the way we look at earthworms. They populate the upper regions of the soil, eating any and all organic matter, and are not a good indicator of soil health. Unfortunately once you have them in your soil they are impossible to get rid of.
the above link took me to a "page not found" error 404 sigh
I’m curious why the article recommends mixing the soil from different raised beds to send in for a soil sample. The beds’ soil may have different; I would think I’d want to know each bed’s results separately in order to rebalance them as needed.
If you only sample from a single spot that won't tell you what your overall bed quality is. If you happened to grow tomatoes where you took your sample but beans 3 feet away you might end up over fertilizing based on the results. If you amend areas differently or grow wildly different things then sample separately.
If you can afford to test each bed separately, by all means do so! For me a standard garden soil test is $20 so that is why I send a representative sample.
I enjoyed reading and every informative.
will surely try to check my soil with Diy method.
Good information shared
Thank you
Thank you for the blog, you explained soil testing methods thoroughly. I got my backyard garden's soil tested from Torrent Labs. It was of great help.
We have been taken over by what they call Japanese Snake worms. They are destroying everything by staying in the top of soil. They do not go into earth and live under leaves and mulch. I have picked up over a thousand while removing rotting leaves and mulch. How can we get rid of them. Went to our extension center and they were no help. Except to say they destroy the top layer of soil.