
Grow vibrant, heat-loving okra for a tasty, easy-to-harvest summer crop

The Almanac Garden Planner - Use It Free for 7 Days!
Plan your 2025 garden with our award-winning Garden Planner.
Okra isn’t just for gumbo anymore! This Southern staple is showing up in gardens everywhere, and for good reason. It’s easy to grow, fun to harvest, and comes with tropical-looking flowers that would make a hibiscus blush. Whether you’re a seasoned grower or okra-curious, we’ve got all the tips to help you grow it like a garden rockstar. Let’s get planting!
About Okra
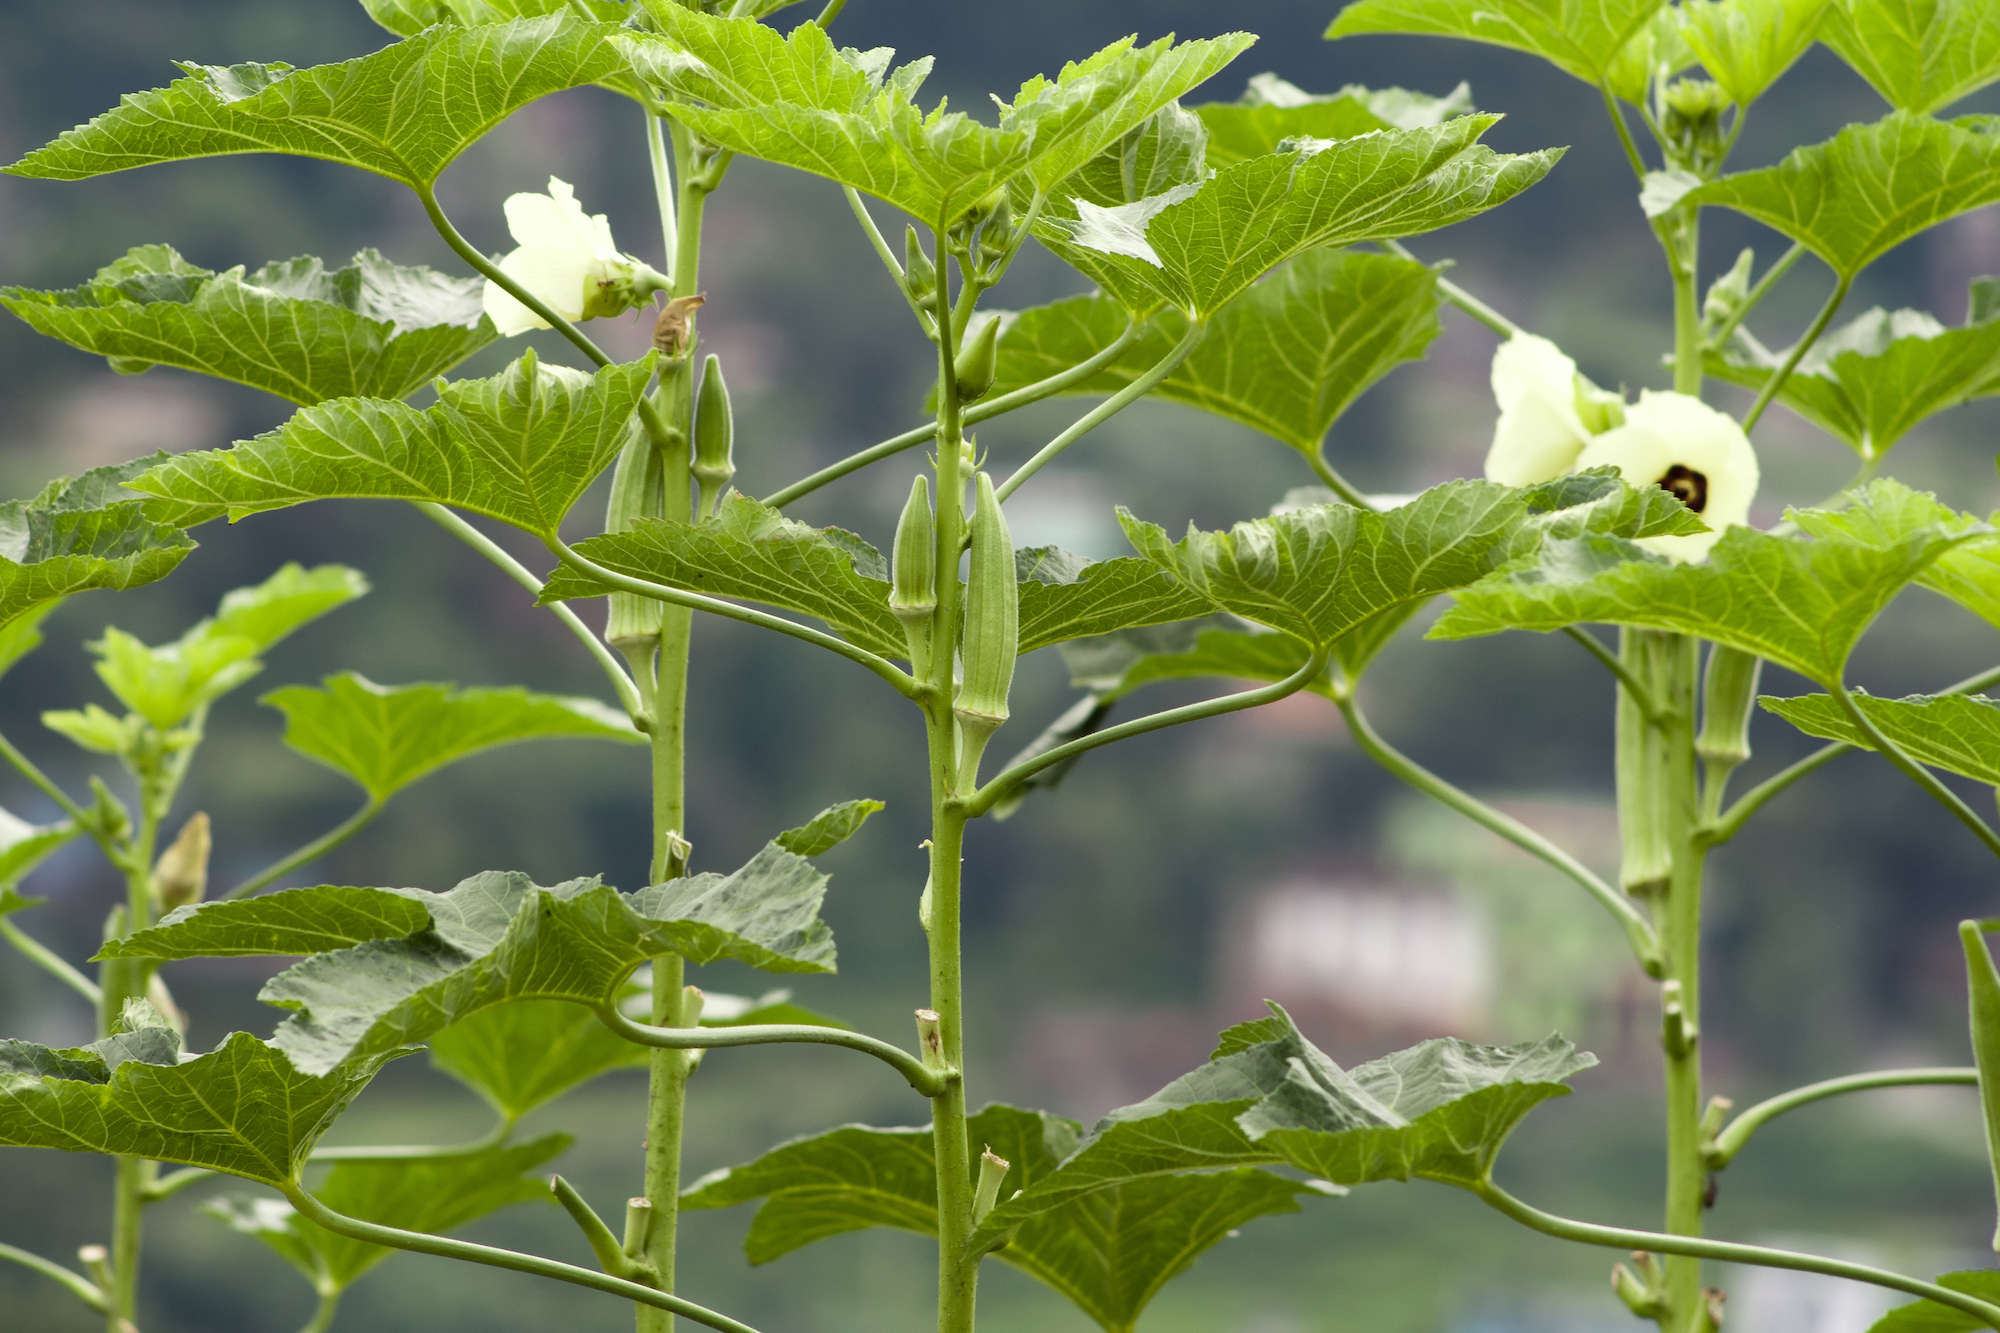
Many gardeners are discovering okra, and the range of this warm-weather crop has been creeping northward and gaining in popularity. This plant not only grows edible vegetables and beautiful flowers, but it is also rich in vitamin A and low in calories, which makes it a great addition to your diet.
If you look at the flower of okra, you’ll see a resemblance to a hibiscus flower. It’s no coincidence—okra is a member of the hibiscus family!

Growing
- Eliminate weeds when the plants are young, then mulch heavily—4 to 8 inches—to prevent more weeds.
- During the growing season, Joseph Masabni of Texas A&M recommends that you “cultivate around the okra plants to remove weeds and grass. To avoid damaging the okra roots, pull weeds close to the plants by hand.”
- Side-dress the plants with 10-10-10, aged manure, or rich compost (1/2 pound per 25 feet of row). You could also apply a balanced liquid fertilizer monthly. Avoid too much nitrogen, which deters flowering and encourages leafy growth. Learn more about soil amendments and preparing soil for planting.
- When the seedlings are about 3 inches tall, thin the plants so that they are 18 to 24 inches apart.
- Keep the plants well watered throughout the summer months. One inch of water per week is ideal, but use more if you are in a hot, arid region.
- High heat can slow the growth of okra.
- Prune the tops of okra plants when they reach 5 to 6 feet tall. This will result in more side branches. Prune those as needed.
- In warm regions, some growers cut plants to about 2 feet when productivity slows in summer. The plants grow back and produce another crop of okra.
Note: Okra has large, hairy leaves, as well as tiny spines on its pods, both of which may cause skin irritation; consider wearing gloves and/or long sleeves when handling. “Spineless” types have pods that don’t present this problem. Regardless of type, irritation does not occur when you eat okra.
Types
Standard varieties can top 8 feet or more! Dwarf types, which seldom exceed 5 feet in height, are best for containers.
- ‘Blondy’: spineless; dwarf at 3 feet tall; 3-inch pale green pods; ideal for northern growers
- ‘Burgundy’: abundant 6- to 8-inch pods (harvest at 3 inches) on 3- to 5-foot-tall plants; edible ornamental, with deep red stem, branches, leaf ribs, and fruit
- ‘Cajun Jewel’: dwarf at 2 1/2 to 4 feet tall; tasty 8-inch pods up to 1 inch in diameter
- ‘Clemson Spineless’: tasty 6 1/2-inch to 9-inch pods on 4-foot tall plants
- ‘Louisiana Green Velvet’: spineless; vigorous to 6 feet tall; good for large areas
Harvesting
When you harvest okra, get out the gloves and wear a long-sleeved shirt to protect yourself from the tiny spines that can make your hands and arms itch for days.
- Once okra is ripe, harvest every day! The pods grow so fast and ripen within a day, so you need to pick continually. Overripe okra is too tough to eat.
- The best pods are only 2 to 4 inches long. This is when okra is at its softest and most digestible.
- Cut the stem just above the cap with a knife. If the stem is too hard to cut, the pod is probably too old and should be tossed.
- Only one pod grows beneath each leaf, so break off the leaf after harvesting the pod.

- Harvest often: The more you pick, the more flowers will appear, and okra goes from flowering to fruit in a few days.
- A severe freeze can damage pods. If one is predicted and pods are drying on the plant for seeds, cut the plant and hang it indoors to dry. Put a paper bag over it so if the pods shatter, the seeds will not be lost.
In the South, regular okra plants can get too tall to harvest; if this happens, cut them back to 12 to 18 inches above the ground. This is usually done in July or August. The plants will sprout again to make a second crop. Otherwise, consider a dwarf variety!
How to Store Okra
- To store okra, put the uncut and uncooked pods into freezer bags and keep them in the freezer. Or wash and blanch okra before freezing.
- Or, can okra to have it throughout the winter.
Cooking Notes
Okra can be consumed in a number of ways—breaded and deep-fried, pickled, stewed (in Indian cuisine), air-fried (a reader favorite), and even raw in the field! Of course, the most famous okra dish is probably gumbo.
For a nice stewy dish, simmer fresh tomatoes and onions and perhaps some pre-fried bacon pieces. Add chopped okra. On the stove, cook for 25 minutes, and the soft insides of okra will help create a nice thick, savory broth to serve over rice.
Or, try roasting okra to bring out its natural nuttiness. Just remove the cap, split lengthwise, and roast on a baking sheet for 25 minutes; we cover with aluminum foil for the first half of cooking.
Catherine Boeckmann


ADVERTISEMENT
How to get it ready for winter
My okra gets about a foot tall and then quits growing. It has very few pods. I live in Colorado. Any ideas about how to get it to grow taller and and have more pods?
Thanks for sharing
how to pick okra
Hi, Josh,
You can find information on how to pick okra under the “Harvesting” section of the article above. In general, okra is ready to harvest in about 60 to 70 days. You want to look for pods about 2 to 4 inches long (about 3 to 6 days after flowering). Much bigger, and the okra can become tough and stringy. (Round-podded varieties may remain tender at larger sizes.) Wear gloves and long sleeves, as okra has tiny spines that can irritate the skin. Use a sharp knife or pruning shears to cut the pod off the stem, leaving about 1/4 inch of stem on the pod; handle pods carefully, as they are easily bruised. Keep harvesting at least every other day to encourage more pods to form. If a pod gets too big, remove it from the plant and discard (or use it in flower arrangements); leaving it on the plant may slow the development of other pods.
When buying okra at a store, look for bright green, firm (but not hard) pods that are a maximum of 4 inches long. Avoid any that are limp/soft, dried, dull in color, or moldy.
Hope this helps!
Your “cooking tips” failed to mention air frying which has become our favorite way of preparing.
Thanks for adding this in! We love to hear what our Readers love.
Love Okra, can be an acquired taste, but it's all in the cooking. A bag of Gumbo base, veggies, meat, and okra gumbo is the best over rice with your favorite spices. Fried is always a favorite, lot more work. The infamous slime comments are what turn most people off who've not had it before. Add a diced tomato, or a teaspoon of Apple Cider Vinegar, and a dash or two of brown sugar to counter vinegar, and the slime is dissolved.
Thanks so much for this hint. Many years ago, my Mom and I, both adventurous Foodies, tried Bird's Eye "Whole Frozen Baby Okra", never having had Okra before, and marveling at the cute little pods and lovely cross section. We steamed it, according to the package instructions, and added it to our lunch plates. We were immediately assaulted by the sn*t factor, and in unison, consigned it to the compost pile. MANY years later, still adventurous, I have continued to try it prepared in different ways.
Finally, in different recipes, including deep fried, and stir fried as in Indian stir fries, I have finally come to appreciate it.
One use of old okra pods is a craft project for kids. Let mature pods dry--on plant if possible. You will know when they are dry because they turn brown. Snap off plant. Rub off any spines with a towel or light sandpaper. Paint the sides colors of your choice, you can add glitter, bows, whatever. They look amazing on Christmas trees and best of all, they rattle!