
How to Sterilize Soil in Oven, Microwave, and Pressure Cooker
There is a lot of buzz out there about sterilizing the soil you use for starting your seedlings and potting them up, especially if you are reusing old soil. See how to sterilize soil in the oven, microwave, or pressure cooker. But let’s also ask ourselves, is this really necessary?
Soil can harbor diseases, insect pests, and also weed seeds. If you purchase new potting soil, it’s considered sterile because it has been treated with heat, steam, or chemicals to kill weed seeds and pathogens.
Can you sterilize soil or old potting soil yourself at home?
Read Next
What Temperature Kills Pests and Problems?
First, you need to decide what you are trying to kill. Researchers at Colorado State University found that:
- To kill off most viruses, diseases, fungi, and mold, you need to heat the soil to 145°F for 30 minutes.
- If you want to eliminate soil-borne insects—which include good guys along with the bad guys—you need to crank up the heat to 160°F.
- To render all weed seeds nonviable, ratchet the heat up a bit more to 180°F.
- To eradicate all heat resistant viruses and seeds, you would need to heat the soil to 212°F for 30 minutes.
There are problems with overcooking the soil though. It can cause phytotoxicity, which can actually suppress germination and kill young seedlings!

3 Ways to Sterilize Soil
How are you going to cook it? There are several common DIY methods to sterilize soil at home.
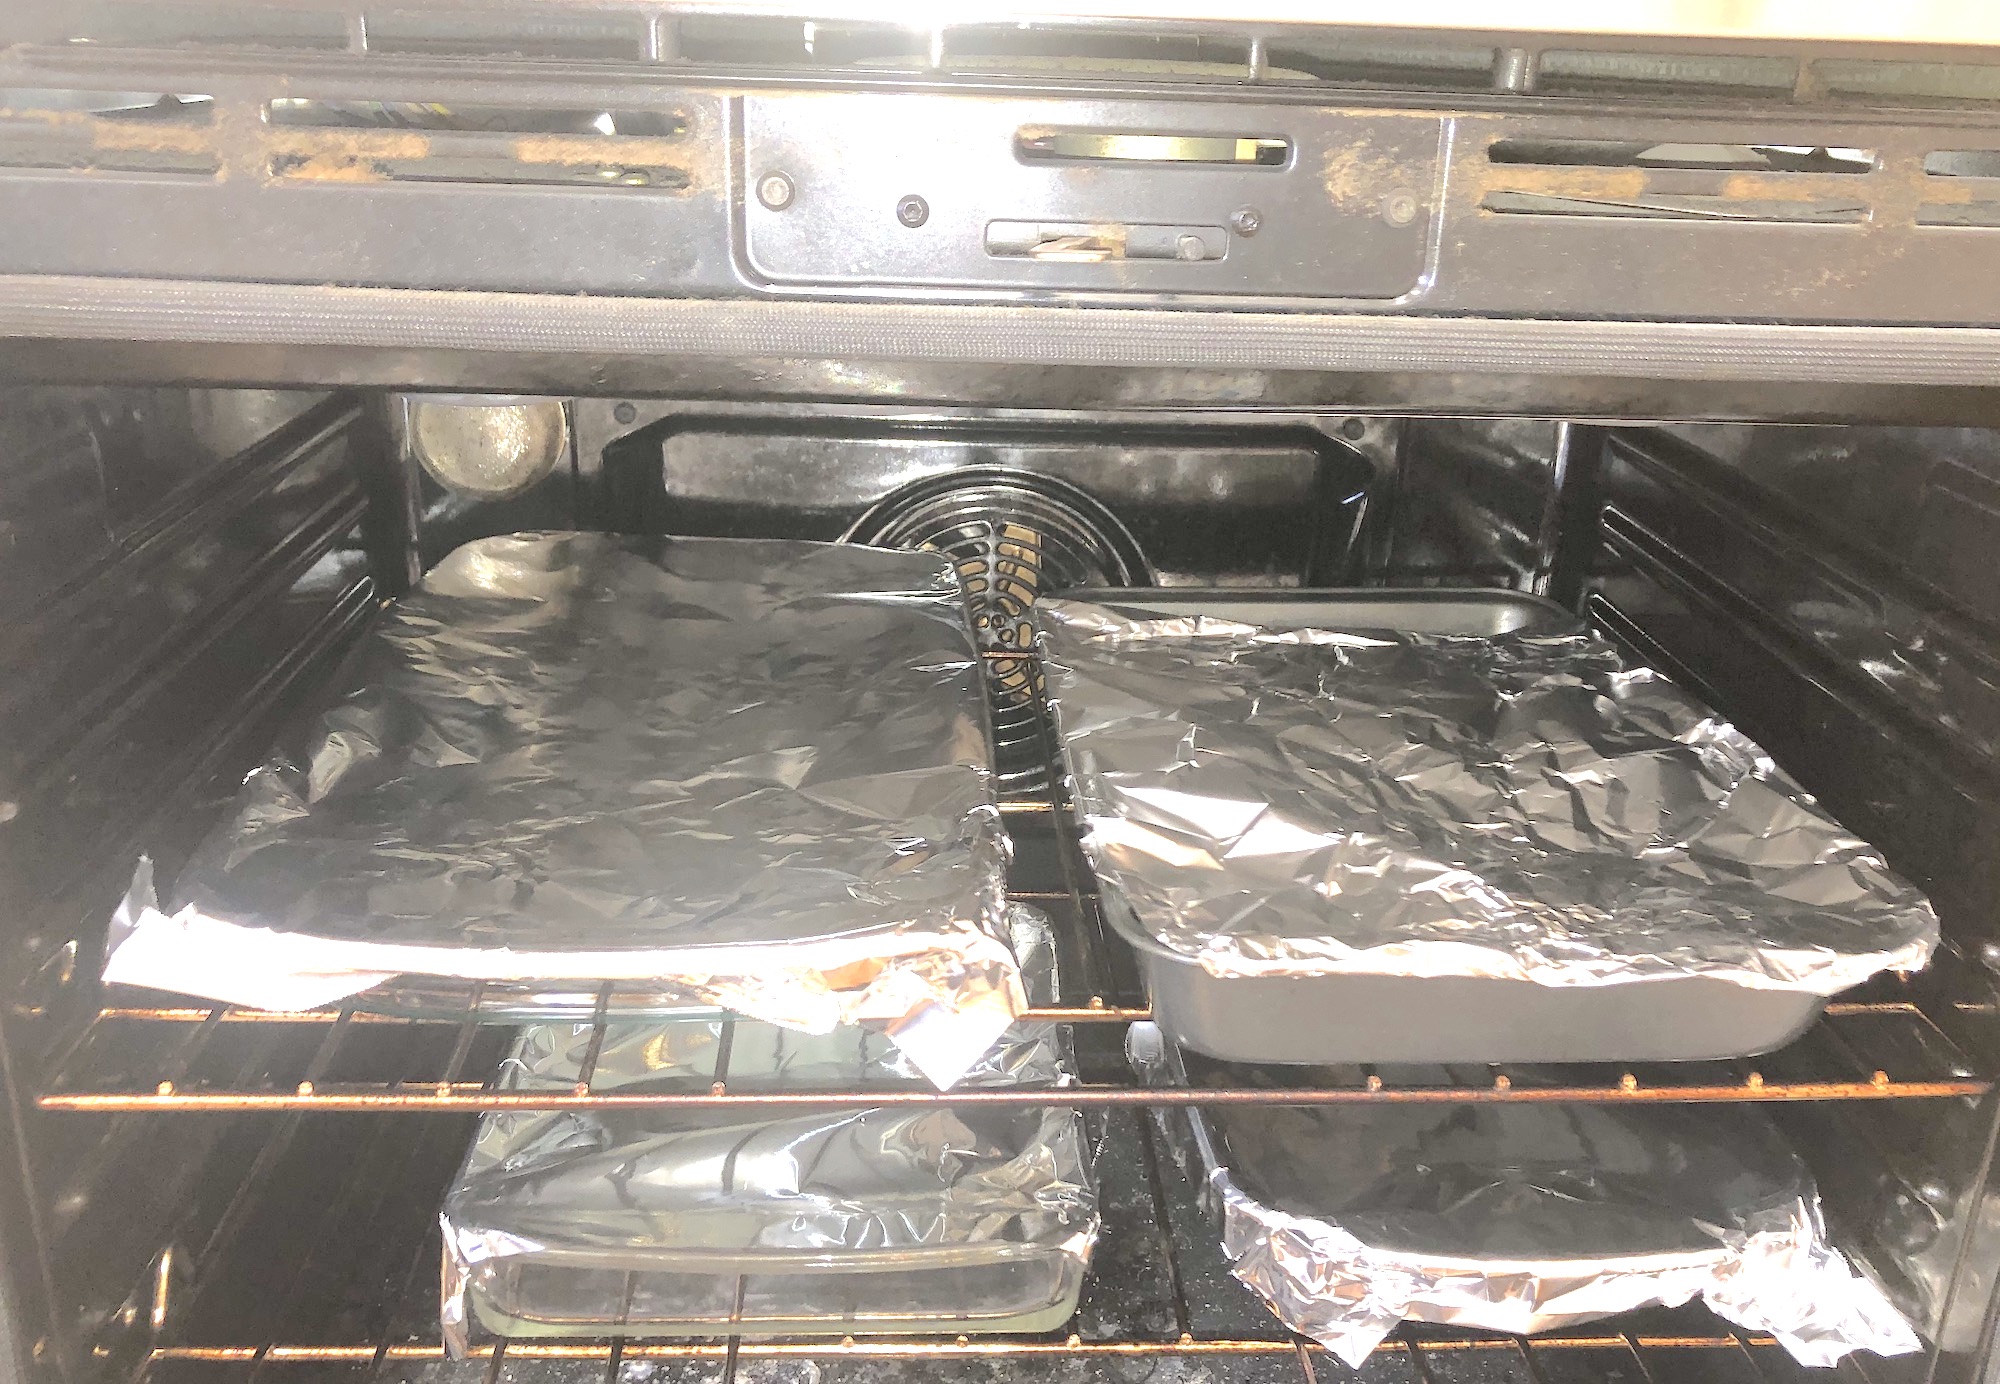
1. The Oven
Some advocate heating in the oven. Don’t. I tried that once in my early gardening days and stunk up the whole house baking soil in my kitchen.
But for the curious, here’s how you do it: Add soil to a baking pan (3 to 4 inches deep), cover with foil, and bake at 200°F for 30 minutes or when the soil temperature reaches 180°F. Anything higher than that can produce toxins. Let cool. Keep covered to remain sterile.
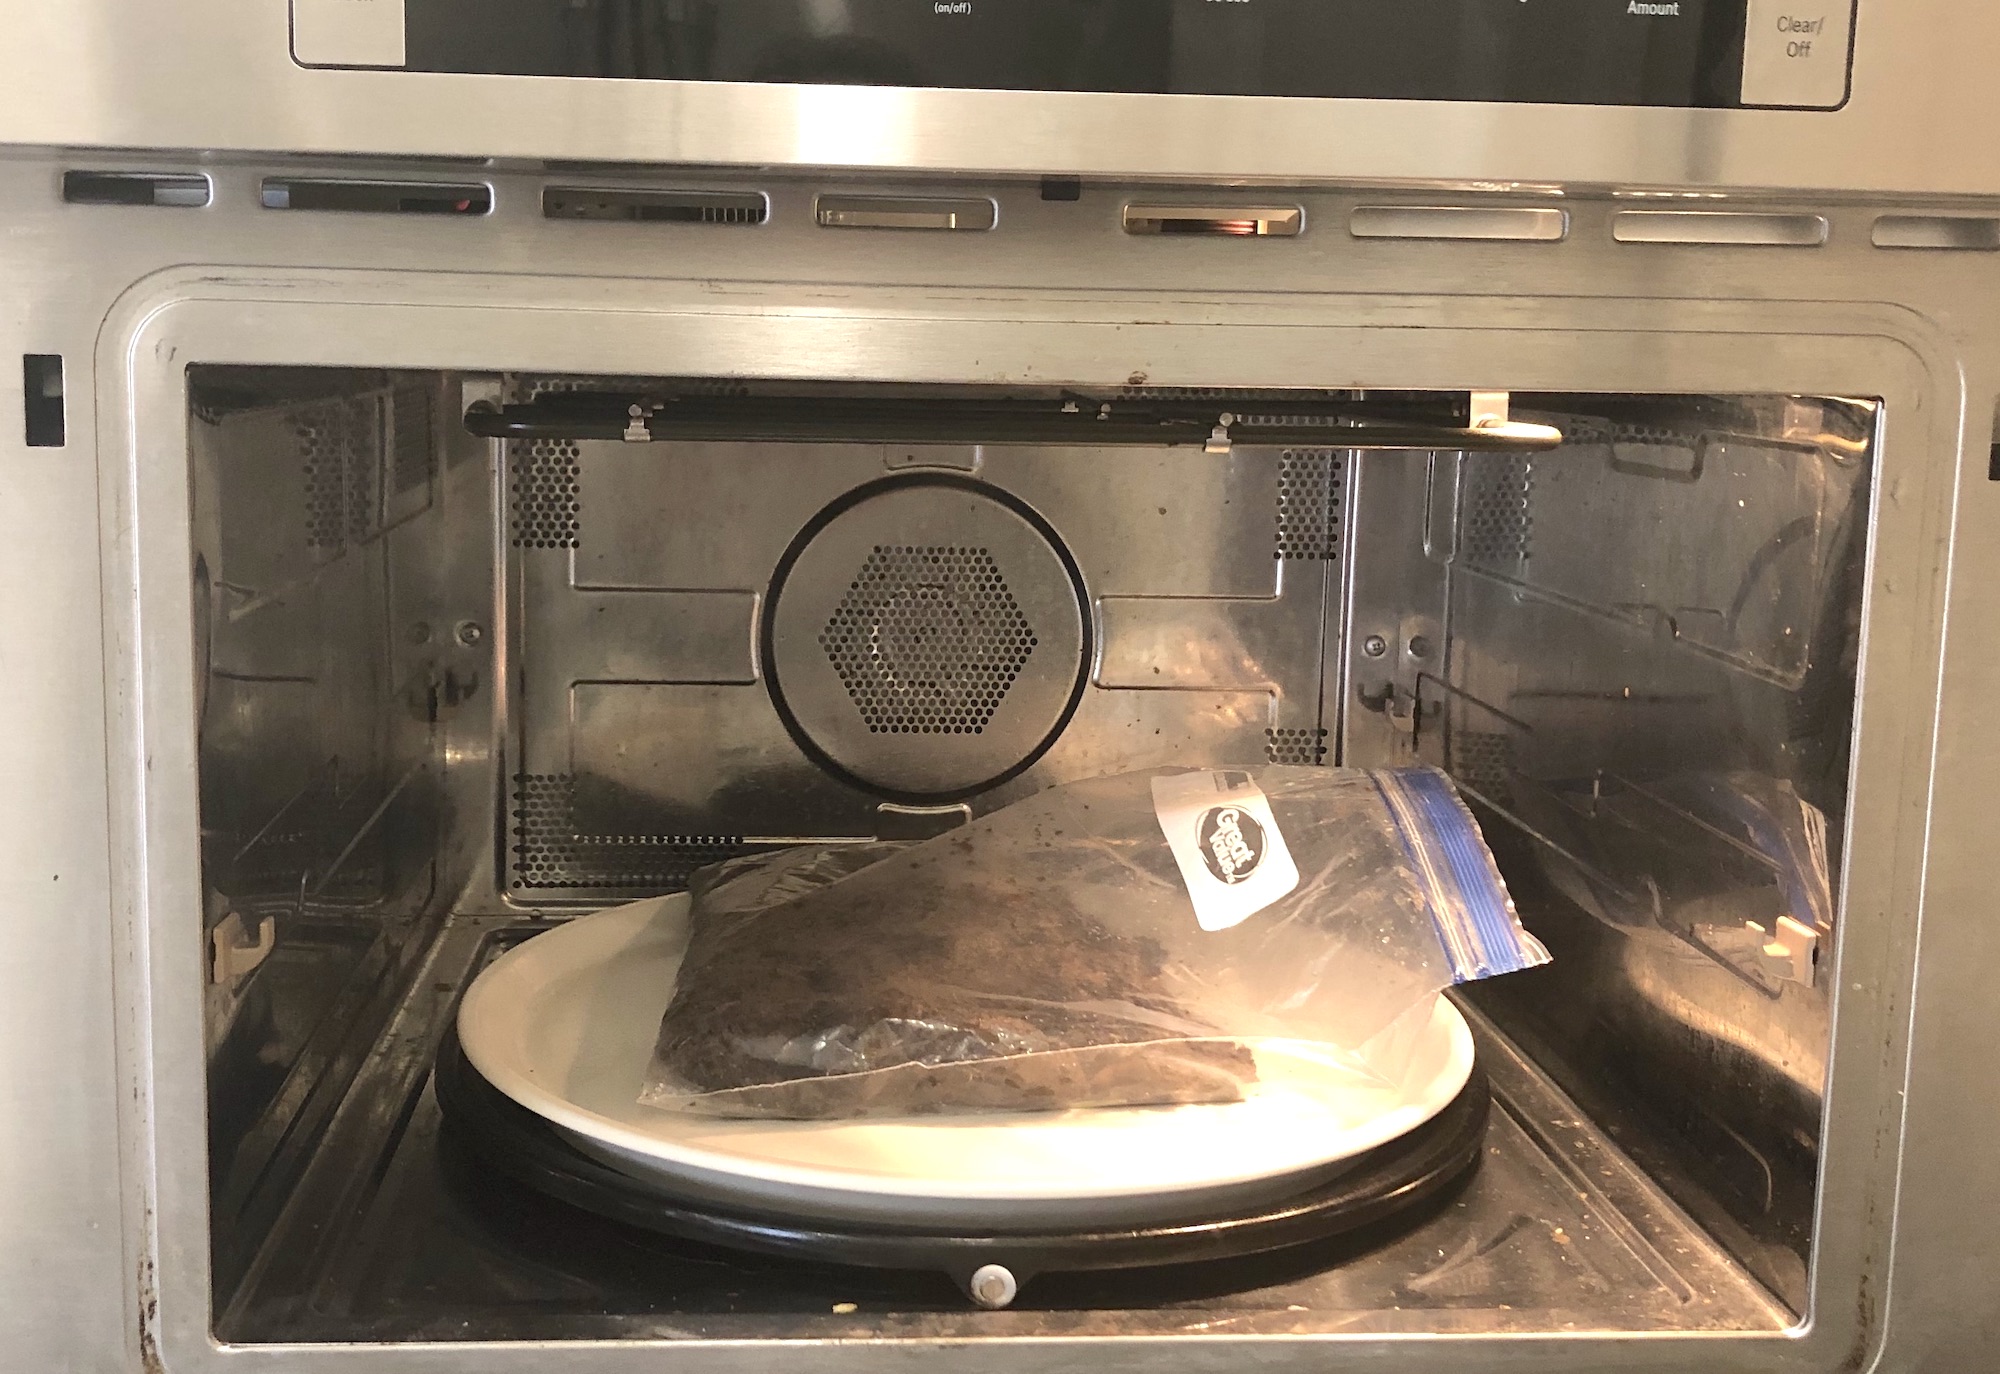
2. Microwave
Enter the microwave. Unless you have a huge one, you’ll have to be content with heating up small amounts of moist soil in ziplock bags. Add 2 pounds of moist soil to an open polypropylene bag and heat for 2 minutes. Let cool. Close the bag, and keep it in the bag to remain sterile.
3. Steam
For many folks, the preferred option is to steam soil in a pressure cooker. But I am leery of that. My mom pressure-cooked everything, and we often had food glued to the wall!
If you want to know a safe way to steam your soil, fill the pressure cooker with 3 cups of water. Separately, fill thick glass jars (e.g., mason jars) or containers with soil no more than 4 inches deep, level the soil, cover the containers with foil and set them on the rack above the water. Close the lid, leaving the steam valve open slightly to allow the steam to escape, at which time it can be closed and heated at 10 pounds pressure for 15 to 30 minutes.
If you don’t have a pressure cooker, put a couple of inches of water in the bottom of a pot and set the foil-covered soil containers on a rack around the water. Cover pot with lid, leaving open a crack. Bring to a gentle boil for 30 minutes. Let cool, and keep the foil over the container.

With all methods, bear in mind that the soil is not going to be sterile for long. As soon as you touch it or scoop it into a container, it will be contaminated. We are not working in a sterile laboratory environment. Think of it as pasteurized rather than sterile.
Why Do You Want to Sterilize Your Soil?
I have been an organic gardener for many years and am highly skeptical of anything that could harm my soil. Soil is a living thing, full of beneficial microorganisms. Learn more about healthy soil (versus dirt) and how to prepare your garden soil for planting.
While many people ask how to sterilize your soil, the simple fix is not to reuse old potting soil for starting seeds. Start with a fresh bag of whatever seed starting mix you like to use. You don’t need to make a major investment. Just enough to get the plants up and growing.
If you are having a problem with damping off, try a compost-based potting soil. When we switched from a commercial potting mix to a locally produced, compost-based mix, we ceased having any problems with damping off or any other kind of disease and had fewer insect problems as well. Well-made compost has already been heated up to 140–160°F, meaning that it will be naturally free of pathogens, and most weed seeds will have been rendered nonviable but the beneficial organisms and nutrients will be intact.
Confession: I always reuse old potting mix as long as the plants that previously grew in it were healthy—but never for seed-starting. In the fall, I round up the pots and window boxes, pull out the old plants, and pile the pots outside to weather. In the spring, all the old soil gets dumped into the wheelbarrow and mixed together, along with some new soil, compost, and fertilizer. I use this for my outdoor ornamentals and window boxes and have never had a problem. When the soil becomes too full of roots to use again, it goes into the compost pile.
Learn ways to use less potting mix to fill pots and raised beds.
I have a few huge pots that I can’t easily lift and dump, so I practice crop rotation in them, never planting from the same family of plant twice in a row. They get a top-up of fresh soil every spring along with some compost and organic fertilizer and the plants grow great!
Go ahead and try sterilizing your soil if you think you must, but I can tell you that I am never going to do it again!
Robin Sweetser


I used to work on a sod farm, The sod was two or three inches thick, and 1 ft wide by 10 ft long.. it was beautiful black dirt and green grass rolled up and I would palletize it on the back of a harvester. Sometimes the mesh in the reinforcement would cut your finger and it would start bleeding. Old timers would say just rub some dirt in it. It helped it heal real quick. I suppose it makes a scab.
Question
Can ya maybe use a pellet grill for the process and some big aluminum pans?
This is more a question than a comment. I opened a bag of potting soil that I bought several months ago for to plant some Lilies of the Valley next to the house. When I started scooping out the potting soil I found white, lacey, tendril-y clumps that I think must be fungus. (I am a gardening novice). My gardening neighbor said I should not use that potting soil if it had fungus. Internet had different opinions from "don't" to "it's not harmful". I trust Farmer's Almanac so I hope you can help me (and quickly. Those poor plants have been waiting two weeks for me to finally plant them so I REALLY don't want to mess it up by kkilling them with bad soil ). Would exposure to the sun make the potting soil good? I'm not supposed to carry anything heavy so I'm hoping to avoid another shopping trip if i can. I very much appreciate your help and recommendations .
Hi Shelli,
When bagged potting mix is exposed to excess moisture it can result in a mold/fungal growth. What you see could also be the result of different components of your potting mix breaking down. After the bag is opened and exposed to light and air, it will be less inclined to produce what you found. Using gloves, you can remove the white portions for disposal. If you feel more comfortable, you can also wear a facemask during the removal. At that point, your potting mix will be fine to use. You can also remove the potting mix from the bag and spread it out on a tarp to dry it out in the sun before potting up your plants.
Good luck with your planting!
Thank you! I'll try that.
I sterilize my used potting soil by covering the pot containing the soil with a black plastic bag and leaving it out in the sun all summer. The temperature of the soil will reach about 150 deg. F on a sunny day. Here in south Florida the growing season is in the fall, winter, and spring, but in other places you could use the soil that you solarized one summer during the next growing season.
My father was a farmer and we grew bedding plants in our many greenhouses. He always sterilized the soil. He used a potbelly stove and piled up the soil (muck land soil) and covered it with heavy plastic. Pumping the heat into the soil, sterilizing the soil for seedlings. I can still smell it.