
A Simple Step-by-Step Guide to Building a Raised Garden Bed
The Almanac Garden Planner - Use It Free for 7 Days!
Plan your 2025 garden with our award-winning Garden Planner.
Building a raised bed is the perfect DIY project. We’ll help you get started with our step-by-step guide on how to build a simple raised bed from scratch. No special skills are required!
We’ll start off with exactly what you’re looking for—how to build a raised garden bed. Then we’ll jump into what kind of wood or material to use, how large a raised bed should be, how to clear the site, filling a raised bed and the soil mix!
What Is a Raised Garden Bed?
But let’s start from the beginning and give a definition. When we say “raised garden bed” or simply “raised bed,” we’re referring to a freestanding box or frame—traditionally with no bottom or top—that sits aboveground in a sunny spot filled with good-quality soil. Raised beds are usually open on the bottom so the plant roots can access soil nutrients below ground level.
Read Next
Of course, a raised bed can be even simpler than that: you could build a raised bed without a frame, mound the soil 6 to 8 inches high, and flatten the top. This requires no additional materials (beyond soil).
How to Build A Raised Garden Bed
You are simply building a box—like a sandbox—requiring minimal DIY skills. It’s fine to buy a commercial raised garden kit, but they can have cringe-worthy prices.
Tools
- Drill/driver and bits, screwdriver
- If cutting the planks yourself (vs. lumber store): Hand saw, tape measure
Materials
- For a 4x8-foot bed, get 3 pieces of 8-foot-long 2x6-inch lumber. If they have 2x8-inch or 2x10-inch lumber, even better. For a 4x4-foot bed, get two pieces of lumber.
- If you don’t have a saw, ask the guys at the lumber yard to cut the pieces in half. For the 4x8-foot bed, they will cut one of the pieces in half for you, giving you two 4-foot lengths to use for the ends. For the 4x4-foot bed, they will cut both pieces in half.
- Deck/exterior screws
- To make it stronger, use 2x4-inch or 4x4-inch pieces in the corners—this will provide a stable structure to nail or screw into rather than the end grain of the board.
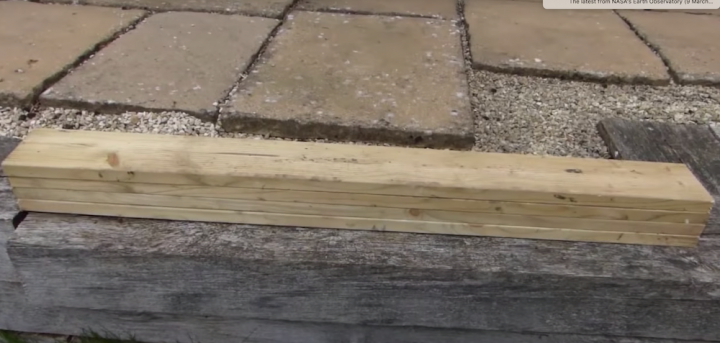
Make the Bed Sides
If your two 8-foot-long boards were not pre-cut at the lumber store, mark off the halfway point and cut each plank in half for a 4x4-foot bed. Then, you’ll have four planks.
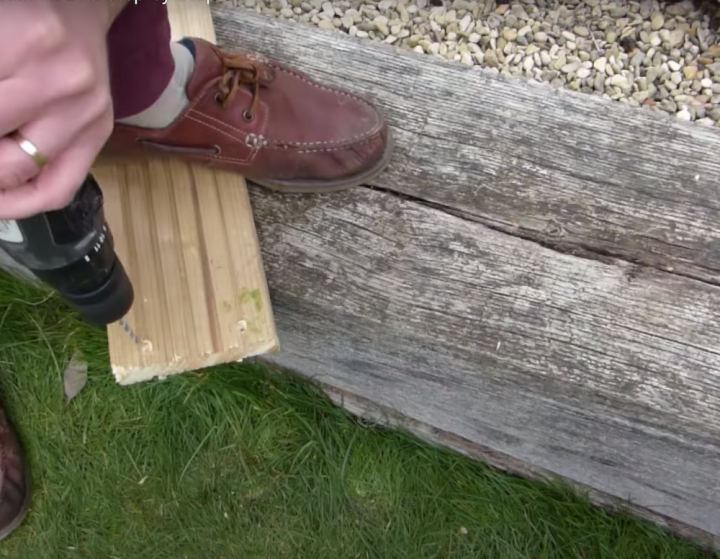
You’ll screw the planks together using decking screws. Two holes at the end of each plank are sufficient. Drill pilot holes using a drill bit slightly thinner than the screws themselves.
One end of each plank will overlap the end of the next and screw directly into it, so position your pilot holes correspondingly. It is easier if you have a helper to hold the boards while you fasten the corners.
- If you’d like extra bracing and a sturdier frame, cut your pine stake into four pieces and use them to nail the boards at the corners for bracing.
Assemble the Raised Bed
With all the wood cut to size and the holes drilled, we’re ready to assemble the bed.
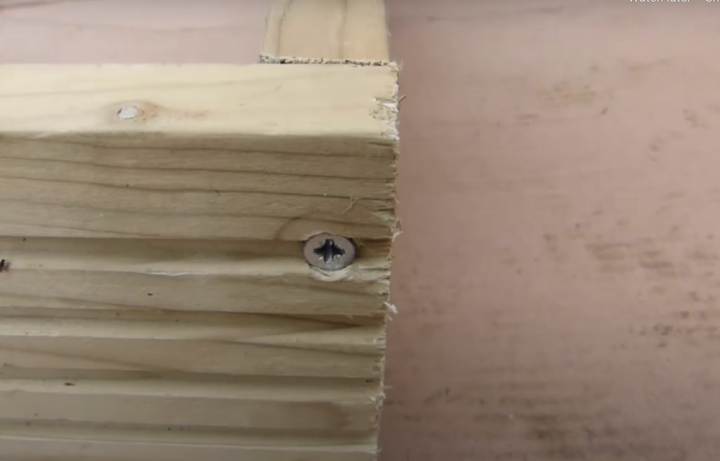
Lay down the beds. The walls need to be laid out so that each plank overlaps the next, with the pilot holes located at the overlapping end.
Screw the walls together with long screws so that each wall is properly secured to the next.
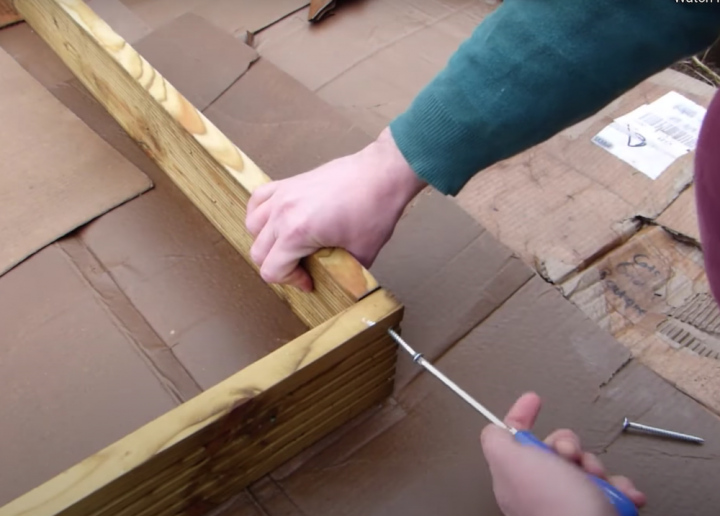
Make sure you have a snug, close fit.
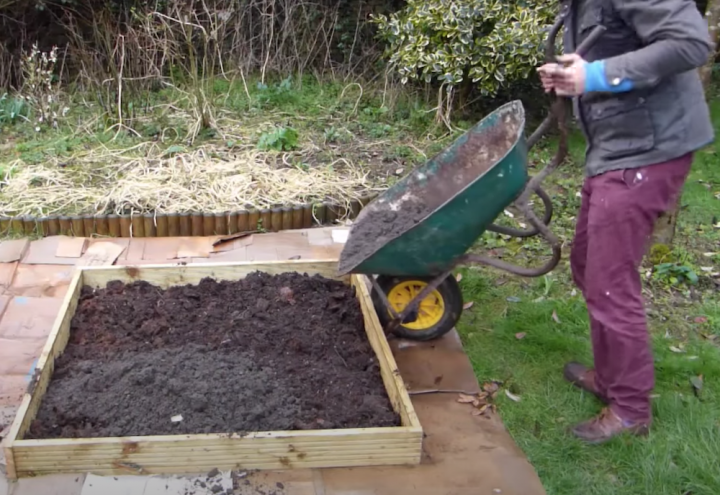
Fill the Bed
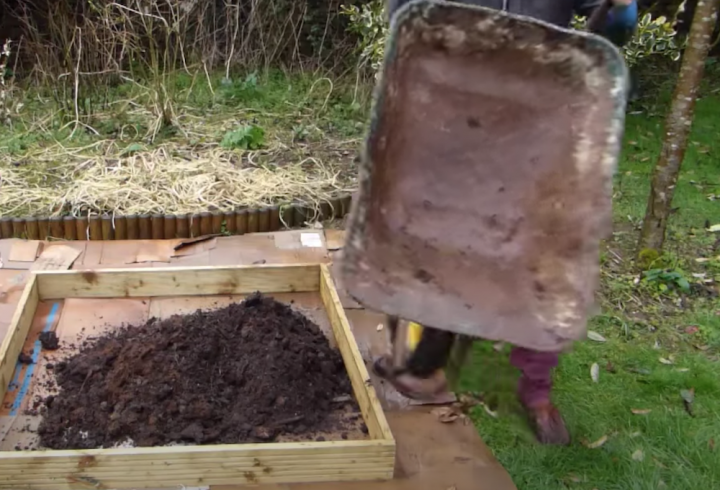
Fill your bed with a nutrient-rich compost mix (homemade or commercially-produced).
Then, top the compost with enriched top soil, especially formulated for vegetable gardening. Its fine texture allows for immediate sowing and planting.
Fill your beds all the way up! The soil will settle, especially with watering. As it settles, you can always top off with compost.
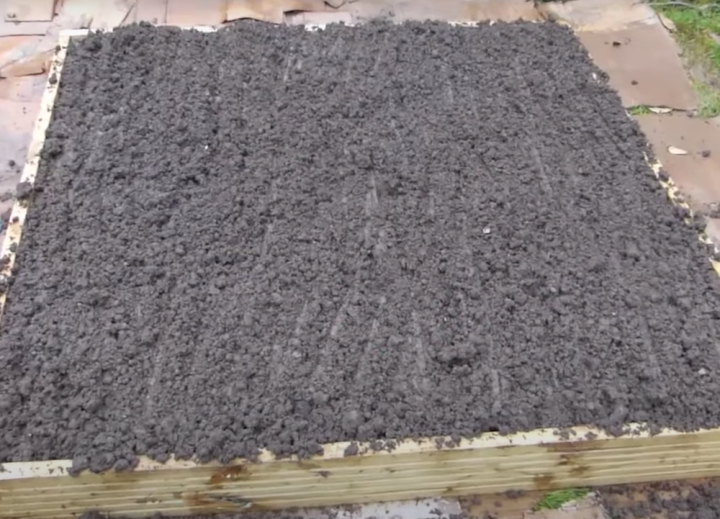
That’s it! Your bed is ready for seeds and plants.
Watch our friend Ben demonstrate how to plan and build a raised bed in this video:
Benefits of Raised Garden Beds
There are many reasons to garden in raised beds.
- They drain well and help prevent erosion.
- They warm up early in the spring and give you a longer growing season since the soil raised above the ground warms up more quickly.
- Raised beds give you control over the soil you put in them, making it possible to plant intensively; plants grown close together in raised beds mature faster.
- They keep weeds from taking over because the beds are elevated away from surrounding weeds and filled with disease- and weed-free soil.
- Since you are not walking in the bed, the soil doesn’t get compacted and stays loose without the need for backbreaking digging every spring. Raised beds help to keep things organized and in check.
- Garden chores are made easier and more comfortable thanks to less bending and kneeling. Save your knees and back from the strain and pain of tending the garden!
- Raised beds are ideal for small spaces where a conventional row garden might be too wild and unwieldy.
- It is easier to separate and rotate crops each year.
- Raised beds allow for easier square-foot gardening and companion planting.
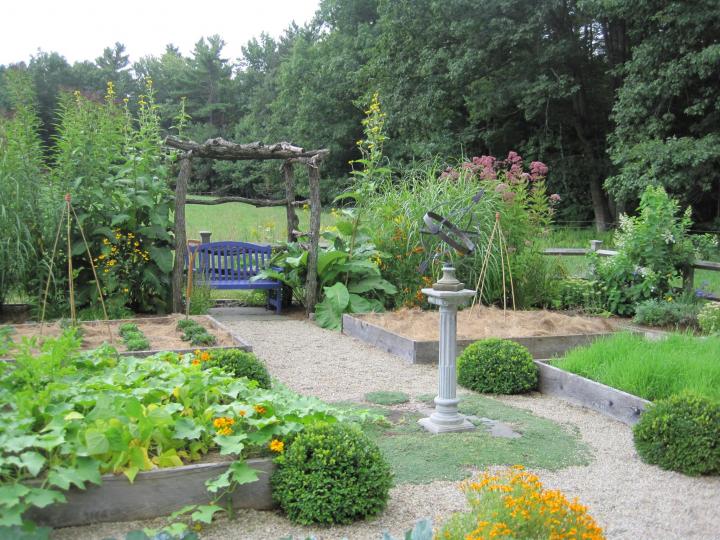
- And, finally, raised beds are attractive!
- Learn more about the benefits of raised garden beds.
Choosing the Right Material for Raised Beds
You can edge your raised beds using any materials you have at hand—wood, stones, bricks, or cement blocks. Stay away from painted or pressure-treated wood, which may leach chemicals or lead into your soil.
Bricks can be placed end to end around the edges, or if you have enough of them, stand them on end to make higher sides for the bed. Bury a bit of the bottom to stabilize them and to deter weeds from slipping under and in between the bricks.
Years ago, I was lucky enough to acquire many roofing slates and used those to edge a raised bed on a slope. Cement blocks can be used to make a bed for heat-loving plants. Here’s the list of possibilities:
- Untreated wood. Pine is the cheapest but will rot after a few years, as will many untreated kinds of wood. Hemlock will last a little longer. Rot-resistant woods like cedar, redwood, or locust will last much longer; they are expensive. Cedar is the top choice because it’s rot-resistant and durable, lasting 10 to 15 years. It is also insect-resistant because of the oils in the wood. Recycled wood made from plastic bottles is also pricey but will last indefinitely. Another option is to choose much thicker boards of untreated wood. For example, a 2-inch-thick board of larch wood should last a decade without treatment.
- Modern treated wood has chemicals to prevent rotting. Unlike in the past, however, studies have shown that any compounds that leach out are well within safe levels established by the EPA. Some gardeners still feel uncomfortable with treated wood. One option for those concerned is to line the inside of the bed walls with polyethylene.
- Railroad ties (treated) are easy because you can simply lay them on the ground and drive in iron spikes. Old railroad ties treated with creosote do not appear to pose any health problems because most creosote has leached away.
- Pallets can be a cheap source of garden bed materials as long as you know where they came from. Pallets are developed for shipping materials. Avoid pallets that are also treated with a chemical called methyl bromide, a known endocrine disruptive chemical that can impact your reproductive health. Most pallet producers stopped using the chemical in 2005, but many old pallets are still there. Look for a stamp on the pallet that says “HT” or heat treated. If there is no stamp or you can’t verify an HT on the surface, don’t use the pallet in your garden.
- Concrete or brick can be used. However, keep in mind that concrete will increase the soil pH over time, and you may have to amend the soil.
- Composite wood is a newer product made from recycled plastic and wood fibers. It’s rot-resistant and long-lasting but also very expensive.
- Cinder blocks: The extra gathered heat from concrete is perfect for Mediterranean-type herbs such as rosemary and lavender. Their holes can be filled with soil mix and planted with herbs or strawberries. Each block is 16 inches long by 8 inches high; the price at big box stores is most reasonable.
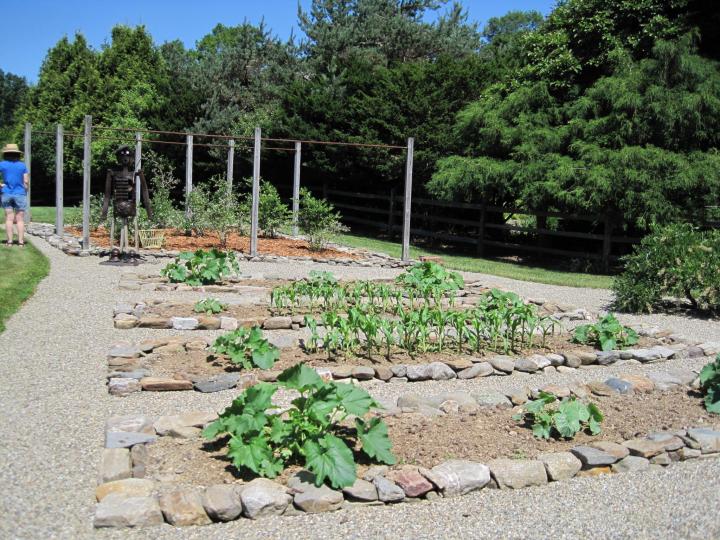
- Rocks and stones are plentiful in some areas and make a great free edging. You can build the bed in place around the soil mound you already have started. Once that is enclosed, you can fill the sides with more soil and add compost, shredded leaves, manure, etc. Rake the top smooth and let it sit until next spring when it will be ready for planting.
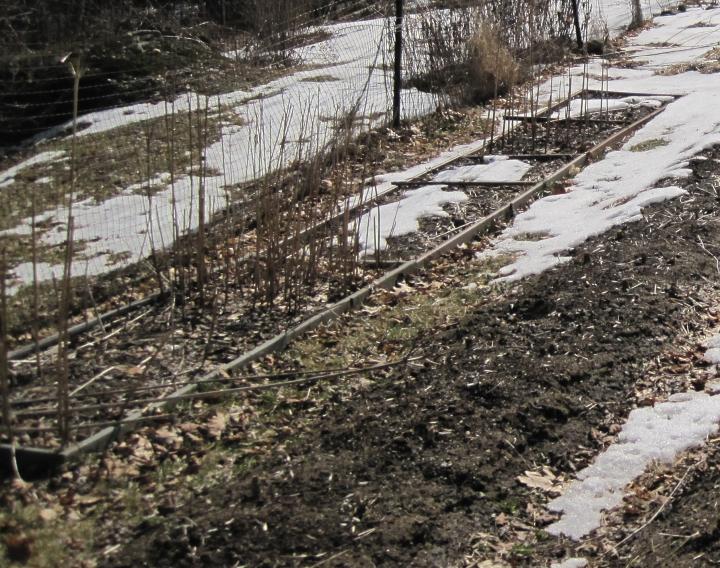
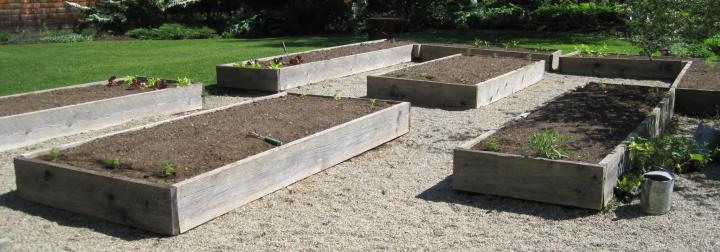
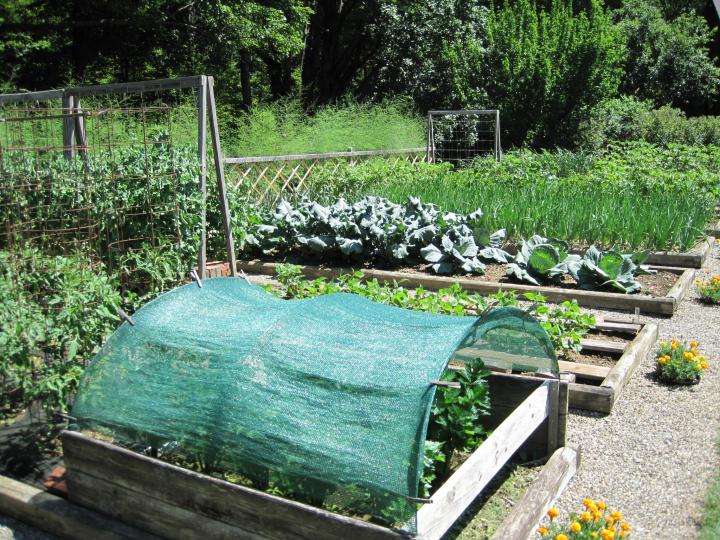
The two beds below were built using Trex lumber from the “seconds” pile at a local lumber yard. It was too warped for building a deck but worked just fine for a garden bed. The bottom is lined with 1/4 inch hardware cloth screening to keep the voles from eating precious bulbs.
How Wide Should Your Raised Bed Be?
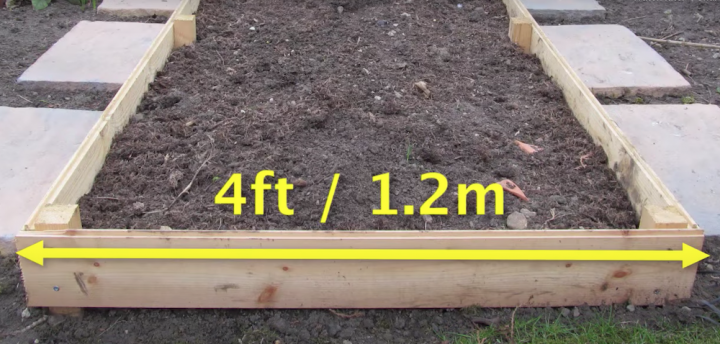
Garden beds should be no wider than 4 feet so that you can access the garden without stepping into the bed. Fortunately, lumber is often cut in 4-foot increments.
- Stepping into the bed is a no-no. It compacts the soil, making it harder for plant roots to get the oxygen they need. Making the bed too wide will also make it difficult to reach the middle, which makes weeding and harvesting difficult.
- If your raised bed is being built against a wall or fence, we recommend making it narrower than 4 feet (2 to 3 feet wide) since you’ll only be able to access the garden from one side.
Length is not as important. You can make a bed 4x4-foot, 4x8-foot, or 4x12-foot. It can be as long as you wish, but I find it easier to make several shorter beds than one really long one. Also, many crop families are best in separate beds.
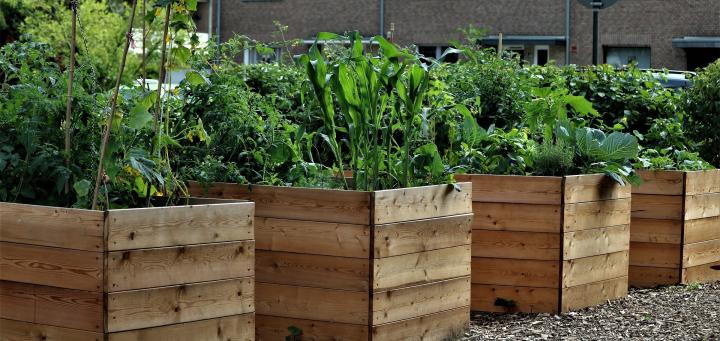
How Deep Should a Raised Bed Be?
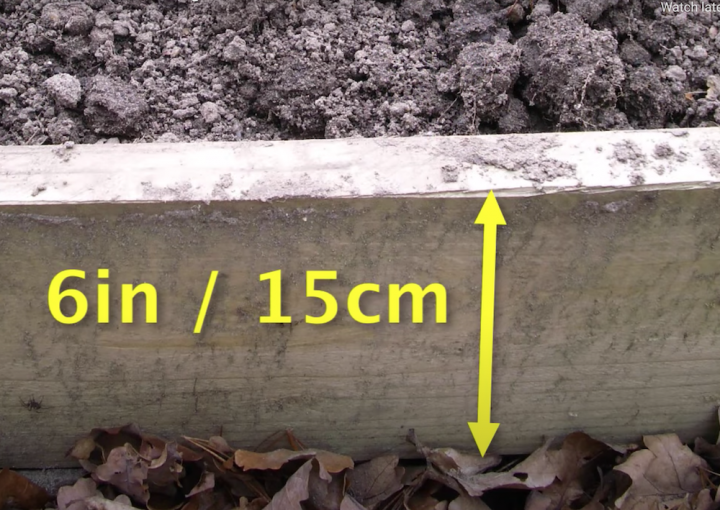
Usually, lumber (such as cedar) will come in a standard size of 6 inches in height. In other words, the sizing is 2 inches by 6 inches by 8 feet. (Note that boards bought at a lumber yard are 1.5 inches thick by 5.5 inches high.)
You could also stack the two boards. The height of two stacked 2x6-inch boards is 12 inches (technically 11 inches).
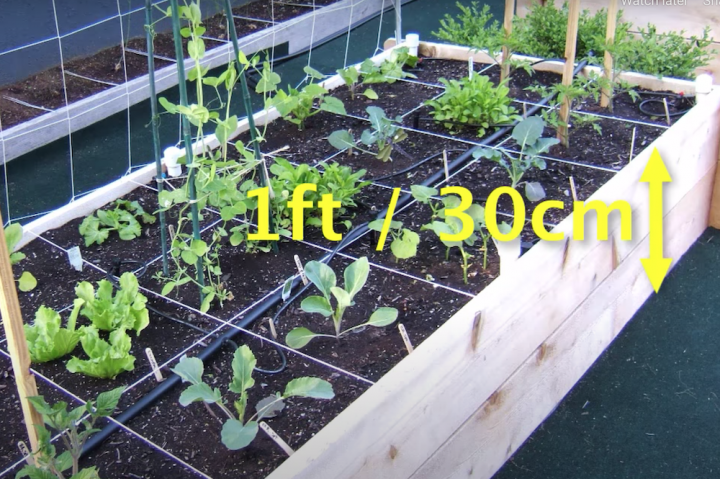
You can certainly go taller (18 inches, 24 inches, 36 inches), but note that the weight of the added soil will add pressure to the sides. You’ll need to add cross-supports to any bed over 12 inches high.
Consider what you may grow. The depth of the soil itself is very important and depends on how much soil depth the crop needs belowground. For example:
- Deep-rooted crops such as carrots, parsnips, potatoes, tomatoes, and squash need a minimum soil depth of 12 to 18 inches. Without loose soil to this depth, the roots will not be able to access nutrients.
- Shallow-rooted crops (like lettuce, greens, and onions) need a minimum soil depth of 6 inches.
To place it safe, you could just ensure your beds have a depth of 12 to 18 inches. Whatever height you choose for your frame, you’ll need to loosen the soil below the ground accordingly. For example, if you have a bed that’s 6 inches high, we recommend loosening the soil below the ground about 6 to 9 inches if you wish to grow root vegetables. If you are only growing shallow-rooted crops, there’s no need.
Where to Put Raised Beds: The Best Location
Raised beds need to be in sites with lots of sun! Here are the requirements:
- Most vegetables need 6 to 8 hours of direct sunlight daily (“full sun”), especially from lunchtime onwards.
- Level, even ground.
- Close to the house for easy access to weeding and harvesting
- Do not site your bed in a windy location or a frost pocket.
- Soil needs to drain well, so avoid any wet or marshy areas.
Preparing the Site: Option 1 (Basic)
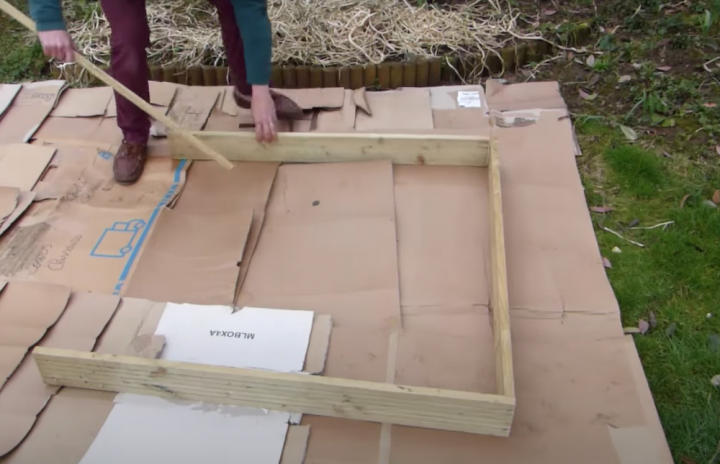
To make a basic raised bed, outline the spot where you want it with string. As mentioned above, keep it between 3 and 4 feet wide so you can still reach the center easily.
It helps to have smothered the grass in the area, but if there is sod or grass in place, mow it short and dig it out, saving the clumps to one side.
Loosen the soil in the bed, flip the clumps of sod upside down in the bed, scrape soil from the pathway around the outside, and add that to the bed, along with any other amendments you wish to use to raise the level of the soil.
You can quit right here if you want.
Preparing the Site: Option 2 (No-Dig)
Some gardeners don’t bother digging out the turf, as the soil will block out the grass and weeds beneath it as long as it’s a thick enough layer. Gardener Charles Dowding founded the “no-dig” method. His philosophy is that digging brings more weed seeds to the soil surface, leading to more weeds and more weeding. Digging also hastens nutrient loss, so you’ll need to feed plants more often, and it rips apart the complex life and very fabric of your soil, reducing its ability to drain properly and retain moisture.
Here’s how to build a raised bed using a “no dig” method:
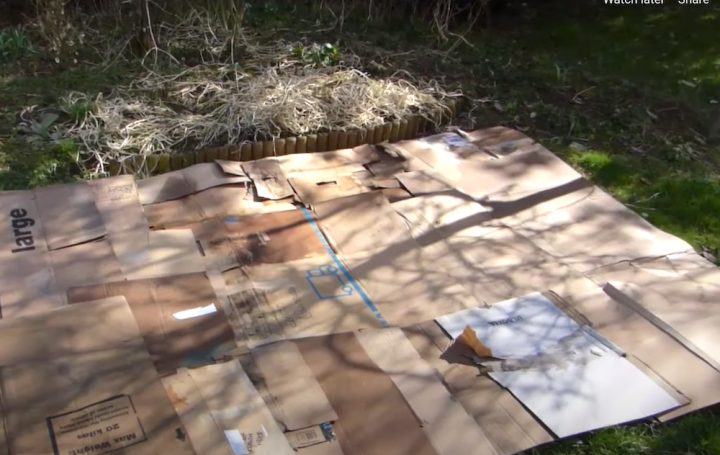
- Mow the grass or weeds as close to the ground as possible. Then, cover the area with cardboard, smothering the grass/weeds, which will eventually rot into the soil. (Make sure you remove any tape and staples that won’t decompose.)
- Be sure to overlap the cardboard/newspaper (by about 6 inches) to ensure no weeds slip through cracks. They will reach for any sunlight they can find.
- Add a thick layer (4 to 6 inches) of compost on the top of the cardboard. This will be your growing medium.
It’s fine to get on and plant immediately after setting up. By the time the roots reach the cardboard, they will have started to break it down, and they will be able to search deeper beyond that cardboard layer.
The compost you add on top should gradually become incorporated with the soil beneath through the actions of worms, etc. Beds will need topping up with fresh organic matter (an inch or two) each fall/winter, which will help to gradually improve the fertility and health of the soil, including that below the level of the raised bed. This means you should be fine growing deeper-rooted veggies like root crops.
For Those With Compacted or Bad Soil
Digging below the ground is often necessary in soils damaged by compaction or other problems, but it only needs to be done once. This is most important for deep-rooted crops such as carrots, which do better in soil that has been loosened and amended down to 10 to 12 inches to allow air and water to reach the plants’ roots.
- After mowing the grass short and digging it out, remove the top layer (about a shovel’s depth or 10 inches); it may be easiest to work in rows.
- Remove all rocks, old roots, and plant debris.
- Dig down a little further with the shovel (a few more inches) to just loosen up the soil.
- Mix the soil with organic matter such as compost. We recommend that the compost make up about 25% of your soil.
- Then, return the top layer and mix the soil layers together.
Learn more about soil preparation and how to build up your garden soil.
Filling a Raised Bed
The most important part of any garden is the soil, and the more organic matter it contains, the better. Soil microbes are fed, oxygen and water readily reach roots, and plants thrive. Here is the balance to aim for:
- 40% compost: Compost is packed with nutrients for plants. While you can compost at home, it can also be purchased in bags from your local garden center. Aged manure can also be used, but you can NOT put fresh manure directly in your garden. Learn more about manure.
- 40% topsoil: We’re not talking about “potting soil,” as it’s too fluffy for raised beds. You’ll also find bagged topsoil at a garden center, local farm supply, or lumber store.
- 20% aeration: In terms of aeration, many bagged soil mixes already contain some perlite, pumice, or rice hulls. If not, you need to add something for drainage. Lava rock is also a good aerator for drainage.
If you are filling a lot of raised beds, we’d recommend that you look into a local landscape company to build soil and compost mixes, which should be cheaper. But if you’re filling up a small bed, bagged is the way to go.
There are two approaches to filling your bed:
- Some folks pour in the compost (or composted manure) first and then add the topsoil (as shown in the video above).
- Other folks add the ingredients in layers like lasagna, mixing as they go.
Do whatever is easier for you!
At the end of the growing season, in fall or winter, top off your raised beds with more compost. As it is worked into the soil, it will improve its fertility and be all set for planting by spring.
Raised Garden Bed Soil Mix
Here’s the recipe we’ve developed in the last decade that works best for our garden beds.
For one 4 x 4-foot raised bed. (Multiply amounts to fill larger beds.)
- 4 cubic feet of top soil
- 3-cubic feet of coconut coir (Note: Traditionally, peat moss has been used as a component of garden soil, but given that it is not a sustainable material, we recommend using coconut coir instead.)
- 2 to 3 cubic feet of compost or composted manure
- 2-inch layer of shredded leaves or grass clippings.
If you use grass clippings, make sure they are not from a lawn that has been sprayed with herbicides or fertilized with a food that contains granular herbicides to kill weeds. Both persist and will kill plants up to 3 years after the initial application.
Mix all materials with a hoe or cultivator and water well. Be sure to mulch well with organic matter such as more leaves or clippings or straw.
In the first year, you probably won’t need much-added plant fertilizer or go light on the fertilizer. But in the following years, as your food crops suck up all the nutrients, your soil will need some amending with a balanced, slow-release fertilizer (or more compost).
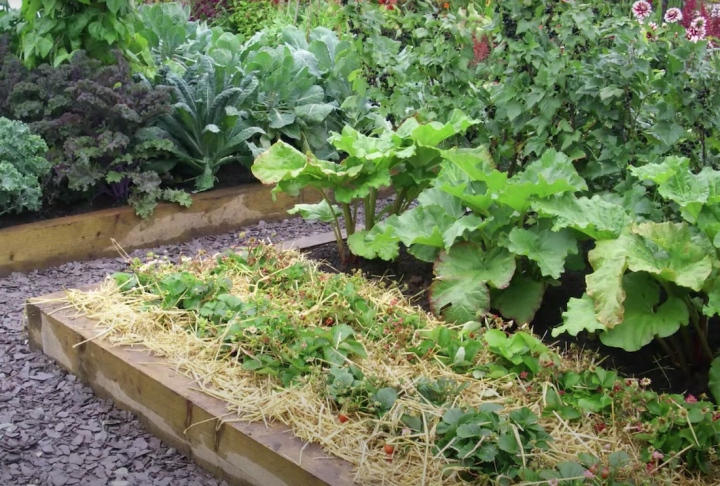
Once you plant, you’ll want to top off your bed with some mulch (leaves, straw, pine needles, or more compost) to retain moisture and suppress weeds.
What to Plant in Raised Beds
If you’re a beginner gardener, we advise that you start with one raised bed and try growing some of your favorite vegetables. Ultimately, four or five raised beds grouped together make a good-sized garden.
What you grow is only limited by the depth of your soil—which is the depth of your raised bed plus the depth of the soil you dug and loosened below ground.
What grows well in 6-inch soil depth:
Lettuce, salad greens, spinach, onions, leeks, radishes, strawberries, basil, chives, cilantro, dill, mint, oregano, parsley, thyme, marigolds, and other annual flowers
What grows well in 12-inch soil depth:
Beans, beets, broccoli, Brussels sprouts, cabbage, cantaloupe, carrots, cauliflower, collards, cucumbers, garlic, kale, summer squash, Swiss chard, turnips, lavender, rosemary, sage, borage, calendula, cosmos, lantana, nasturtiums, snapdragons, sweet alyssum (plus everything in the 6-inch list)
What grows well in 18-inch soil depth:
Eggplant, okra, peppers, pumpkins, sweet potatoes, tomatoes, watermelon, and winter squash (plus everything in the 6- and 12-inch lists)
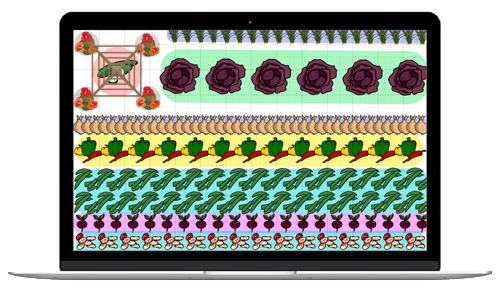
For ideas, we have some sample raised bed vegetable garden plans—with plant lists!
Also, many vegetables grow best from seed, but some plants do better as young starter plants (especially tomatoes and peppers).
Start Growing!
Once you have built your raised bed and filled it with soil and compost, you can start planting and growing a garden!
Here’s a handy tool: The Old Farmer’s Almanac Garden Planner! In minutes, you can create a garden plan right on your computer. The Garden Planner will show you the number of crops in each space so you don’t overbuy or waste seed. Test out our Garden Planner with a free 7-day trial—plenty of time to play around and plan your first garden!
Catherine Boeckmann


ADVERTISEMENT
I have several raised gardens that were built about 4 years ago. Last year nothing grew in my gardens because tree roots had taken over. I cannot find any articles to help me with this problem.
I started my beds with thick layers of cardboard on the ground, but by the 2nd year the roots were already coming through. Moving the beds is not really an option. I did dig all the soil out of 2 of the gardens last week, laid down more cardboard and black weed barrier and I'm hoping that will buy me at least 2 years of root free garden.
Any advice?
I have a dwarf white spruce that I planted around 4 years ago. Most of the branches are now bare, but there is new growth that comes every year where there are still needles. I'm thinking the soil is bad, and I should try again with a new dwarf spruce, but plant it in a raised bed. What are your thoughts?
Hi Pamela,
It could be an issue with the soil, as dwarf white spruce prefer acidic to neutral soil. If your soil pH is too high it can negatively impact your shrub’s growth. It could also be an issue with drainage because they really thrive in well-draining soil. Excessive heat, harsh winter winds, too much sun exposure, and/or too much or not enough water may also lead to the issues you described. Spider mites can also wreak havoc on your plant, while crowding also results in needle loss and bare branches.
As far as planting in a raised bed, it would depend on what else you have planned for that space. You would have to make sure that other plantings share the same soil requirements because if you choose something that needs a more alkaline soil, one or the other will suffer. It might be better to plant a new dwarf white spruce in a container with high quality potting soil that you can adjust the pH when necessary so it gets the proper growing conditions it needs. You can also place the container in the perfect spot in your landscape for full sun.
Hope this helps!
Thank you. The container idea sounds like something I can do.
The idea of creating a raised bed is so interesting & tempting. Maybe I’ll try one this year. Thanks for all of your suggestions.
First, I want to say how happy I am to have found the almanac on line. I grew up in the country and use to always have a garden, but now I life in a city suburb so after many years, I am ready to garden again only now, it will have to be raised beds. I found a good deal and have order the beds which are 17 inches deep. I will place them on a stone patio and plan on using yard debris in the bottom. Since they will be on stone, what else specifically do I need to do?
Hi Sharon,
It’s so great to hear that you have decided to start gardening again!
We’re not sure what you mean by using yard debris on the bottom, but one thing you might want to consider, if your new raised bed does not have a bottom (which if it does make sure there are drainage holes), is creating a wire basket that will sit inside the bottom of your raised beds. With that and the addition of a loose layer of heavy-duty landscape fabric, it will help keep the soil in place as well as keep the soil from coming directly in contact with the stone patio.
You will want to use a quality soil mixed with compost that will provide good drainage and soil retention. Since your beds are only 17 inches deep, you will want to make sure to choose plants that will thrive in that depth of soil, as some vegetables require 18 to 24 inches for root depth.
Hope this helps and happy gardening!
Raised beds should have 1/4" hardware cloth stapled onto the bottom in order to keep moles and mice out.
The beds should also be placed over a permeable weed barrier as well. Cardboard will only work for a few years at most, only worth it if you are NOT using cedar for the beds as you will need to redo after just a few seasons.
Edging just means things will look neat but not stop nasty things from entering/growing into the bed...
I started gardening this year with some large containers. The plants are doing great. We have enjoyed tomatoes and peppers so far. I planted a strawberry plant and every time a strawberry is just about ready the squirrels beat me to it.
Nice info, I am very thankful to you that you have shared this special information with us. I got some different kind of knowledge of garden boxes for vegetables.from your web page, and it is really helpful for everyone. Thanks for share it.