No-Till Vegetable Gardening
No-Dig Gardening is about doing less work and getting improved results from happy soil. Yes, you can boost your soil’s health while saving your back! By not tilling, you allow the beneficial organisms in your soil to thrive undisturbed. Mother Nature does not use a spade, so why not follow her example?
What Is No-Dig Gardening?
No-dig gardening—also called no-till gardening, layer gardening, and lasagna gardening—is a technique that requires no turning over of soil, making it a better place for your plants to grow. You simply spread a new layer of compost on top, often in the autumn.
Why Use This No-Dig Method?
If you grew up on a farm, as I did, you probably grew up plowing and tilling every year.
However, this isn’t the best approach for a home garden. Turning the soil brings up weed seeds, and disrupts the natural soil structure. In nature, air and water spaces in the soil are critical to growing healthy plants, and ensures that there is less erosion from winds and rain.
The no-dig method saves time and energy while preserving the overall soil structure. The soil is then able to better retain water and is resistant to erosion. Since there is no cultivation involved, there are fewer weeds because new seeds are not brought to the surface to germinate, and any that grow are easy to remove in the soft soil.
By simply adding organic materials (compost), you build on the fertility of your soil to keep it rich in nutrients that make your vegetables strong and healthy, requiring no extra fertilizer. You’ll find your garden is much more productive.
If you have raised beds, you are essentially following a no-dig garden technique. Fill the bed with a 50:50 mix of topsoil and compost and you can plant right into the bed!
If you want to create a new no-dig vegetable garden, here are instructions.
Before You Begin
Choose the area that you want to use for your new garden bed. It can be an existing bed, open soil, or even a patch of lawn. You’ll need to avoid stepping in the soil, so design your bed(s) with plenty of walking and kneeling space for easy access to your crops. You can begin at any time, but it takes several months to a year for the new bed to be usable. The best time to start is in the fall so that the soil has an entire winter to prepare.
Tools and Supplies
Shovel
Wheelbarrow
Gloves
Kneeler
Cardboard boxes (regular flat brown boxes without a gloss or sheen, not corrugated or pizza boxes; no tape)
Compost (a mix of brown/green materials)
How to Create a No-Till Vegetable Garden
Creating a new no-till vegetable garden is simple:
- First, mark out you growing areas. Make beds no more than four feet wide to avoid the need to step on the growing areas. (This helps to minimize soil compaction, which makes tilling even less necessary.)
- Clear the soil surface of any debris and rocks.
- Mow grass short or cut weeds to the ground.
- Add a layer at least 4 inches thick of well-rotted organic matter such as compost, or manure from a trusted supplier who can guarantee no herbicides have been used.
- Flatten and lay out cardboard boxes over the entire planned (or existing) bed area. Lay down with generous overlaps as the base for paths. Cover with shredded bark or similar for a non-slip surface.
The cardboard will kill all grass and weeds underneath. Spread 1 to to 2-inch layers of compost material over the cardboard until the pile is about 8 to 10 inches high. Optionally, you can continue adding layers to a height of 2 to 3 feet as the pile will shrink over time due to the slowly composting organic material. Leave the new bed for several months to a year, or until bed has compacted and composted into dark, rich soil.
If the organic matter is still lumpy when it’s time to plant, start vegetable seedlings off in plug trays or pots to transplant when they’ve developed a sturdy root system.
An optional extra stage is to top the compost with wood chips (or other organic matter such as hay), as popularized by organic gardener Paul Gautschi in his ‘Back to Eden’ method. Add the wood chips about two inches deep, making sure not to mix it into the compost beneath. Then simply push aside the wood chips to plant directly into the compost. This top layer helps slow down evaporation and gradually feeds the soil below, reducing the need for additional fertilizers.
Future Labor
At the beginning of each growing season, spread a 1- to 2-inch layer of mulch or dead leaves over the top of the bed. The mulch helps to prevent any remaining weeds from growing and keeps the soil cool and moist. After the harvest in the fall, pull out all of the plants from the season and spread them over the soil. They will add to the existing nutrients and help the next year’s vegetables to grow.
Mulch to Build Soil
In no-till gardening, mulching replaces digging. The mulches protect the soil surface from erosion, help maintain soil moisture, smother weeds, add fertility and improve soil structure—all without the need to till!
It’s important to keep replacing mulch as it breaks down into the soil. Suitable mulches include compost, leaf mold, wood chips, hay, grass clippings, straw and sawdust. No-till beds can be free-standing or built with sides as raised beds to contain all that extra organic matter.
Regular mulching weakens weeds by smothering them and by never bringing weed seeds to the surface to germinate.
A Word on Composting
If you’re creating your own compost, remember to layer a mix of “green” and “brown” compost materials as you spread the material on the cardboard boxes. Examples are below.
“Green” Compost Materials
Grass clippings
Fresh manure
Coffee grounds
Plant trimmings
Vegetable excess
“Brown” Compost Materials
Black-and-white newspapers (color ink is toxic to plants)
Dead leaves
Straw
Woodstove ash
See more about the perfect compost recipe.
Ready to plan out your vegetable garden? Check out the free trial of the Almanac Garden Planner!
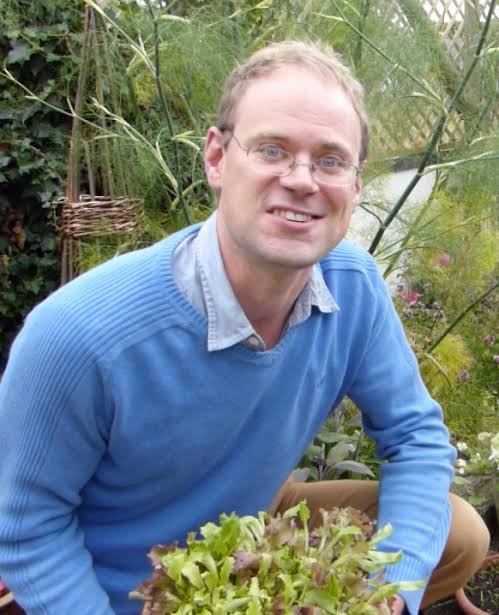
Benedict Vanheems


ADVERTISEMENT
Something you need to mention is that termites LOVE the cardboard. I tried something similar years ago because where I live the soil is rocky with little soil which is really clay. After the idea failing, I removed everything and found a horrible infestation of termites...unfortunately, very near my house.
You could have mentioned roof stout who over 50 years ago perfected your method or are you perfecting hers
We've invested in grow pots, similar to the green "tubs" in the background of the video. It saves on soil, no weeding, and really conserves on water.
Ever heard of Ruth Stout, “No Work Grdening”
fantastic advice! and easy to follow. I will definitely follow your advice. Thanks
I started 3 years ago with a keyhole garden, then read about the "Ruth Stout Method" which is basically a combination of No Dig/No Till and Back to Eden methods, using hay or straw as the mulching material. I disassembled my keyhole garden and used the composted material and soil in it as the basis for my new garden. I covered the entire garden area with corrugated cardboard and additional rotting hay while putting it to bed for the winter. Last spring, we started building the raised beds using 2x4 cedar decking on edge for 3'x8' beds and wire cattle panels for arches and trellises, then adding bags of soil mix to the raised beds and a little bit of Vegetable and Tomato Food and some Acidifier to the soil at the bases of the arches and trellises. Once I planted seeds and seedlings, I laid out soaker hoses and attached them to battery-operated timers for all the beds, then improvised hoops and covered everything with insect barrier netting to protect the plants from the evil grasshoppers. The garden this past summer performed wonderfully. All vine-growth plants were trained onto trellises, arches and fences, including melons and sweet potatoes, which kept them off the ground and out of the walkways. I was having trouble finding old hay for free last spring since the local ranchers were feeding everything they could find to the cattle at the end of last winter so I went ahead and bought a few bales of Bermuda hay at Tractor Supply. At $11 a bale, it is actually fairly economical since it goes a long way. I only used 2 bales and have 1 more that I have been using to mulch for this winter. This winter, I will add another layer of cedar 2x4s to increase the height of the raised beds by 3 1/2" and in the spring I will add my own compost and some more purchased soil mix. I am also planning to install a drip irrigation system since the PVC supply line for the hoses froze and cracked last fall. Besides, I have gotten 2 seasons out of most of the soaker hoses and they are starting to disintegrate from wear & tear, calcium build-up and UV exposure. Time to switch to a more robust, permanent system. Using the timers is a great labor saver, though. The plants get the water they need, whether I am in the garden or not. The garden is approximately 32' x 64'. Last week, we installed freeze-proof hydrants and buried "Pex" water lines for the gardens and the chicken/Guinea house. There is another garden nearby at 32' x32' but it needs some major work done to it before I can get anything to grow in it. Scraping off the scrub and mesquite trees brought lots of weed seeds to the surface, mostly of noxious weeds and Johnson grass. I am currently planning to build some elevated beds in it using 55 gal drums in wooden stands. It is sloped so needs a bunch of terra-forming done first and possibly a retaining wall. I am still waiting for the new tractor to come off the cargo ship from South Korea. Eventually, the plans call for building a greenhouse in the complex.
My overall impression is that covering the entire garden with hay for the winter makes it much easier and more pleasant to work in for the spring and summer. It keeps the ground from getting muddy and helps to keep the soil moist so the dust is kept to a minimum. One problem with covering cardboard with hay was the fact that footing became slippery and dangerous. Straw is almost impossible to find around here and the hay has a tendency to want to grow grass but as long as you pull it up as it sprouts, it isn't too bad.
Hay has seed ,straw does not, salt hay is even better.
I gave away my tiller years ago, and built raised beds for my vegetables. Each year I do dig in compost at the end of the growing season, but I will not just put the compost on top. I even use compost as a mulch. Any weeds are immediately pulled out when I see them. I have been gardening for almost 50 years.
For years I would turn over my raised beds every spring. I never looked forward to that task. A couple of years ago I was convinced by the gardeners that I follow on You Tube including Ben of GrowVeg to give no-till a shot. I have been won over! No-till saves me time, my back, and the healthy components of the soil that I used to damage by turning over my soil. My plan going forward is to add fresh compost as I put the beds to rest for the winter and again in the spring when I wake them up. I have always used mulch so I will continue that as well. Thanks again for sharing your gardening experience and wisdom.
Thanks for introducing me to Ben. I’ve been watching him all morning. I have learned so much and can’t wait to get into the garden this week. Thanks again for sharing.