
Toilet leaking water from base.
Replace The Wax Ring: Step-by-Step Photographs
What do you do if your toilet is leaking from the base? Toilet leaks indicate that you may need a new wax ring to seal the connection between the toilet and the drain pipe. It’s a concerning problem with a simple fix! Plus, this DIY home project only takes a couple hours. See our step-by-step guide to fixing a leaky toilet—complete with photographs.
Question: What does every home has at least one of, and as the years pass this item will need to be re-set or replaced?
Answer: A toilet.
Read Next
Whether correcting a leaking toilet flange on an existing toilet, or planning to install a new toilet, even a DIYer with a a few hand tools and a hour or two of time can install a new toilet flange seal.
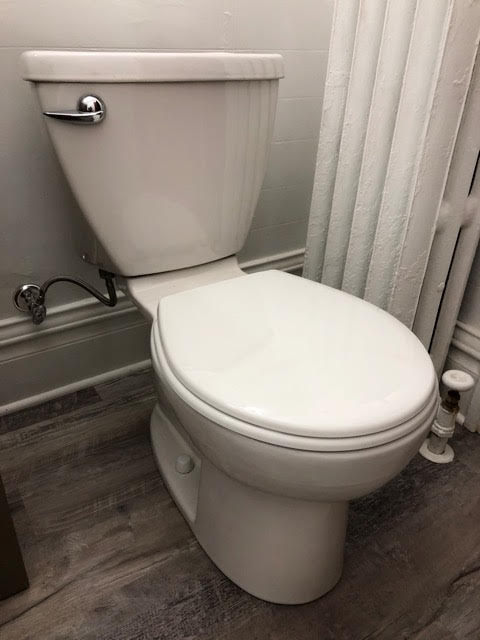
A typical, residential toilet
Signs of a Toilet Leaking
Do you see water on the floor around the base of the toilet? Have you spotted water stains on the ceiling in the room directly below the bathroom? Both are typical signs that the wax ring that seals the toilet to the drain may be old or worn out. This is a common problem when toilets have aged over years.
The first thing you do if your toilet is leaking at the base is stop using it. Water from a leaking seal will damage ceilings, structural members, and floor sheathing if left uncorrrected. This water intrusion can also introduce mold and mildew into the living space. Fortunately the fix is inexpensive, and requires a minimum of time.
Why Toilets Leak at the Base
Every floor mounted toilet sits on, and is bolted to, a PVC or cast iron floor flange. This flange is the entry into the drain-waster-vent (DWV) system of the home. The bottom of the ceramic toilet base seals to the floor flange with a flange seal. Traditionally, the seal was a ring of bees wax. Today, there are other synthetic and more reliable seals available at home centers.
Before replacing the seal, however, rule out loose bolts at the toilet’s base (under those plastic covers). Carefully tighten the bolts with a wrench which will tighten the toilet down against the floor. (Don’t overtighen.) Usually, if tank bolts are loose on a leaking toilet with a wax ring, even tightening them will not stop a leak. Once the wax shape is compromised, the seal is pretty much done and needs to be replaced. The Perfect Seal ring (see more below), on the other hand, DOES allow bolts to be tightened later and/or the toilet to be repositioned if needed.
If the toilet still leaks when being flushed, then you know it’s not a case of loose bolts.
Tools and Materials to Replace Wax Seal
You may already have some of these tools in a toolbox but we’ve included everything to ensure you’re ready to get started.
- Cresent wrench, 6” or smaller
- Channel lock pliers
- Utility knife
- Hacksaw
- Paint scraper
- Large sheet of cardboard
- Latex or other waterproof gloves
- New wax seal or Perfect Seal ring
- Rubber shims
- 1/4” or 5/16” toilet bolts
- Shop Vac or suction tool (turkey baster)
- Plastic tub to catch drips
- Bath caulk
10 Steps to Replace a Wax Ring
We’ve outlined 10 steps to replace the wax ring and included photographs to illustrate along the way.
Note: While replacing a seal is a manageable DIY job for any homeowner, the hard part is that you do need to move the toilet (and a standard toilet weighs 85 pounds) so you may need a helper to gently lift the toilet onto nearby cardboard.
Step 1: Shut Off Water Supply
The first step in replacing a seal is to turn off the water supply to the toilet tank. Most baths have a small supply shut off valve extending from the wall, just below the tank. A supply hose or tube connects the valve to the tank. If the shut off valve is newer, it can be operated by hand. Use pliers to gently turn it to the “off” position if it does not turn easily.
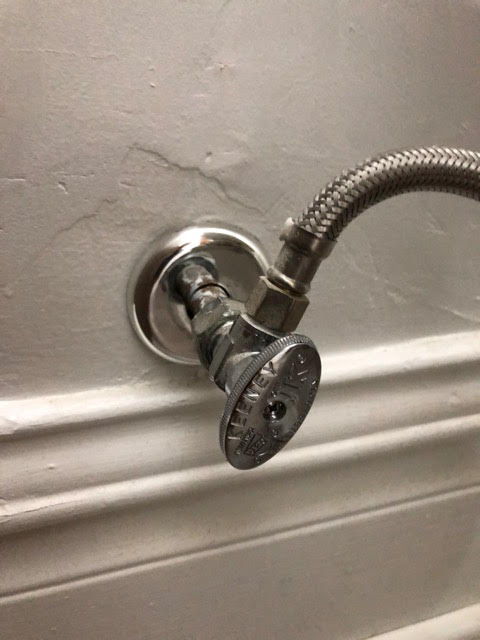
The supply valve directs water to the toilet tank.

This fitting is generally tightened by hand to the bottom of the tank, but it may take pliers to loosen it. Note the plastic tub to catch any water that drips when removing the supply line.
Step 2: Flush the Toilet Water Out
Remove the lid to the tank and place it in a safe location where it will not be dropped or damaged. With the supply valve in the off position, flush and hold the toilet tank lever down until as much water as possible empties out of the tank. Make sure that no new water enters through the fill valve in the corner of the tank.
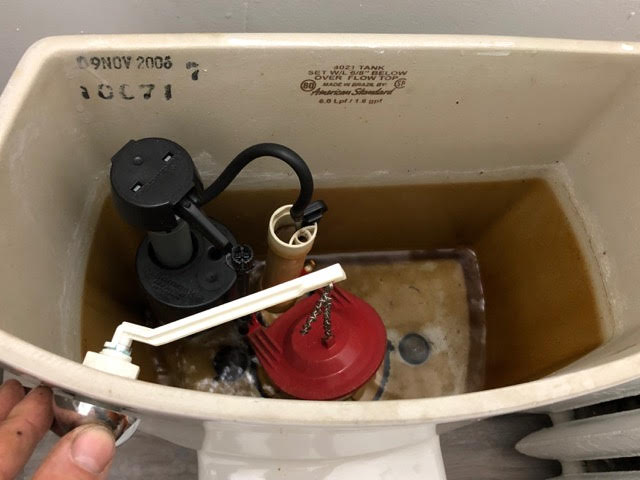
After the supply valve is turned off, hold the flush handle down to empty the tank as much as possible. Check to make sure that water does not continue to run into the tank from the fill valve.
If water continues to enter the tank though the fill valve, the supply valve to the tank is not providing a complete water stop. In this case, locate the main water meter in the home and valve off all water to the house. Then, disconnect the supply line from the bottom of the tank with a pair of slip joint or channel lock pliers. Twist the supply line nut counterclockwise to completely disconnect it from the tank.
Now is a great time to slip on a pair of protective latex gloves!
There will always be some residual water left in the tank and bowl. Use either a shop vac (with the filter removed), a suction tool (ie turkey baster), or a large sponge to drain all water from the tank and bowl.
Step 3: Unscrew T-Bolts
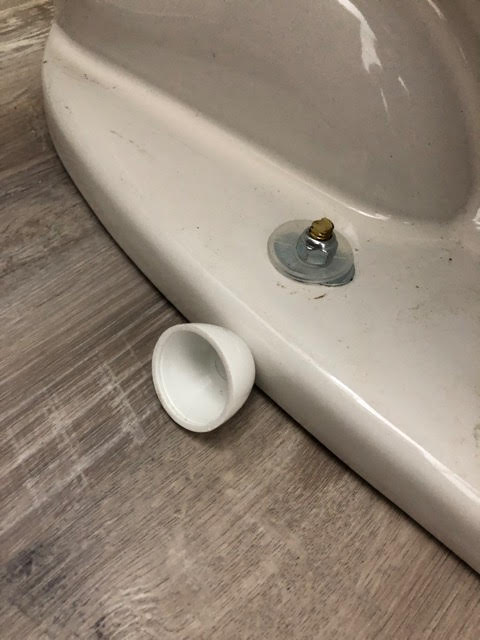
Now, remove the plastic bolt caps from the flange bolts, and use a 6” crescent wrench to remove the nuts from the bolts. There will be one bolt on either side of the toilet base.
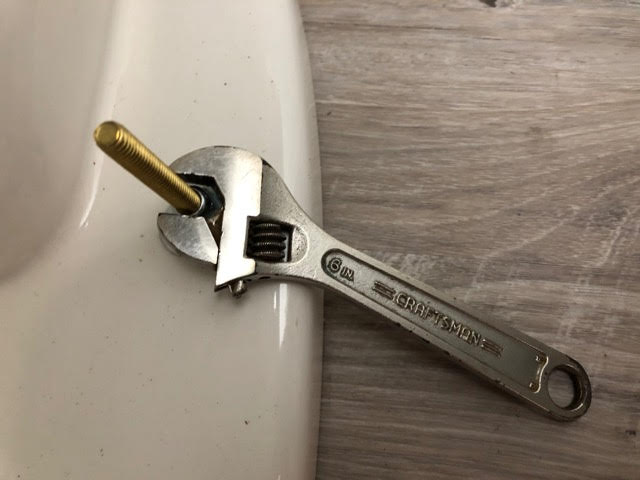
Use a crescent wrench that is no longer than 6” to loosen the bolts on either side of the base of the toilet.
Step 4: Remove the Toilet
At this point, I like to place a large sheet of cardboard on the floor in close proximity to the toilet to protect the flooring. Then, with a helper, grab the toilet bowl where it meets the tank, and lift straight upward over the bolts. Gently lay the toilet on its back or side on the sheet of cardboard. Have some rags handy to absorb any small water drips.
(To avoid injury doing it yourself, straddle the toilet, engage your core, crouch down, grab from under the bowl, and lift the unit straight up—using your leg muscles, not your back.)
Step 5: Scrape Off Previous Wax Ring
More than likely, the toilet had been mounted to the flange with a round wax seal. Use a paint scraper (or putty knife) to scrape off all wax from the flange, as well as any wax thay may remain on the bottom side of the toilet base. Although the photo of a new wax ring shows a nice, clean appearance, the old wax ring will likely be discolored and flattened. Get everything as clean as possible, and use a rag to wipe the underside of the toilet base and the floor flange.
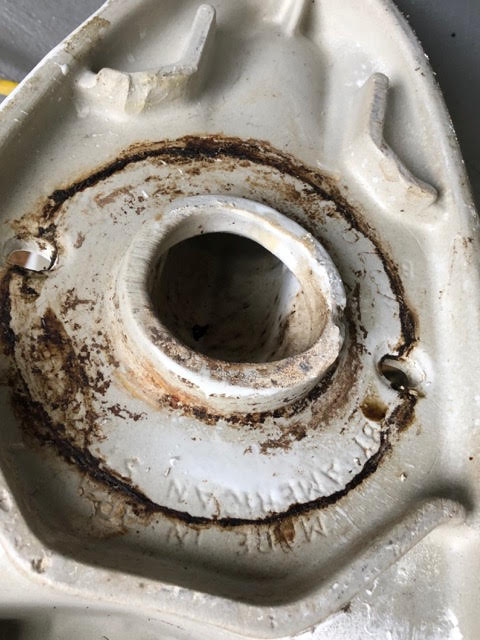
The waste opening on the underside of the toilet sits directly over the PVC or case iron floor flange.
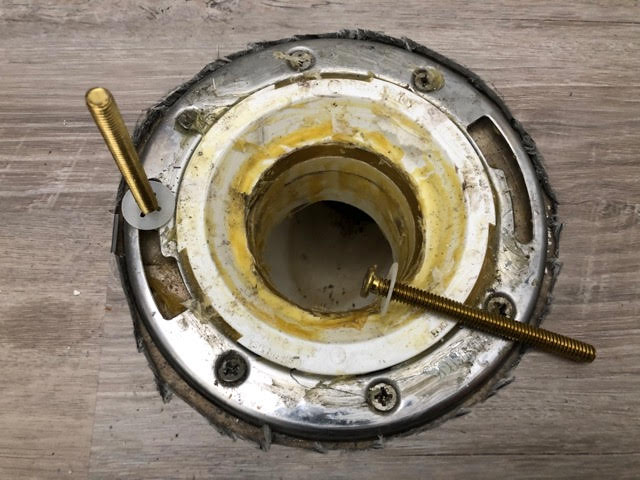
PVC floor flange with stainless steel ring. The wax residue is from the prior installation. These bolts are the new ones that will be used.
Step 6: Slide New Bolts Into Flange
I always replace toilet bolts when I reset a toilet, or install a new one. There are two sizes of bolts available: ¼” and 5/16” in diameter. I am partial to the latter because they hold more securely on older, worn floor flanges.
Make sure those slots for the tee bolts in the floor flange (with stainless steel ring) are cleaned out. Slide a bolt into the slot on each side of the floor flange, and slip the plastic washer over the bolts to compress them to the floor flange and hold them in a vertical position.
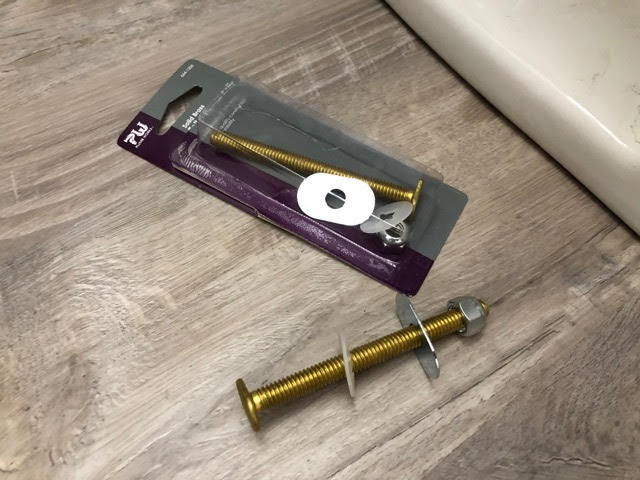
A5/16” x 3” long brass bolt kit.
Step 7: Place New Wax Ring On
Because wax seals tend to dry out and leak over time, I now use the synthetic Perfect Seal ring on all toilet installs and repairs. This rubber ring allows the toilet to be removed and repositioned if necessary, while a standard wax ring does not. If the flange is level with or slightly above the surface of the finished floor, I remove the blue rubber extension ring. If the flange sits below the surface of the floor, I leave the blue ring in place. Follow the instructions in the Perfect Seal box.
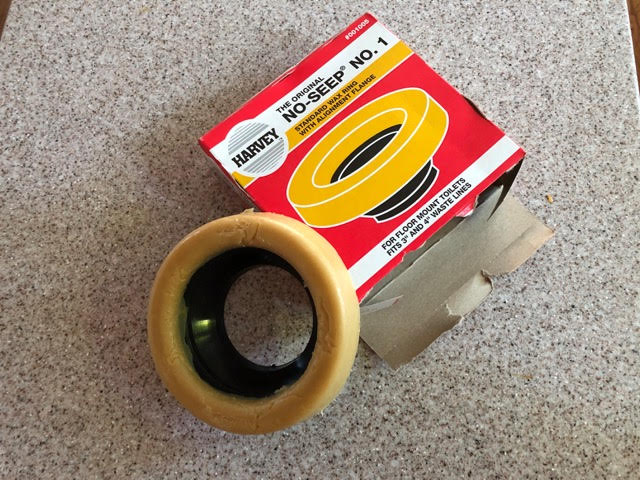
There are modern alternatives to the traditional wax ring. The Perfect Seal is one of them.
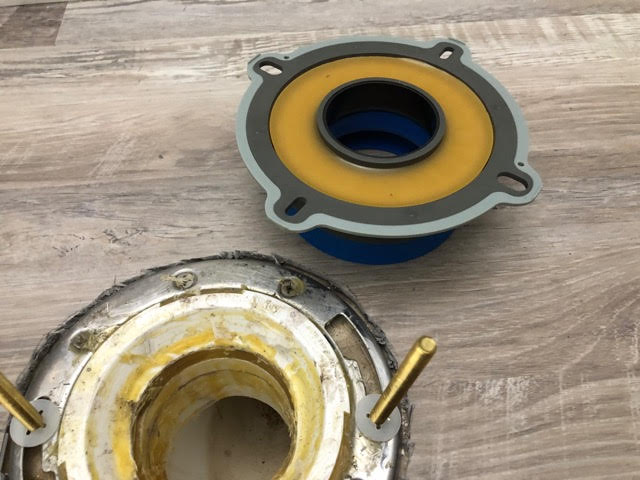
The bottom view of the Perfect Seal. The wax insert will seal against the floor flange.
Remove the wax paper from the wax surface on the bottom of the Perfect Seal, and set it over the two bolts. Press down gently to seal the wax to the flange. Note: Toilets are heavy! With a helper, tip the toilet back to an upright position on the cardboard sheet. Then, carefully lift the toilet above the flange, and set it straight down—slowly. Make sure that the toilet mounting bolts slide up thought the two slots in the cermaic base. At this point, drop a metal washer on each bolt, followed by the plastic washer for the decorative caps, and then the bolt nut. Hand tighten the nut down.
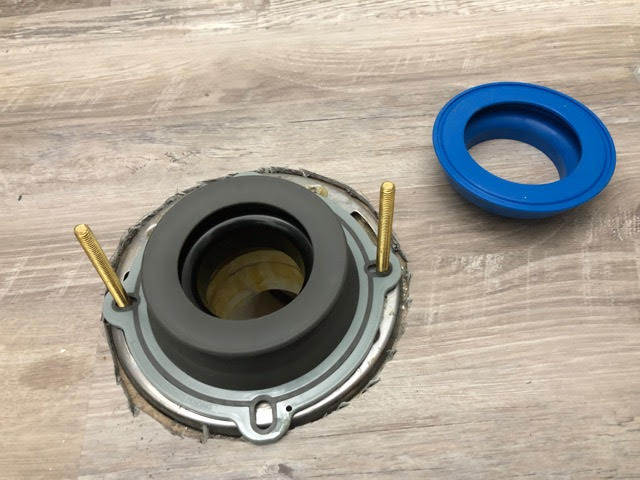
The Perfect Seal properly placed on the floor flange. The blue rubber collar is removed because the flange sits flush to the finished floor surface.
Step 8: Reset the Toilet
Either sit or kneel on the toilet bowl rim or seat lid. Applying your body weight gently compresses the new seal and drives the toilet base down so that it sits flush on the floor surface. Do NOT wiggle or rotate the toilet, just apply straight downward pressure.
Step 9: Tighten the Bolts
Tighten the flange bolts slowly and carefully, alternating back and forth between each until both are snug. Use a maximum of a 6” crescent wrench and do NOT overtighten. A nut that is tightened too much, even half a turn, will crack the ceramic base and send that toilet immediately off to the dumpster (and you back to the store to purchase a brand new toilet). Once the nuts are snug, tighten a quarter turn at a time and apply a slight twisting motion to the toilet base to make sure that it cannot slide or rotate.
Once the new flange bolts are cut, the decorative plastic cap seats over the bolt and snaps onto the plastic washer.
If the toilet rocks side to side or front to back, even slightly, loosen both nuts about two full turns and slip rubber shims between the toilet base and the floor to eliminate the wobble. Trim the shims with a razor blade or utility knife.

Rubber shims for plumbing use will take the wobble out when the toilet sits on an uneven floor. Trim any portion of the shim that protrudes out with a utility knife.
Step 10: Reconnect the Water Supply Line
Reconnect the supply line to the toilet tank. Most times this connection only needs to be hand tightened. But if you need to use pliers, use care as the plastic nut will crack easily if overtightened.
Return the supply valve to the on position, and allow the tank to fill until the tank fill valve shuts off. Flush and repeat this step four or five times to ascertain that the flange seal is watertight. Using a hacksaw, carefully cut the brass toilet bolts to a height about ½” above the tops of the nuts. Snap on the decorative plastic caps, and apply a bead of bath caulk around the toilet base and floor to provide for a sanitary seal.
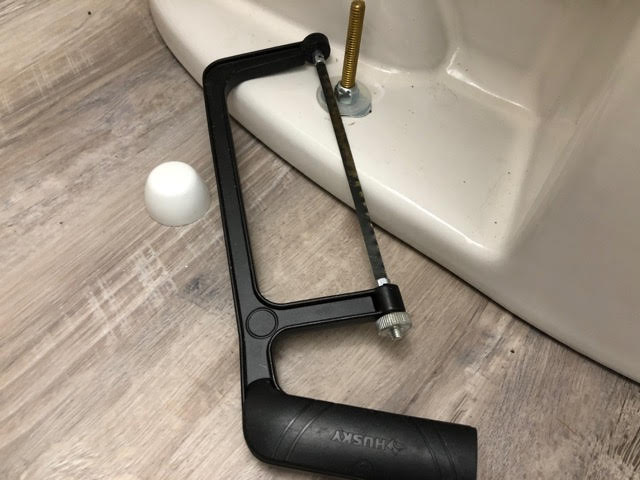
Use a hacksaw to cut the bolts about 1/2” above the nuts. Notice the length of the bolts. Always purchase longer bolts, they are easier to align when setting the toilet and can be trimmed down.
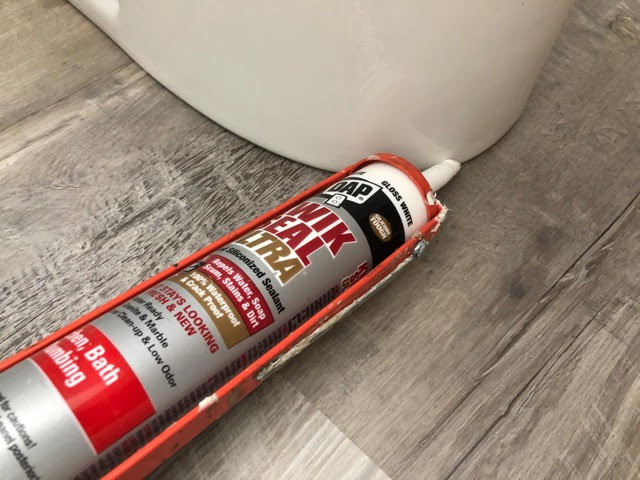
After flushing several times and checking for leaks, seal the bottom of the toilet base to the floor with bath caulk.
The entire process above is the same for installing a brand new toilet. Actually, one benefit is that the bowl can be installed first, and then the tank bolted to the bowl per the manufacturer’s instrictions.
Either way, with a few common hand tools and an hours time, any DIY can save themselves a couple of hundred dollars, and gain a little job satisfaction, as well!
Looking for more DIY home project? See how to repair a hole in your drywall.
Tom Dvorak


ADVERTISEMENT