
Winter is for dreaming! Plan your perfect garden.
Want to start a new vegetable garden in 2024? Or, perhaps you want a few tips on improving your layout. We will share our step-by-step process on how we plan our garden. Let’s start with some simple rules to follow when considering where everything should go.
Getting Started
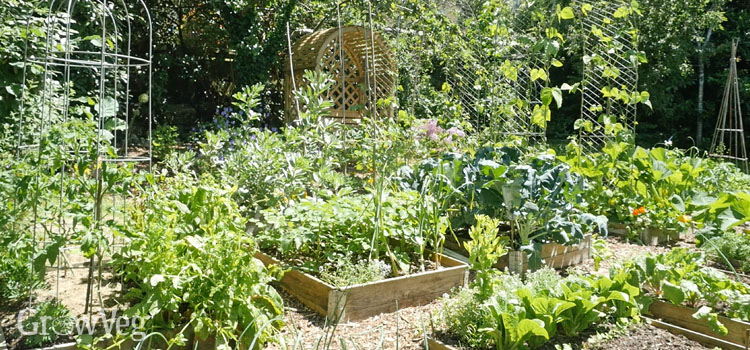
Planning a new vegetable garden is exciting stuff, but first, we need to lay the groundwork for the space we have to work with. It’s not just where the vegetable beds are that needs considering; the area around them is just as important.
The Right Location
Choosing the right location for your garden goes a long way to ensuring its success. You want somewhere that gets as much sunshine as possible—at least eight hours of direct sun a day is ideal, though if the only space you have gets less than this, don’t worry; there’s still plenty you can grow. If you have the time, it’s worth noting where the shadows fall on a sunny day and at different times of the year—including in summer when overhead trees will be in leaf—so you can accurately judge how sunny the area you have in mind will likely be.
Read Next
Soil conditions are just as important. You want somewhere that doesn’t get waterlogged in wet weather or over the winter, and this is where raised beds can prove handy because by raising the planting area above ground level, you’re naturally going to improve drainage within the bed. You also want to avoid frost pockets—so steer clear of lower areas where sinking cold air tends to collect.
Paths and Bed Size
As your garden expands, so too does the importance of moving about it easily. Good, clear paths wide enough to comfortably get a wheelbarrow down will make life so much easier when watering, weeding, or harvesting your crops.
Closely tied to path width is bed width. If you can, keep the beds or growing areas between your paths to a maximum width of 4ft or 1.2m. This means you can reach the middle of the bed from the paths without having to step on growing areas because treading on soil can compact it, which is worse for your plants.
Paths can be just bare, laid to grass, or even paved. We love woodchip on top of an initial layer of cardboard for surfacing paths to keep things from getting muddy, and as it’s a natural material, it will feed the soil and by extension, the surrounding crops as it rots down. Woodchips don’t need mowing, of course, but the flip side is they will need topping up occasionally as they decompose.
Drawing up Your Plan
There are three ways to create a garden plan.
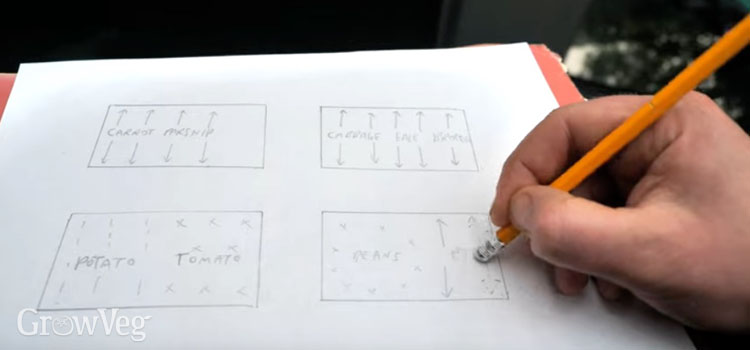
- Level one is to sketch out your growing area using old-fashioned paper and pencil. Using a pencil rather than a pen is important because you’ll need to erase and redraw things as the plan evolves. It’s a very tactile process and one that people with an artistic streak love.
- Level two is where you create a spreadsheet to keep track of everything, with separate rows for each crop. It’s easy to create multiple versions of your plan that take you through the seasons or even month by month, but it’s much harder to map out the overall layout. Spreadsheets are still a bit clunky, though.
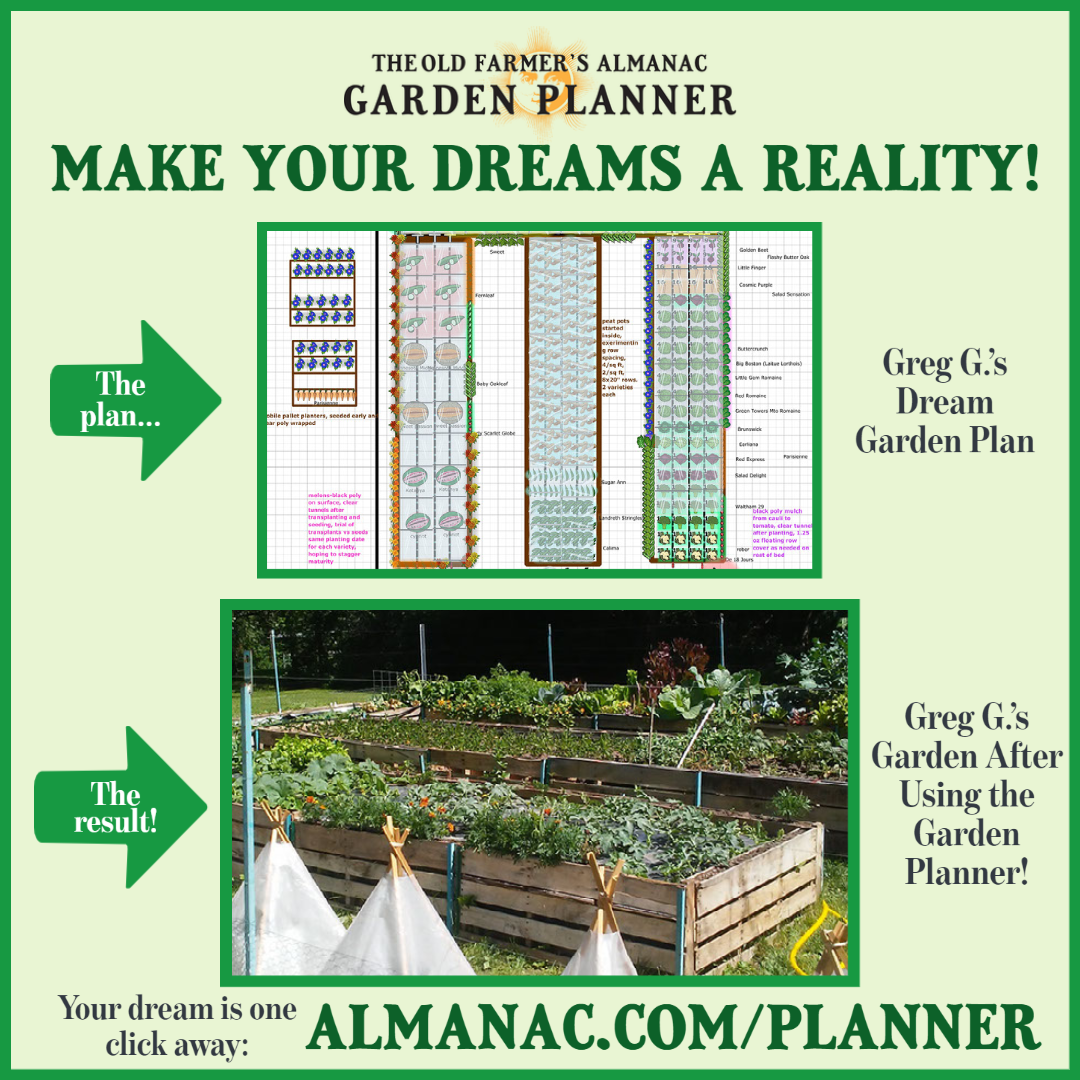
- Level three is using something like our online Garden Planner. Even if this is something new to you, try it! With this method, making changes is a breeze. You can quickly draw out a growing area as well as add plants to the plan, and it’s got handy built-in tools like crop rotation and companion planting features. As you add plants, it automatically updates the accompanying plant list, which clearly shows how many fit, what you’ll be growing, and when.
The online Garden Planner is your shortcut to becoming the best gardener you can be — with the world’s smartest and most popular Garden Planner tool.
However, any of these methods will work with the garden planning rules. Note: It helps to watch the video below. Ben illustrates how he laid out last year’s crops (using the garden planner), and as you move through planning a garden, you’ll see the corresponding sections of his garden plan as well as photos of how it all turned out last summer.
10 Steps to Laying Out the Plan
Now for the part we all look forward to: laying out the plants and plan!
1. Fussy Crops
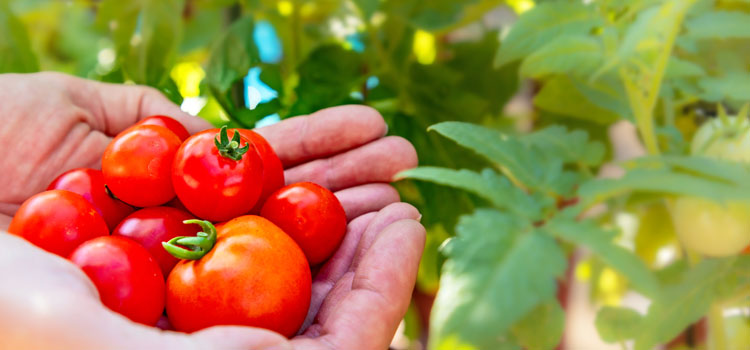
When working up a garden plan, the first plants to place are the fussiest ones—the frost-sensitive, warm-season crops. Examples are tomatoes and peppers. These need the sunniest spot you can find, ideally sheltered from chilly winds. We’re talking about prime real estate! If you don’t have all-day sun, look for a spot with afternoon sun so there is less chance of the tomatoes shading out lower-growing crops.
Corn also goes towards the back of a garden so it doesn’t shade other plants; set out corn in a block formation—filling an entire bed (or raised bed if you’re using them)—to encourage better pollination and fuller cobs.
2. Vertical Crops
Next, we place climbing or vertically-trained crops because they will also cast shade. We need to be mindful of shade because plants that are behind them will receive less sunlight once they reach full height. One great for a garden is to have arches run through the middle, creating more vertical space and making an eye-catching centerpiece perfect for climbing beans. Once they’ve grown up and leafed out, the area behind them gets somewhat shaded from the midday sun, so consider this for …
3. Shade-Loving Crops
In a shadier bed, place cool-weather crops such as broccoli. If you’re in a hot climate, then shadier areas are very much your friend and could prove invaluable for growing cool-season favorites like leafy salads and spinach.
A bed that is shaded for much of the day but still manages a couple of hours of direct sunshine (to help things along) is the perfect spot for salads, and as well as luscious leaves; add rows of salad onions, radishes, and beets or beetroot.
4. Sprawling Plants
Next up are the sprawling plants—typically also tender crops, such as squash, zucchini or courgettes, melons, and sweet potato. It makes sense to set these sprawlers towards the edge of the garden, sunshine allowing because here they can spread out across paths or onto surrounding paving or lawn without fear of them smothering less rambunctious plants.
5. Staple Crops
With the prime spots taken, it’s time to position what’s left. Other vegetables like potatoes, onions, and most root crops will appreciate at least five hours of direct sunshine but will still grow okay (just a bit slower) if they get a little less than this. But if your garden is more shaded than sunny, there are other options, too. See our article on shade-tolerant vegetables and fruit.
Incidentally, the Garden Planner has a filter option for shade-tolerant plants – how cool is that!
6. Thirsty Crops
Last summer was hot, which made watering a big job! You can take the strain off watering by growing thirsty crops like celery in an area of the garden that holds soil moisture for longer or try grouping water-intensive crops together so it’s easier to water them in one go.
With the outline of the plan in place, we can now start moving crops around to get the perfect plan.
7. Convenience Crops
Convenience is always worth considering for things like watering and, of course, harvesting. Position crops that’ll be picked more often closer to the house. For example, make your herb bed the closest bed to the back door in order to go out and nab a fresh sprig of aromatic goodness whenever a recipe demands it. Other crops you might want nearby for regular picking might include tomatoes, salads, and chard.
8. Flowers for Pest-Defense
Don’t forget to include plenty of nectar-rich flowers in your vegetable garden. These will attract both pollinators and pest predators like hoverflies. Poached egg plants, calendula, and nasturtium are great choices along the main path, and made an effort to tuck in a few flowers within the beds themselves. They add a stunning splash of color while attracting the sorts of beneficial bugs any gardener would be thrilled to see. If you’re seeking inspiration, the Garden Planner has all sorts of companion planting ideas, including plenty of companion flowers that’ll make your garden sing!
9. Compost and Water
As well as your paths and growing areas, you’ll want to make space for some sort of compost heap or bin— either within the vegetable garden itself or at least close by. Your garden will generate a lot of compostable material—and all of it can be turned into nutrient-rich compost to return to your soil next season.
You’ll also want to be close to a water source or somewhere you can install barrels to collect the rainwater for irrigation.
10. Seedling Protection
An optional extra is to include somewhere sheltered for starting off your seedlings and helping along more tender crops. A simple cold frame would be good or, if space and budget allow, perhaps a small greenhouse. You needn’t spend big bucks on this; there are some fantastic homemade cold frames and anything that keeps the chill off will really help tender seedlings make the transition from indoors to out during those bright spring days when night-time temperatures can still be a little fresh. See how to build a cold frame.
A Final Word on Garden Planning
With an online Garden Planner, you can tweak your plan along the way to reflect what actually got planned and then keep your “final plan,” which will be useful next year in terms of crop rotation. Having an at-a-glance, easy-to-tweak way of making a plan has honestly transformed the way you garden, and you’ll ultimately get more from the space you have.
If you’re interested in trying the Garden Planner, there’s a free, seven-day trial. Don’t worry; you won’t need to put in any payment details, and there’s certainly no obligation to continue once the trial’s finished.
We hope that the steps above make your garden the most productive ever! What are you planning this year? Have you ever used our colorful garden planner? Have any good tips that we missed? We welcome your comments below!
Benedict Vanheems


ADVERTISEMENT
We have been using 4x4 plastic garden boxes the last couple of years. What are your thoughts on using them? It does limit the size of our garden but also cuts down on some of the work.
Overall, we’re a fan of raised beds and a 4x4 shape is the minimum we’d go to get bang for the space. Depending on how your boxes are made, you may want to add a good weed barrier.