
A Simple, Quick, Foolproof Recipe for First-Time Sourdough Bakers
Sourdough has an irresistible flavor and tantalizing aroma. Here’s our excellent Beginner’s Guide to Making a Sourdough Starter. Here’s a beginner’s guide to making a sourdough starter. We say it’s for beginners because it’s a straightforward, quick, and foolproof recipe for sourdough newbies.
Of course, sourdough is about more than flavor. Additional rewards include the comforting rhythm of creating something inexpensive, useful, and healthy. Making the starter is an activity that requires time, patience, and mindfulness. But once you have an active, bubbly starter in your kitchen, a little planning and a few tricks make it easy to adapt sourdough care and baking to your schedule and lifestyle.
What is a Sourdough Starter?
A sourdough starter is a leavening agent that helps dough rise, but it also uses the natural yeasts and bacteria in the air. Yes, wild yeast is literally in the air around us!
Read Next
As flour and water are left to ferment, the medium captures wild yeast and good bacteria from our environment. A small portion of this live fermented culture makes bread and other baked goods rise, including pancakes, biscuits, pizza dough, coffee cake, and more.
Sourdough: A Pastime With a Past
Sourdough is rooted in American history. In the days before packaged yeast was sold in grocery stores, cooks who wanted yeast-leavened baked goods were forced to rely on various techniques to collect wild yeast from the air.
The early pioneers created concoctions of potato, water, and flour and left them at room temperature, covered with a porous cloth, for as long as necessary to attract local yeast. After some time, bubbles appeared, indicating that wild yeast and beneficial bacteria were feeding on the flour and converting natural sugar to alcohol and carbon dioxide—fermentation.
It was hard to develop a good batter from wild yeast. Weak yeast strains could lead to unreliable baking results. Mold and unwanted bacteria could contaminate a yeast batter. A good batter was, therefore, highly valued. Cooks guarded their containers of yeast, carefully nurturing the contents. If a loss did occur, the custom was to borrow a portion of yeast batter from a neighbor rather than start over.
As was the practice, a yeast batter kept at cool room temperatures developed a distinctive sour tang from the fermentation process, so the mixture became known as “sourdough.” Early settlers—and especially prospectors in the American and Canadian West—often were called “sourdoughs” because they relied on their precious canisters of yeast batter. They dipped daily into the batter, or starter, to make pancakes, biscuits, and bread and replenished it after each use, making refrigeration unnecessary.
The San Francisco area, in particular, became known for its sourdough. Microbes unique to the landscape live and ferment the flour and water, giving bread from this area its sour and chewy traits. These microbes have since been identified: The yeast is Candida milleri, and the bacterium is Lactobacillus sanfranciscenis. Their presence reveals how a sourdough starter reflects the water and flour fed and the environment in which it is maintained and used.
Sourdough Starter 101
It’s helpful to think of sourdough as having three key stages:
- Making a starter. Baking with sourdough requires what we call a starter, so this guide gives an effective method for making one from scratch. The process can take up to a week, after which you’ll have a living starter culture that needs to be cared for and used.
- Caring for a starter. To keep your sourdough starter active and effective, remove some starter from its container and then replenish, or “feed,” the rest with flour and unchlorinated water. Storing the starter in the fridge slows fermentation, letting you bake just once a week or ess frequently.
- Using a starter. Feeding your sourdough starter every time you use it in a recipe develops a baking routine that minimizes hands-on time and can free you from discarding the starter.
There are numerous ways to make, care for, and use sourdough starters. Regardless of your approach, keep in mind these points:
- Making and caring for a sourdough starter are separate processes. When you make a starter, you need to remove, or “discard,” some starter each time you add flour and water until the natural yeast and good bacteria become established. Once you have an active starter, simply bake with it and feed it what remains to maintain your supply.
- Sourdough starter can be fed in many ways, including equal weights of flour and water and a range of flour types. In this guide, the starter is fed equal volumes of all-purpose flour and unchlorinated water—for example, 1 cup of flour and 1 cup of water. The recipes given here match this feeding ratio and flour type. You may have different results if you use a different starter in these recipes.
- That said, every sourdough starter is unique. The type and even brand of flour affect how it absorbs water. Humidity and temperature affect how quickly dough ferments and rises. Keep baking, adjusting (and making notes) until you find what works for you and your starter.
A Simpler Sourdough Starter for Beginners
Starters can simply begin with flour and liquid, but including both traditional and modern ingredients kick-starts the process.
The sourdough starter recipes in The Old Farmer’s Almanac archives mainly use another leavening agent alongside the sourdough starter. It’s not the pure wild yeast method used by pioneers, but it has advantages.
- A little dry yeast ensures bread dough rises, even if the sourdough starter responds slowly.
- The dough also rises faster, one reason many professionals bake such hybrid breads: They’re on a schedule. If pioneers could have picked up affordable little packets of dry yeast from any grocers, they may have mixed some in, too.
- Short rise times have downsides. You lose the long fermentation that makes sourdough taste so, well, sour. Slow fermentation also lets the good bacteria (lactobacilli) in the sourdough starter work on the flour, reducing the phytates that make wheat hard for some people to digest. Speeding up the process reduces that benefit. The hybrid method can affect texture, too.
If you’re new to sourdough baking, you need to fit baking into a busy schedule, or if your past attempts with sourdough starter produced bricks rather than bread, the techniques here may be just what you need to build up some baking confidence. Once your starter is happily bubbling away and you’ve become comfortable using it, consider moving on to wild yeast loaves.
Our Beginner Sourdough Starter
This starter mimics the old-time sourdoughs made famous during the Gold Rush. It is based on unchlorinated water enriched with potatoes, a particularly hospitable medium for wild yeast. This recipe, from the Almanac archives, adds dry commercial yeast; it’s not traditional, but it produces reliable results. You only need the potatoes and one package of dry yeast to begin the process. Once your starter is established, feed it with flour and unchlorinated water. No more potato or dry yeast is needed.
Ingredients:
- 2 large mealy potatoes, peeled and cut in half
- 2 tablespoons sugar
- 1 package dry yeast, dissolved in 1/4 cup warm water
- 3 cups all-purpose flour, scoop measured
- 1 cup warm water
Kitchen Tools:
Beyond some everyday cooking tools (saucepan, bowl, spoon, etc), you’ll need a glass or plastic container covered with a breathable lid. Sourdough starter is a living culture that needs to breathe while fed and stored. The mouth of a glass canning jar can be covered with a paper towel or coffee filter that’s held in place with a canning ring.
Another type of glass or plastic container covered with breathable material and secured with a rubber band or twine can work, too. Just ensure the container is large enough that the starter can expand to about double after it’s fed.
Directions:
- Place potatoes in a large saucepan with enough water to cover. Boil gently until the potatoes fall apart.
- Do not drain potatoes. Force through a sieve, liquid and all, and allow to cool to room temperature. Add water to the potatoes if necessary to make 3 cups.
- Pour the mixture into a large glass or ceramic bowl. Using a nonmetal spoon, stir in the sugar, dissolved yeast, and 2 cups flour. Beat until smooth and creamy.
- Cover with a clean kitchen towel and set in a moderately warm spot (about 70ºF). Allow it to stand for 24 hours, and the batter should smell pleasantly sour.
- Stir in the remaining cup of flour and 1 cup warm water. Cover with a towel and allow to stand at room temperature for 2 to 3 days. The longer it stands, the more assertive the flavor.
- Transfer the starter to a glass or plastic container covered with a breathable lid and store it in the refrigerator.
- Before using the starter, stir in any liquid on the surface and allow it to come to room temperature.
How to Care for Your Sourdough Starter
With a few days of feeding your flour-and-water slurry, the wild yeast and good bacteria in the flour and the air become active and multiply. The slurry gradually turns into a bubbling starter that you can use repeatedly for years.
Caring for your starter is as simple as using some of it in a recipe and feeding what remains. If you followed the Sourdough Starter With Potato and Packaged Yeast recipe above, you should feed your starter by stirring in equal parts of flour and water by volume—no need for a kitchen scale.
- Let the starter come to room temperature.
- Remove the portion you need for your recipe, leaving some in the container.
- In a medium measuring cup, combine equal volumes of flour and water that, when stirred together, match the volume of the starter you removed. For example, if you removed 1 cup of sourdough starter, you’ll likely need to stir together 3/4 cup of flour and 3/4 cup of water.
- Replenish, or “feed,” what remains in your starter container by stirring in the contents of the measuring cup.
- Top the container with a breathable covering, like a paper towel secured by a rubber band. Let it sit on the counter for an hour or so, and then return it to the refrigerator until you want to bake again.
Many pioneers used their starters daily, but you probably won’t be that devoted to yours. Using and feeding your starter at least once a week and refrigerating it between baking days keeps it healthy. You can bake less frequently, but the starter won’t be as effective. If you haven’t used your starter for a while, bring it to room temperature, remove some starter, and then feed what remains once or twice so that it revives and becomes strong enough for bread.
Some people discard the weaker starter they remove, adding it to their compost. Others feed it and give it to a friend. You can also bake with it: use the pancake or coffee cake recipe before attempting Crusty White Bread.
Starters can last for years if fed regularly and refrigerated between baking days. But unfed starters sometimes develop problems. Starters that have been dormant for weeks may develop a dark, protective surface liquid known as “hooch” because it has a slight alcoholic smell, or they may dry out. Such dormant starters can likely be revived. However, spots of pink or orange mean unwanted molds have taken up residence. You’ll have to discard the starter and begin again.
How to Use Your Sourdough Starter
These sourdough recipes from the Almanac archive all use a starter fed with equal volumes of flour and water, called a 200% hydration starter. (This means you provide the starter with equal parts water and flour by volume, measuring in cups instead of weighing out ounces or grams. This creates a fairly thin starter that is easy to stir and pour into a measuring cup. It’s an excellent foundation for pancakes, sweet breads, and crusty bread; you can use it for all of the recipes in this guide.)
The recipes also add leavening agents, like baking powder, baking soda, or dry yeast, to capture the sourdough flavor while ensuring the dough always rises.
Sourdough Pancake Recipe
The recipe can be made with an active, bubbly sourdough starter, but you can also use an unfed or weak sourdough starter. Serve with plenty of warmed maple syrup. Makes 12 large pancakes.
Ingredients:
- 1 1/2 cups all-purpose flour, scoop measured
- 1 tablespoon sugar
- 2 teaspoons baking powder
- 1/2 teaspoon baking soda
- 3/4 teaspoon salt
- 1 1/2 cups milk
- 2 large eggs
- 3 tablespoons butter, melted
- 1 cup sourdough starter, at room temperature (200% hydration)
Directions:
- Combine flour, sugar, baking powder, soda, and salt in a large mixing bowl. Whisk to blend.
- In a separate bowl, whisk together the milk, eggs, and butter.
- Make a well in the dry ingredients and pour in the sourdough. Then add the egg mixture and stir with a wooden spoon until well moistened. The batter will contain some lumps.
- Place a griddle over medium-high heat. Brush the surface with vegetable oil or rub with a strip of uncooked bacon as the griddle warms.
- When the griddle is hot, stir the batter and add more milk if necessary to create a consistency like heavy cream.
- Ladle scant 1/4 cupfuls onto the hot griddle. Cook until the bubbles around the outside edge are broken.
- Turn the pancakes and cook the other side.
- Repeat with the remaining batter, adding additional milk if needed to maintain proper consistency.
Keep cooked pancakes warm until all are ready.! 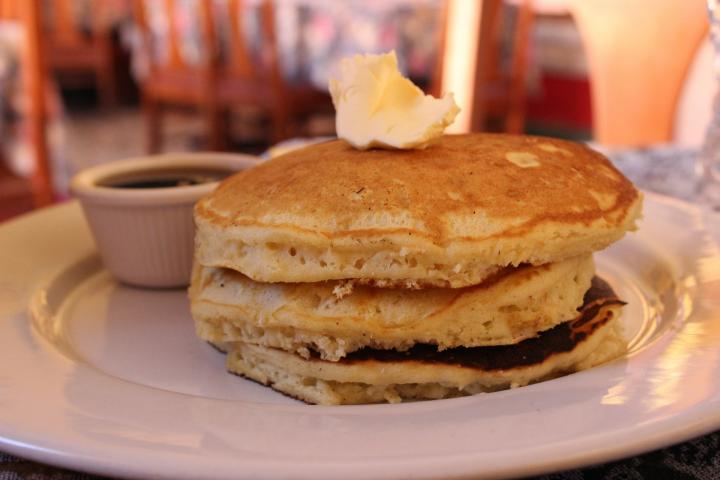
Streusel Coffee Cake Recipe
A cinnamon-flavored crumb topping complements this sourdough cake. Fold in a cup of fresh blueberries or chopped fresh apple if you like. Makes a 9” x 13” cake.
Ingredients:
- 2 1/4 cups all-purpose flour, scoop measured
- 1/2 cup light brown sugar
- 2 tablespoons butter
- 2 1/2 teaspoons cinnamon
- 2 cups sourdough starter, at room temperature (200% hydration)
- 3/4 cup milk
- 1 cup granulated sugar
- 2 large eggs
- 2/3 cup vegetable oil
- 2 teaspoons baking powder
- 1/2 teaspoon baking soda
- 1/2 teaspoon salt
Directions:
- Preheat oven to 350ºF. Generously grease a 9” x 13” baking pan.
- In a small bowl, combine 1/4 cup of the flour, the brown sugar, butter, and 1 teaspoon of the cinnamon. Cut in with a knife until crumbly, and set aside.
- In the bowl of an electric mixer, combine the sourdough, milk, and granulated sugar, and blend well.
- Beat in the eggs and vegetable oil.
- In a separate bowl, combine the remaining 2 cups of flour, baking powder, soda, salt, and remaining 1 1/2 teaspoons of cinnamon.
- Whisk to blend thoroughly. With the mixer set at low speed, gradually mix in the dry ingredients. Pour into the prepared pan.
- Sprinkle with the crumb mixture and bake for 30 to 40 minutes, until a wooden pick inserted into the center comes out clean. Place pan on a rack to cool.

Applesauce Walnut Bread Recipe
Studded with walnuts, this spicy sourdough bread makes a wonderful after-school snack. Makes 1 loaf.
Ingredients:
- 1 3/4 cups all-purpose flour, scoop measured
- 1/2 cup light brown sugar
- 2 teaspoons baking powder
- 1/2 teaspoon baking soda
- 3/4 teaspoon salt
- 1/2 teaspoon cinnamon
- 1/4 teaspoon allspice
- 1 large egg
- 1/4 cup vegetable oil
- 1 cup applesauce
- 1 cup sourdough starter, at room temperature (200% hydration)
- 1/2 cup coarsely chopped walnuts
Directions:
- Preheat the oven to 350ºF. Generously grease a 9”x5” loaf pan.
- Sift the flour, sugar, baking powder, soda, and salt into the bowl of an electric mixer.
- Add the cinnamon and allspice, and run the mixer briefly on low speed to blend the dry ingredients.
- In a separate bowl, whisk together the egg and vegetable oil, then stir in the applesauce.
- With the mixture set at low speed, gradually pour the egg mixture into the dry ingredients.
- Add the sourdough and beat until thoroughly moistened. Stir in the walnuts.
- Pour into the prepared pan and bake for 50 to 60 minutes, covering the loaf with foil during the last 10 minutes if necessary to prevent over-browning.
- The loaf is done when a wooden pick inserted into the center comes out clean. Place pan on cooling rack; after 10 minutes, turn out loaf and cool completely on a rack before slicing.
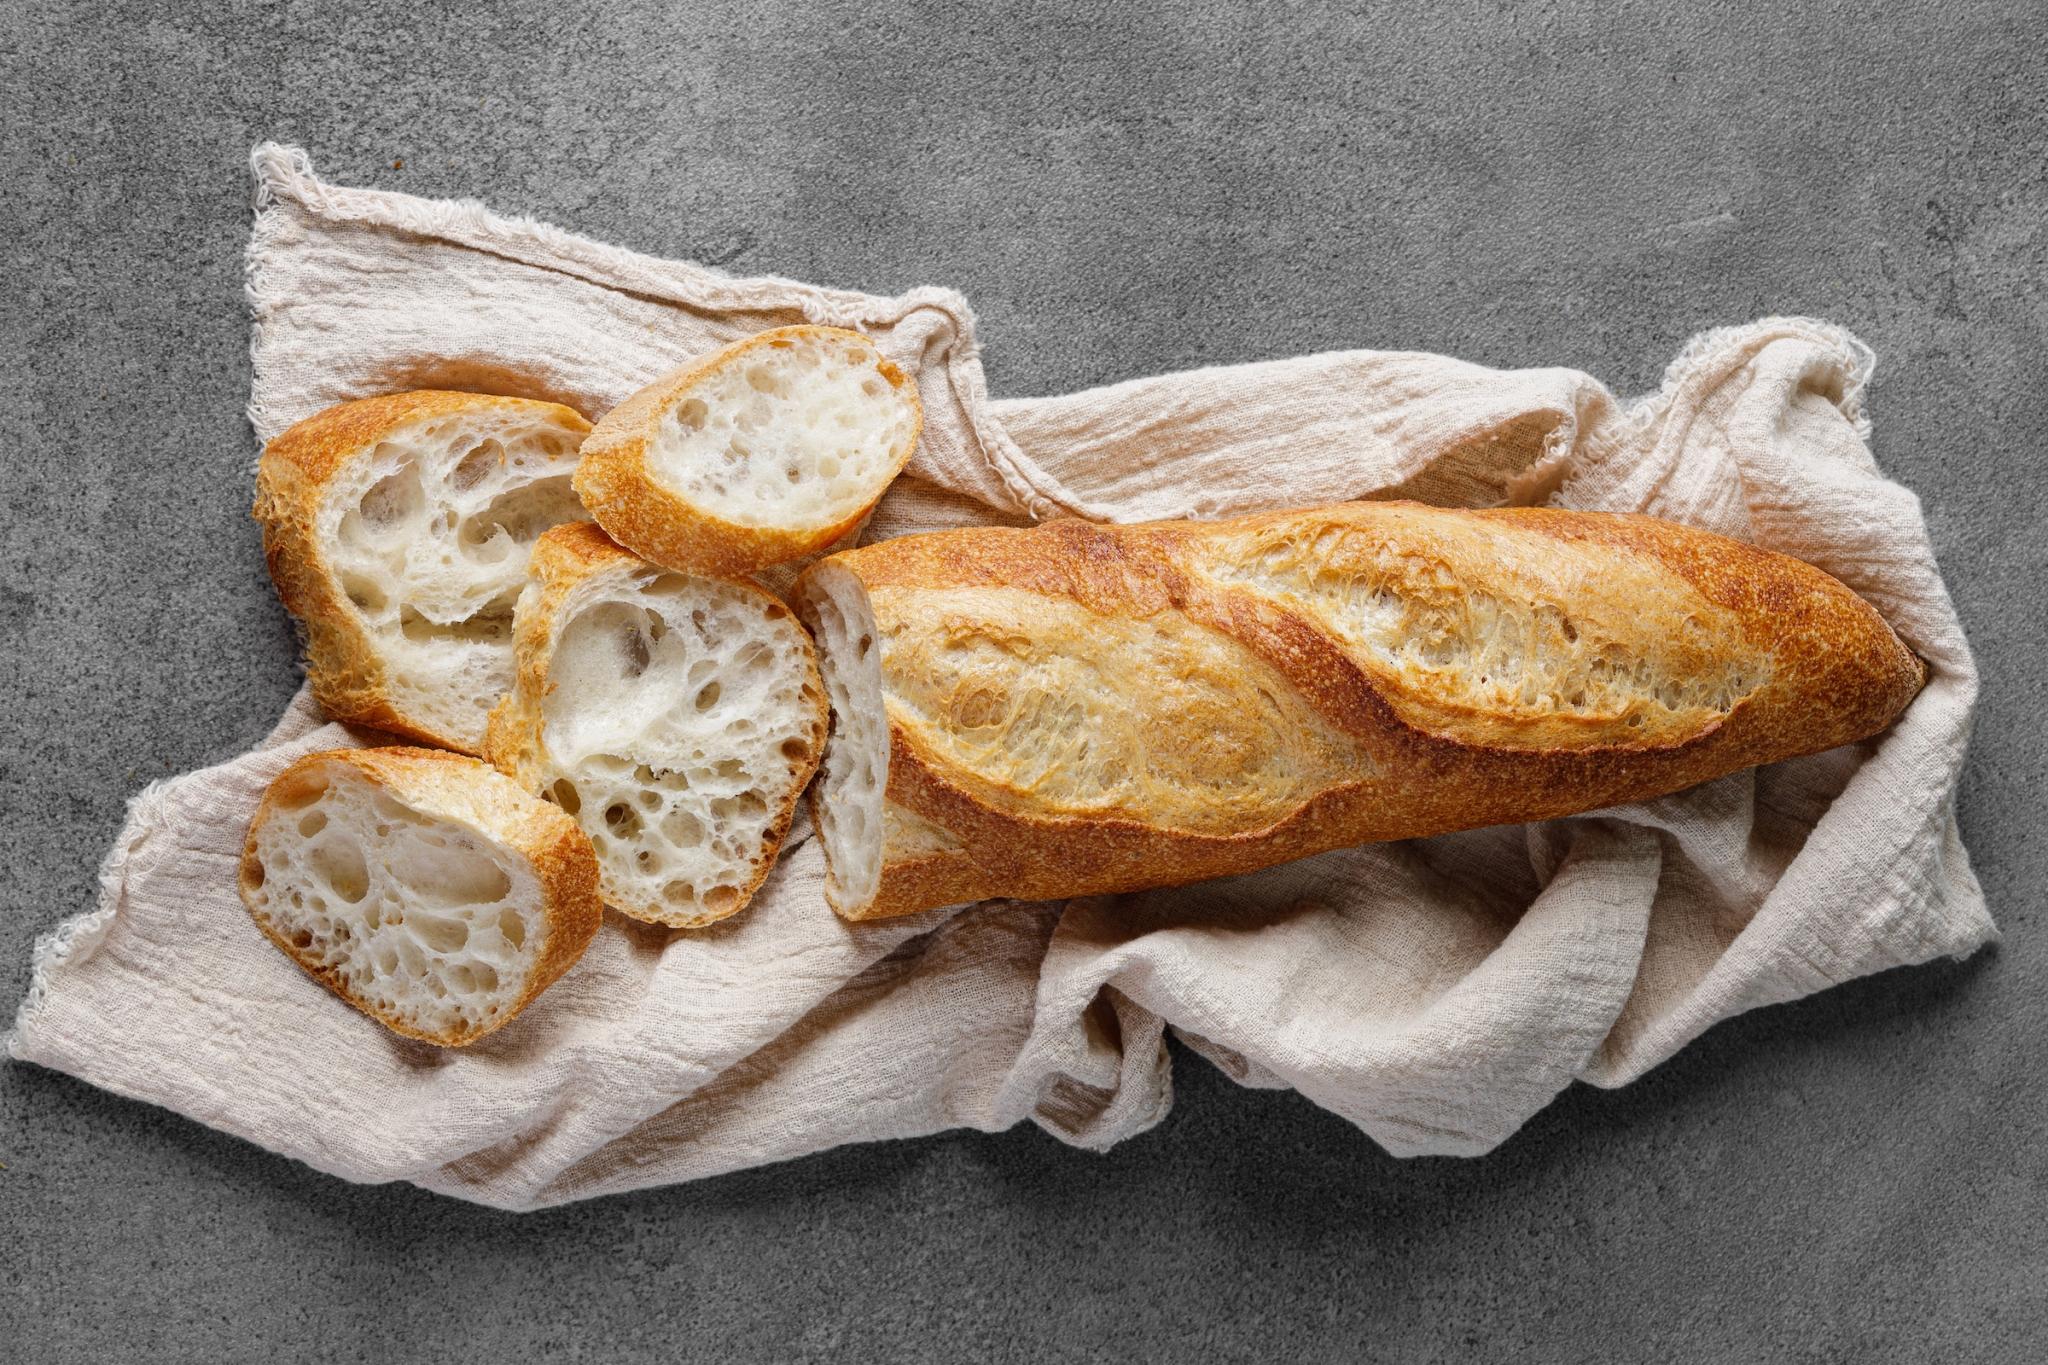
Crusty Sourdough Baguette Recipe
This recipe creates crusty loaves with a soft, flavorful center. If you don’t have loaf pans, grease a baking sheet and shape the dough into two long freeform loaves. Makes two 15” or three to four smaller ones.
Ingredients:
- 1 cup warm water
- 1 tablespoon sugar
- 1 package dry yeast
- 2 cups water-based sourdough starter, at room temperature (200% hydration)
- 1 teaspoon salt
- 4 to 5 cups bread flour, scoop measured
Directions:
- In a large mixing bowl, combine the water, sugar, and yeast. Stir to dissolve the yeast.
- Add the sourdough, salt, and 2 cups of the flour.
- Beat vigorously until the dough pulls away from the sides of the bowl in ropy strands, adding up to 1 cup of additional flour as needed for the strands to form.
- Measure out 1 cup of the flour, scatter some over a work surface, and turn out the dough. Knead the dough, sprinkling on flour until the cup of flour has been absorbed. Knead in enough additional flour to form a smooth, non-sticky dough. (The dough should spring back when you poke it with your finger.)
- Place dough in a greased bowl and cover with plastic wrap. Set in a draft-free spot and allow to rise until doubled.
- Turn dough out onto a floured surface and knead again until smooth and satiny. Return the dough to the greased bowl and cover with plastic wrap.
- Set bowl in a draft-free spot and allow to rise until doubled.
- Generously grease 2 baguette pans (or 4 smaller pans) and sprinkle with cornmeal.
- Turn the dough out onto a floured surface and shape into 2 long loaves.
- Dust lightly with sifted flour and transfer to the prepared pans. Cover loosely with plastic wrap.
- Let rise until doubled.
- Make 3 diagonal slashes down each loaf with a razor blade. Dust again with sifted flour and bake in a preheated 450ºF oven for 25 to 35 minutes or until nicely browned.
Let us know how your sourdough experiments turn out!
Julie Laing


ADVERTISEMENT
Good grief, just use whole wheat and or fine rye flour and water in equal parts by weight. This is what scares most SD bakers away: Thinking they have to use a half bag of flour then throwing half of it away daily. All that's needed to build and maintain a starter is half a cup at most. Go to Sunrise Flour Mill site and follow their starter method. In a nutshell: 2 T flour & 2 T water. Cover, set in a warm place and wait. Next day repeat. Within 3-days, you'll see bubbles. Day 3, add 2x the flour and 4x the water. Cover. Day 4, discard half and repeat day 3 feeding (refreshment).
I maintain 50 to 100 grams of mature mother starter. Two days ahead of bake day, remove half, and feed it every 12 hours and on the last feeding make the amount called for in my recipe. Feed the mother starter and put it back in the fridge to sleep. Feed it once a week if not baking often. BTW, use grams when measuring your flour and water - you'll get more constant results.
Sites to research, The Pantry Mama, True Sourdough and The Perfect Loaf. Just sayin'...
What did I do wrong??? I boiled two large peeled potatoes. Forced the potato and water through a sieve. Ended up with about 3 cups of essentially mashed potatoes. When I added the two cups of flour, it just made a dough.
Do you have a recipe for cinnamon rolls using the sourdough starter?
I'm not a sourdough fan, so I have no idea whatever possessed me to read the article and comments. I just want to say that I greatly admire the dedication of everyone, author, editors and those who posted their comments. You all are preserving one of the things from the way of life that made America what it is today. Great work!!
When I initially found this recipe(2020)there was also the milk based starter recipe on the same page but now it's gone, do you know where I can find it?
I am looking for the milk based starter as well!. . .where did it go?
I have been using "starter" for over 25 years and do not understand why the great recipes are adding leavening.? why add yeast, be patient. why baking soda and powder. Sometime I will for pancakes but it works fine with add adding them.
"A distinctly American invention" - really? Sourdough as a technique was known and documented in the Old World a few millennia before the founding of modern America - search Google Books for "Handbook on Sourdough Biotechnology"
Beavo!!!
Exactly what I was going to say! :-) I guess they could rephrase it: "an age-old invention particularly beloved by Americans"! For those who don't want to go look, here is an excerpt from Wikipedia: "In the Encyclopedia of Food Microbiology, Michael Gaenzle writes: 'One of the oldest sourdough breads dates from 3700 BCE and was excavated in Switzerland, but the origin of sourdough fermentation likely relates to the origin of agriculture in the Fertile Crescent and Egypt several thousand years earlier', which was confirmed a few years later by archeological evidence.[3] ... 'Bread production relied on the use of sourdough as a leavening agent for most of human history; the use of baker's yeast as a leavening agent dates back less than 150 years.'[4] Sourdough remained the usual form of leavening down into the European Middle Ages[5] until being replaced by barm from the beer brewing process, and after 1871 by purpose-cultured yeast.'" THANK YOU FARMER'S ALMANAC FOR THE OTHERWISE GREAT ARTICLE ON SOURDOUGH, THOUGH!