Quantcast
Garlic: How to Plant, Grow, and Harvest Garlic Bulbs | The Old Farmer's Almanac

How to Grow Garlic: The Complete Guide

clean garlic heads after being harvested from the garden
Botanical Name
Allium sativum
Plant Type
Sun Exposure
Hardiness Zone
Grow your best garden ever – download our FREE Companion Planting Chart.

Sign up for our daily newsletter to get gardening tips and advice.

No content available.
Subhead

Planting, Growing, and Harvesting Garlic

Print Friendly and PDF

Yes, you plant garlic from a clove in the fall! However, you can also plant it in February and March for mild climates. This pungent bulb adds flavor to countless recipes. Before you plant, know which garlic variety matches your climate as well as your cooking. Learn all about planting, growing, and harvesting garlic and garlic scapes.

Planting Garlic—From a Clove

In the fall, you plant a clove from this year’s head of garlic, cover it with mulch, and harvest it in summer, during the middle of the vegetable garden season. After you harvest and clean out the bed, you can plant another crop in the same bed!

You can also enjoy garlic leaves or “scapes,” which appear in early spring. They’re delicious stir-fried or in salads.

In addition to having an intense flavor and many culinary uses, the “stinking rose” also serves as an insect repellent in the garden and has been used as a home remedy for centuries.

Can You Plant Store-Bought Garlic?

We do not recommend this. Most grocery store garlic heads have been treated. Plus, most commercial garlic comes from large-scale farming areas with mild climates (such as California), so the garlic may not be suited for growing in your climate and may carry pests or diseases with it as well.

If you want big bulbs, use “seed” garlic from a local nursery, farmer’s market, or online seed supplier. Or, keep some of your best heads of garlic from your harvest to replant! But before you plant garlic, make sure you know the difference between the two main types of garlic: hardneck and softneck garlic – and which type will grow best in your climate. See Recommended Varieties below.

Planting

Garlic does best in full sun, so select a planting site that receives 6 to 8 hours of sunlight per day. A couple weeks or so before planting, prepare the soil by mixing in a healthy helping of compost or aged manure.

If your garden soil is poorly draining or high in clay, garlic grower Robin Jarry of Hope, Maine, suggests growing in heavily mulched raised beds instead. “I plant in raised beds for good drainage and then mulch with about 6 inches of old hay after the ground freezes. I never water my garlic—I like low-maintenance vegetables!” Raised beds should be 2 to 3 feet wide and at least 10 to 12 inches deep.

Spacing for Garlic

When to Plant Garlic

Garlic is most often planted in the fall (between late September and November) in areas that get a hard frost. Plant garlic cloves 6 to 8 weeks before the first fall frost date, before the ground freezes.

Garlic does best if it can experience a “dormancy” period of colder weather—at least 40˚F (4°C)—that lasts 4 to 8 weeks. By planting garlic bulbs in the fall, they have time to develop healthy roots before temperatures drop and/or the ground freezes, but not enough time for the garlic to form top growth. Then, by early spring, the bulbs “wake up” from their dormancy and start rapidly producing foliage, followed by bulbs, before the harshest heat of summer stops their growth.

You can plant garlic cloves in mild climates as late as February or March, but the resulting bulbs won’t be as large. However, you can still enjoy the garlic scapes during the summer. (Scapes are the plant’s tender green shoots with a mild garlic flavor. Enjoy on eggs, in salads, as a pizza topping, or in stir-fries!) If you plant in the spring, wait until after the soil can be worked, and it crumbles apart easily.

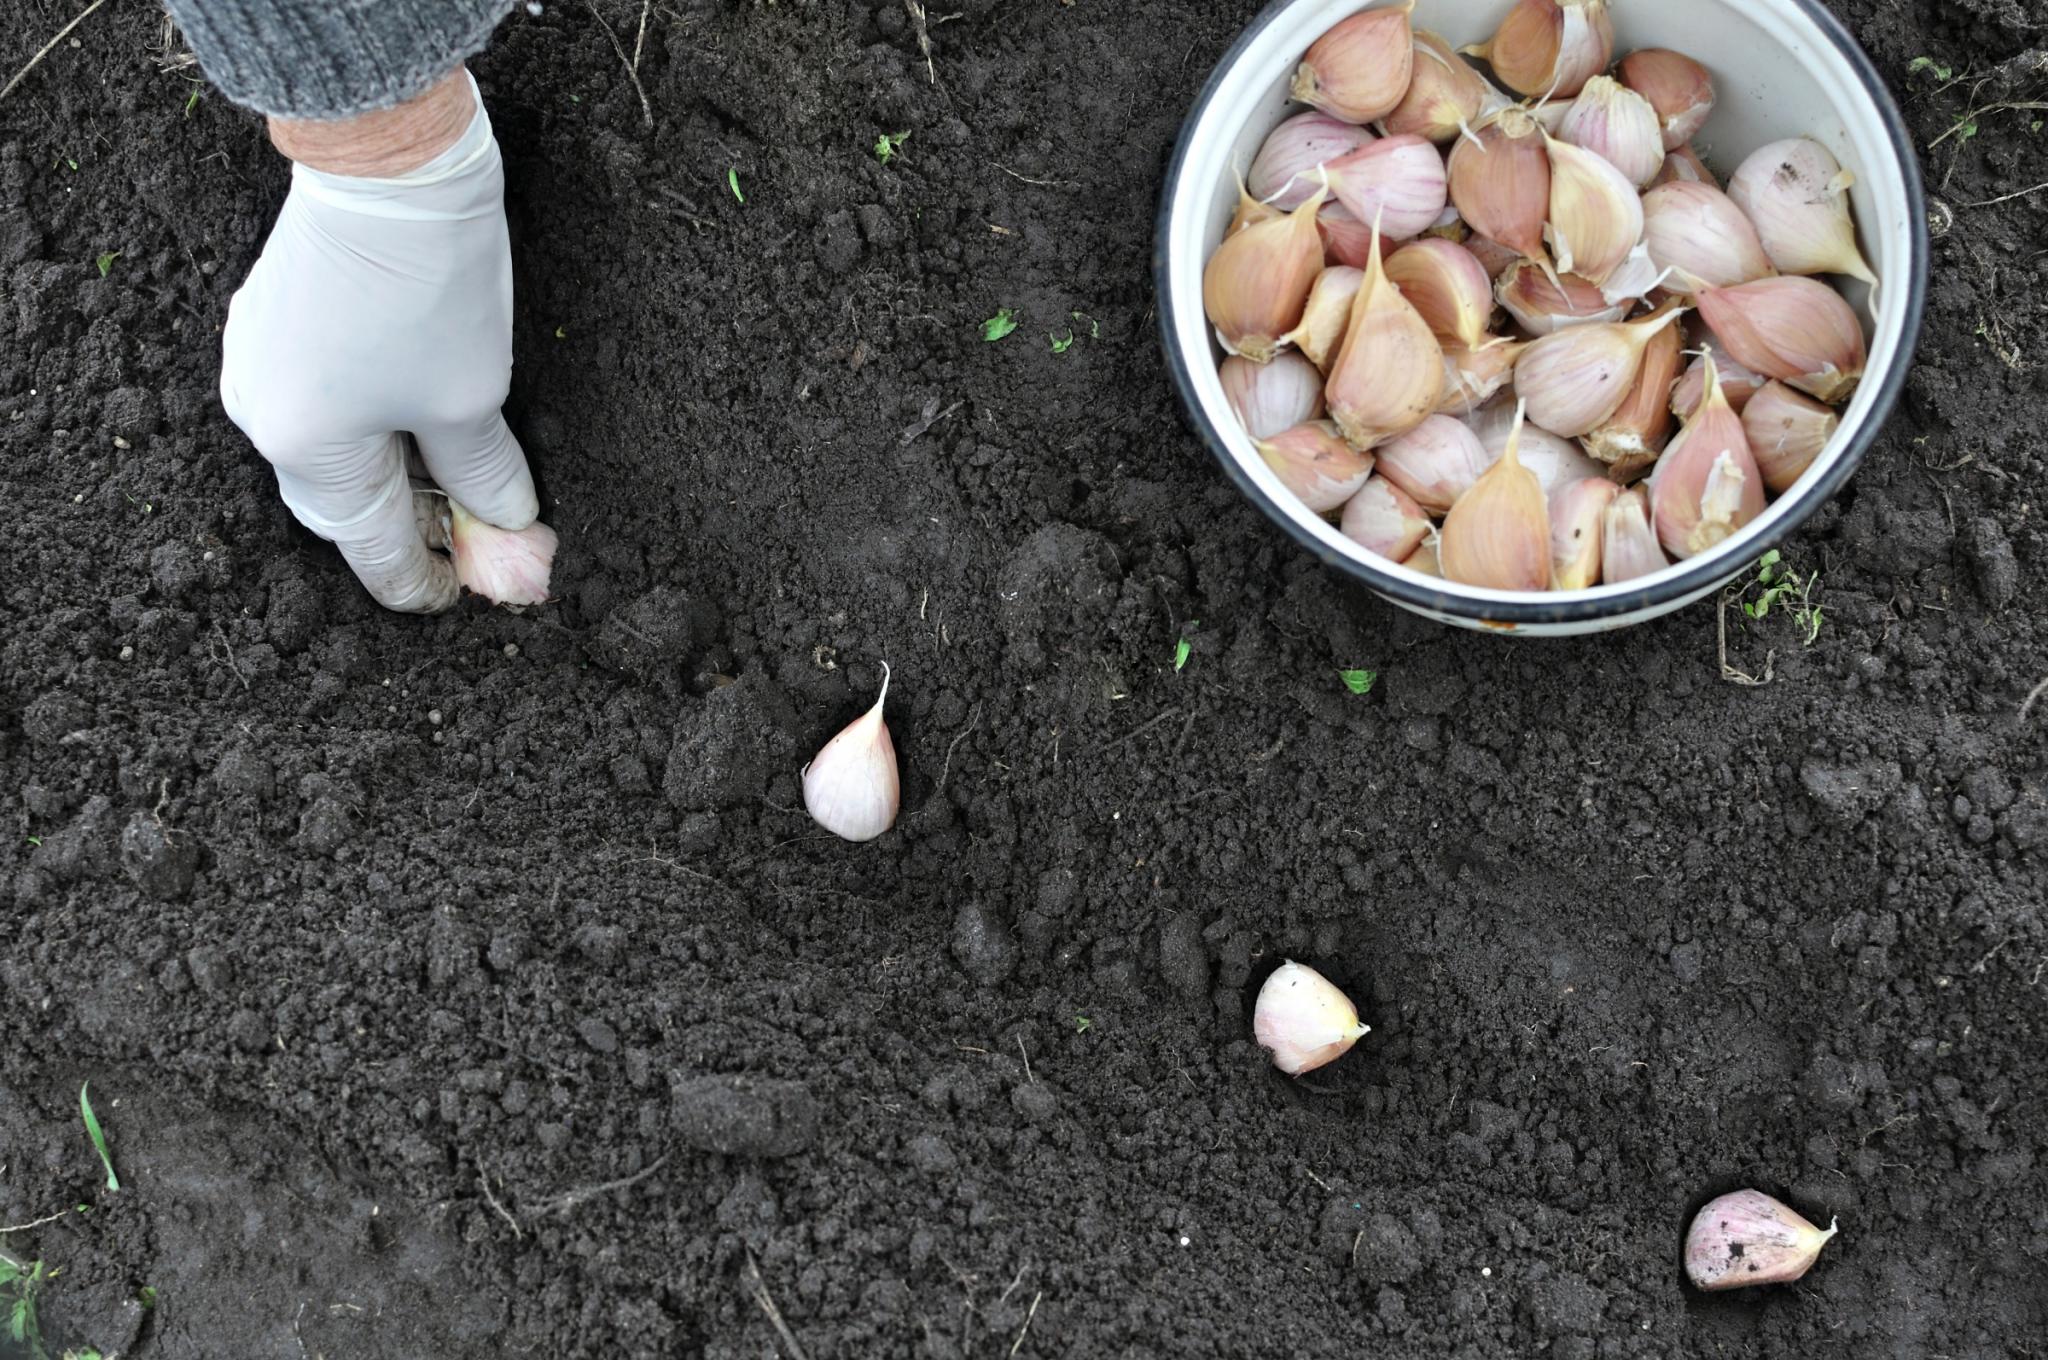
Planting garlic cloves in dirt with rubber gloved hands. Photo by Yuriy S / Getty Images
Photo by YuriyS/Getty Images

How to Plant Garlic

  • Immediately before planting, work a couple tablespoons of 5-10-10 complete fertilizer, bonemeal, or fish meal into the soil several inches below where the base of the garlic cloves will rest.
  • Select large, healthy cloves, free of disease. The larger the clove, the bigger and healthier the bulb you will get the following summer.
  • Break apart cloves from the bulb a few days before planting, but keep the papery husk on each individual clove.
  • Plant cloves 4 to 8 inches apart and 2 inches deep in their upright position (with the wider root side facing down and pointed end facing up). 
  • Plant in rows spaced 6 to 12 inches apart. Depending on the variety, A 10-foot row should yield about 5 pounds of the fragrant bulbs.

In this short video, Ben shares his tried and tested techniques for planting a truly spectacular crop of garlic.

Growing
  • Gardeners in areas where the ground freezes should mulch garlic beds heavily with straw or leaves to ensure proper overwintering. Read our mulching guide for more info!
  • Mulch should be removed in the spring after the threat of frost has passed. (Young shoots can’t survive in temps below 20°F / -6°C on their own. Keep them under cover.)
  • In the spring, as warmer temperatures arrive, shoots will emerge through the ground.
  • Cut off any flower shoots that emerge in spring. These may decrease bulb size.
  • Garlic is a heavy feeder. In early spring, side-dress with or broadcast blood meal, pelleted chicken manure, or a synthetic source of nitrogen such as a pelleted fertilizer.
  • Fertilize again just before the bulbs begin to swell in response to lengthening daylight (usually early May in most regions). Repeat if the foliage begins to turn yellow.
  • Keep the planting site well-weeded. Garlic doesn’t do well with competition—it needs all available nutrients!
  • Water every 3 to 5 days during bulbing (mid-May through June). If May and June are very dry, irrigate to a depth of 2 feet every eight to 10 days. As mid-June approaches, taper off watering.
Garlic shoots growing out of soil. Photo by YuriyS/Getty Images
Photo by YuriyS/Getty Images
Harvesting
  • Harvest from fall plantings will range from late June to August. If you planted in the spring, calculate your approximate harvest date based on the “days to maturity” of the garlic variety you planted.
  • In general, the clue is to look for yellowing foliage, but this isn’t the case for all garlic varieties. Harvest when the tops begin to yellow and fall over, but before they are completely dry.
  • Before digging up your whole crop, it’s a good idea to sample one bulb. Lift a bulb to see if the crop is ready. We often dig up a bulb before the tops are completely yellow (in late June or early July), as some garlic types will be ready earlier. The garlic head will be divided into plump cloves, and the skin covering the outside of the bulbs will be thick, dry, and papery.
    • If pulled too early, the bulb wrapping will be thin and easily disintegrate.
    • If left in the ground too long, the bulbs sometimes split apart. The skin may also split, which exposes the bulbs to disease and will affect their longevity in storage.
  • To harvest, carefully dig (don’t pull or yank stems by hand) up the bulbs using a garden fork. Avoid damaging the roots, especially the root-plate (where they attach to the bulb). Lift the plants and carefully brush off surplus soil, but do not remove any foliage or roots before putting them to dry thoroughly.
Harvested garlic bulbs. Photo by Nikolaeva Elena/Getty Images
Photo by Nikolaeva Elena/Getty Images

How to Store Garlic

  • Let garlic cure in an airy, shady, dry spot for about 2 weeks. Hang them upside down on a string in bunches of 4 to 6 or leave them to try on a homemade rack made from chicken wire stretched over posts. Make sure all sides get good air circulation.
  • After a few weeks, the garlic should be totally dry and ready to store.
  • The bulbs are cured and ready to store when the wrappers are dry and papery and the roots are dry. The root crown should be hard, and the cloves can be cracked apart easily.
  • Once the garlic bulbs are dry, you can store them. Brush off (do not wash) dirt, remove only the dirtiest wrappers, trim roots to ¼ of an inch, and cut tops to 1 to 2 inches.
  • Bulbs should be stored in a cool (55°F / 13°C), dark, dry place, and can be kept in the same way for several months. Don’t store in your basement if it’s humid. Do not store garlic in the refrigerator, either, as it will be too cold and too humid.
  • The flavor will increase as the bulbs are dried. Properly stored, garlic should last until the next crop is harvested the following summer.
  • If you plan on planting garlic again next season, save some of your largest, best-formed bulbs to plant again in the fall.

Garlic cloves in a braid

Gardening Products
Wit and Wisdom
  • Rub raw garlic on an insect bite to relieve the sting or itch. Find out more uses for raw garlic.
  • Old-time gardeners swear that garlic “learns” because it adapts to your growing conditions and improves each year.
  • Garlic has a long history of healing.

A nickel will get you on the subway, but garlic will get you a seat.
–Yiddish proverb

Pests/Diseases

Garlic has very few problems with pests in the garden (in fact, it’s a natural pest repellent), and very few problems with the diseases that plague other veggies. Keep an eye out for the same pests that bother onions.

Garlic Pests and Diseases
Pest/DiseaseTypeSymptomsControl/Prevention
Onion maggotsInsectLimp, yellow, or stunted plants; larvae feed on roots/bulbs/stems and may spread bacteriaUse row covers; harvest on a timely basis; monitor adults with yellow sticky traps; weed, especially wild onions; destroy crop residue; rotate crops
Onion thripsInsectLeaves, especially in folds near base, have white patches or silver streaks; brown leaf tips; bulbs distorted or stunted; curling or scarringRemove plant debris; choose resistant varieties; add native plants to invite beneficial insects; use row covers; use straw mulch; monitor adults with yellow or white sticky traps; use sprinklers or other overhead watering
White rotFungusLeaves yellow, wilt, and die, starting with oldest; white, cottony growth at stem base or on the bulb, later with black, poppy seed–like particles; roots rotDestroy infected plants; choose disease-free cloves/sets; destroy crop residue; disinfect tools; solarize soil; rotating crops on 5-year or longer cycle may help
Cooking Notes
  • Learn how to make your own garlic powder to easily spice up a recipe.
  • Roasted garlic bulbs are also a favorite of ours!
  • Around the summer solstice (late June), hardneck garlic sends up a seed stalk or scape. Allow it to curl, then cut off the curl to allow the plant to put its energy into bulb formation. Use the scapes in cooking the same way you would garlic bulbs. We like to stir-fry scapes the way we cook green beans—similar, with a spicy kick! Note that they get more fibrous and less edible as they mature.
Garlic scapes. Photo by Mikhail Naumov/Getty Images
Garlic scapes. Photo by Mikhail Naumov/Getty Images.
About The Author

Catherine Boeckmann

Catherine Boeckmann loves nature, stargazing, and gardening so it’s not surprise that she and The Old Farmer’s Almanac found each other. She leads digital content for the Almanac website, and is also a certified master gardener in the state of Indiana. Read More from Catherine Boeckmann

2023 Gardening Club