
Making Homemade Apple Cider
Making cider is a great way to celebrate fall—and that pure, fresh apple cider taste is like nothing you’ve ever tasted from a grocery store. If you have the right tools, it’s simple to do and lots of fun! Check out our DIY tutorial on how to make apple cider by hand.
In colonial days, many farmers and families owned a barreled cider press (and in those days, the cider was often left to ferment and become an alcoholic “hard” cider). Today, the “old-fashioned” cider press is becoming more popular again, perhaps because more people are planting fruit trees and becoming more interested in homesteading.
The difference between the taste of homemade, unfiltered apple cider and that of pasteurized, filtered grocery store cider is indescribable. They barely resemble each other.
Read Next
The taste of homemade cider pops in your mouth—pure, fresh, and flavor-packed! Plus, you can use all those less-than-perfect apple drops from the ground, so it’s also a big saving from the price of store cider.
To make your own apple cider, you’ll need a few key tools. First, you’ll need a cider press. You can purchase one online or at a local farm supply store. You’ll also need a large container to catch the juice, such as a food-grade plastic bucket or a stainless steel pot. Additionally, you’ll need a strainer or cheesecloth to remove any pulp or solids from the juice.
Once you have your tools, it’s time to start making cider. You can use any type of apple, but some varieties are better suited for cider-making than others. Look for sweet, tart, and juicy apples, such as Honeycrisp, Granny Smith, or Jonathan.
Whether you drink it fresh or let it ferment, homemade apple cider is a delicious and satisfying way to celebrate the fall season. So grab your cider press, and let’s get started!
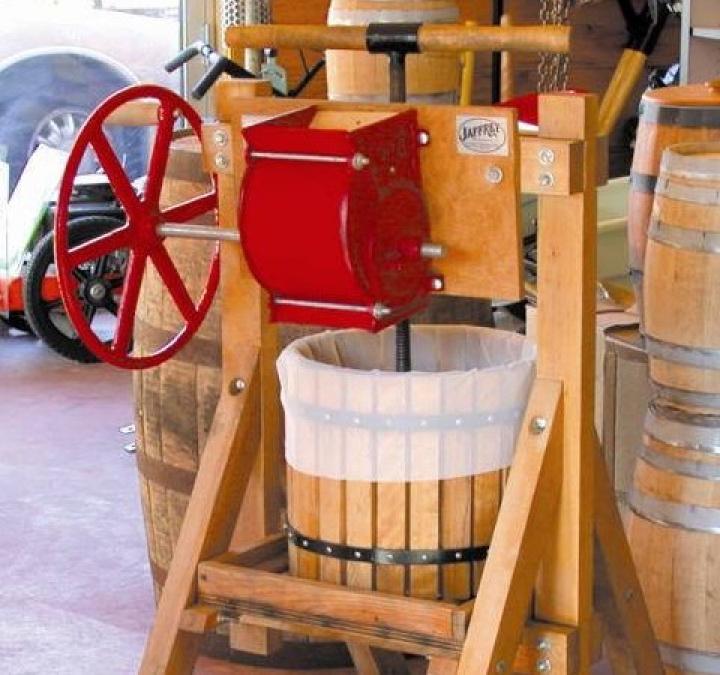
The Apple Press
An apple press makes the whole process fun and simple. The press essentially grinds the apples into a pulp and then presses the juices out. Once you get going, the liquid gold keeps flowing. You go from press to glass in 30 seconds!
There are many kinds of presses, from a very simple hand press to the traditional cider press with a grinder. You can often even rent an apple press. Then, you only need the apples and a few supplies (cutting boards, knives, and empty pitchers). Take turns with the press—and you’re in cider heaven!
How to Press Apple Cider
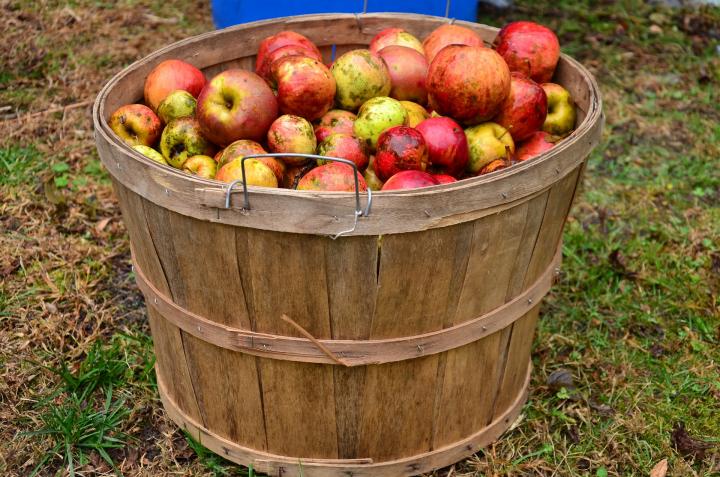
- Start with a wheelbarrow of apple drops (fallen apples). You need a good amount of apples to make cider. Approximately 30 to 40 apples will yield one gallon of cider.
- The apples need to be as ripe as possible. It’s OK to use less-than-perfect apples on the ground at any orchard or old apple farm. Discard any rotten ones, though. Spoiled or rotten apples cause the juice to ferment too rapidly. (You know they say… one bad apple ruins the bunch!)
- Blast the apples with a hose to wash them off.
- Now you need to grind up the apples. Some presses come up a grinder. Feed the apples into the hopper.
- Turn a cast iron wheel to grind the apples. The wheel is attached to the grinding shaft, which quickly and easily chops up the apples.
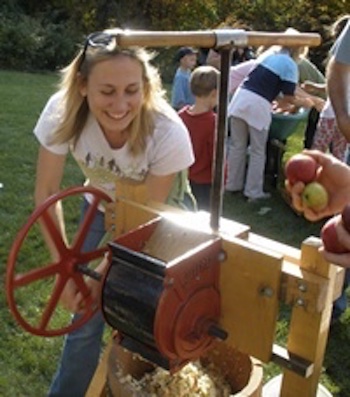
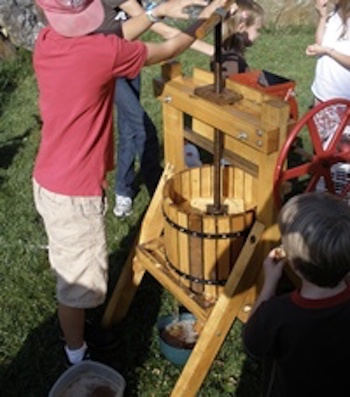
- The apples fall into the tub below. A big press screw is flowered onto a wooden pressing plate.
- Turn the pressing plate down on the pulp to free up the apple juices, which flow into a container below the press.
- Once all the juices are pressed out, empty the leftover pulp into a bin. Then, grind up more apples and press again!
- The juice quickly oxidizes into a rich amber color. Some apple “froth” forms on the top, which can be skimmed off.
- Finally, pour the cider into jugs and drink! Amazing sweet, fresh as a whistle, and crazy delicious! (Watch out for any drunken bees who ended up in the jug!)
* If you are concerned about pasteurization before drinking, just heat the cider to 160 degrees Fahrenheit for about 6 to 8 seconds. After pasteurization, cider can be frozen for longer storage.
Add some cider donuts, and you’re in heaven… or, for a special treat, make some mulled apple cider.
Cider pressing is a great occasion for friends and family to get together on a fall day. The kids—of all ages—will have a blast cranking the press. If you have the inclination, find (or make) a cider press and throw your own autumn harvest party next year!
Are you looking for more great ways to utilize your apple harvest? Be sure to check out our favorite apple recipes.
Anyone else a cider fan? Or, own a cider press? Have any questions or comments? Just post below.
Catherine Boeckmann


I love, love, love all of your articles! BUT there are too many ads popping up and trying to load that my poor computer makes it haywire. I have a new computer, so it's not that, it's the ads. I realize that ads support your endeavors, BUT there are just so many I'm thinking about not reading your content anymore! Is there something I can do to stop the madness? Thank you!
Not to be "that guy" but you've got a bug somewhere. Clear your cache and run Malwarebytes (free download). I never get popup ads here, and I'm not getting any currently. 👍
Can you water bath can cider for long term storage? Freezers already full.
Hi, Shirley. Yes, you can! (Pardon the pun!) Leave 1/4-inch headspace in your jars. Make sure that the the water level is at least 1 inch over the tops of the jars in your canner (and remember you need room for the boiling water). Process for 5 minutes if using pints or quarts and 10 minutes if using half gallon jars.
A friend of mine freezes the apples solid, thaws them and then presses them, 1/4 more juice, no grinding needed. Great juice!
Great tip, Mark! Thanks for sharing.
Some resources say to press the apples slowly to get more yield. Do you know how on Earth this could possibly be true?
Mark, you have us stumped. We have not heard of this method.
Thank you for your awesome article! I just bought an apple press and have one question. Would the juice come out be considered apple juice or cider? Would I need to add anything to the juice to make it cider? Thanks in advance!
I'm going to start feeding the crushed apples thru the press to collect the juice. Next step?