
Drying Tomatoes in the Oven or the Sun
Got too many fresh tomatoes, peppers, or herbs? Drying is one of the simplest forms of preserving, requiring only an oven or the Sun’s energy over several days. The result is rewarding and can add intense flavor and color to salads, pizza, soups, pesto, and sauces. See how to dry tomatoes and more!
Drying is one of the oldest forms of preservation in the world. Virtually all indigenous tribes used the technique as a way to preserve foods for colder or drier times.
Drying Tomatoes
With tomatoes, plum types work best, as they have less water. San Marzanos are my favorites and great for sauce. Other choices include ‘La Roma’, the standard for paste and ‘Principe Borghese’, a traditional variety best suited for drying.
Read Next
As with most preserving, choose firm, unblemished fruit, not overripe fruit.
Drying in the Sun
This method is easy but not for everyone; you need to have a climate with low humidity (less than 20%) as well as high temperatures in the 90s. If you’re so lucky, proceed …
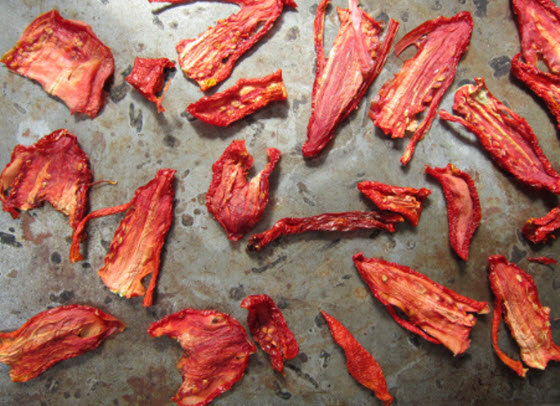
I wash and dry the tomatoes, then cut them into slices. The thinner the slice the quicker they dry. However, I find that if I cut them too thin, they stick to the tray and become difficult to remove. Quarter-inch slices have worked best for me.
Use clean plastic-mesh screens (available from cookware stores), not metal! Place the cut tomatoes in a single layer, allowing about an inch of space between the pieces for air circulation. You want to set your trays on a table or bench so they get air circulation. Place a layer of cheesecloth on the fruits and set the trays at least a foot above the ground so air circulates freely underneath them.
This process takes a few days to a couple weeks, depending on the weather; if rain is in the forecast, bring your trays inside. Dried fruit should be evenly dry, flexible, and not sticky.
Oven Drying Tomatoes
Oven-drying is much faster and not dependent on weather. It takes about 6 to 12 hours to dry fruit.
Preheat the oven to 140° to 145° F Place the prepared fruits skin side down on a plastic-mesh screen, or on a baking sheet lined with cooking parchment or a silicon baking mat. Prop the oven door open slightly to allow the moist, hot air to escape. Check the tomatoes regularly, and rotate the baking sheet if necessary. Dried fruit should be uniformly dry and pliable but not sticky when cool.
The fruits can also be removed earlier. Although these moister tomatoes must be refrigerated, they have a rich flavor and are ideal for packing in olive oil for up to a week.
Preheat the oven to 150 degrees Fahrenheit. Wash about 5 pounds of tomatoes. Peel the skins, if desired. Remove the stems and blemishes. Cut the tomatoes in half, take out the seeds, and then cut the halves into ½- to ¾-inch slices.
Place the tomato slices on cookie sheets such that they do not touch each other. Sprinkle with seasonings or salt, as desired. Place in the oven and bake for 6 to 24 hours, depending on the variety, size, and moisture content of the tomatoes. Use an oven thermometer to monitor the temperature periodically and make sure that it is correct; adjust as needed. Check the tomatoes every so often and switch sheets from top to bottom racks and back to front. Turn the tomatoes over occasionally.
The tomatoes are done when they turn dark red and are leathery and dry; they should be flexible and not hard or brittle. If they are tacky or moist, keep baking. When ready, remove the sheets from the oven and cool the tomatoes to room temperature. Place in plastic bags, squeeze out the air, and store in the refrigerator for 2 to 4 weeks or in the freezer for 8 to 12 months.
The Easiest Way: Food Dehydrator
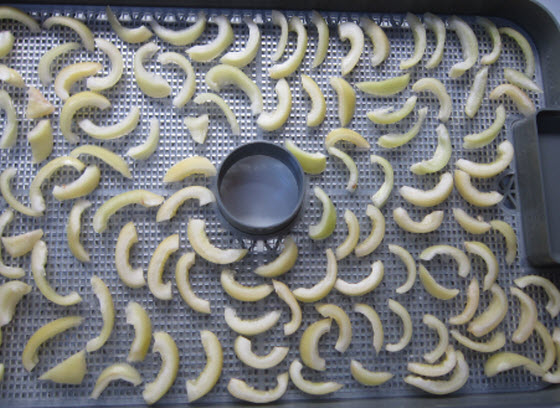
If you are ready to invest in an electric dehydrator, this is the easiest way to dry tomatoes. I find that drying tomatoes needs more power.
I lay them flat on the tray and put the dehydrator on 125 degrees. After a few hours, I lift them up so that they won’t stick and the next day, I turn them over. At the end of a few days, they are nice and dry and ready to use in recipes. I want them to be almost crispy so that I can grind them up and use them in dips.
I also dry paprika in my hydrator. (Note: “Paprika” comes from actual paprika peppers!)
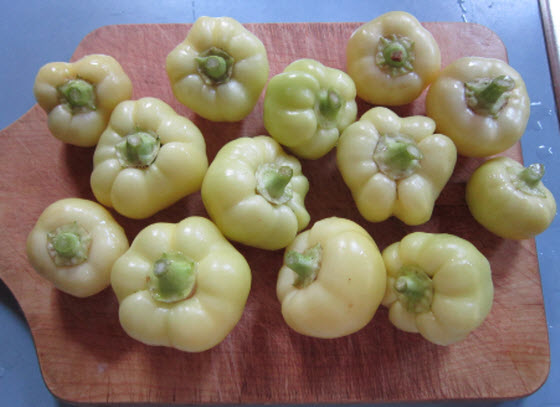
I get the plants from some local nurseries and put them in the ground when the danger of frost has passed. I have heard that they like sulphur so I usually place five or six matches in the ground with their roots. They enjoy a bit of support as well so I have some nice cages that I use to give it to them.
As the peppers mature, I cut them from the plants. I carefully wash and dry them and slice them into ribbons discarding the internal seeds (or feeding these bits to the chickens if you have some). These ribbons go onto the trays and I again dry them at about 125 degrees. It takes a few days and you want them to get completely brittle so you can grind them into powder.
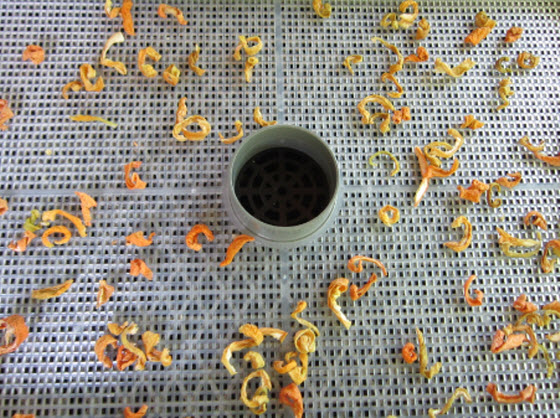
This powder makes excellent gifts and is a great addition to quiches, deviled eggs and other egg dishes.
→ See even more ways to use tomatoes!
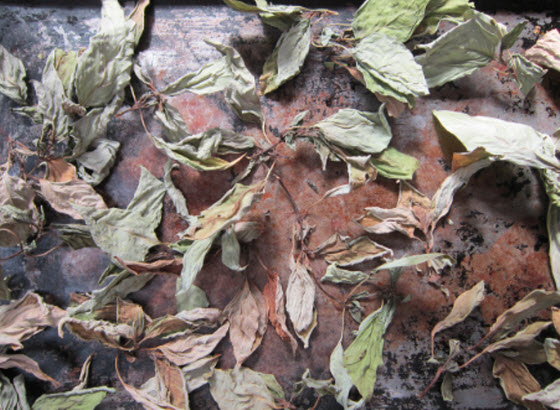
Drying Basil
This year, I didi dry my basil in the oven. Mine has a pilot light which is ideal. If yours doesn’t have this option, the lowest setting (with the door slightly ajar) often works well.

It’s relatively thin and can easily be dried by spreading it out on a cookie sheet.
Once dried, I transfer it to glass jars. This basil can then be used in soups, salads, eggs or dips. It does discolor a bit, but it tastes just fine.
You can even give away dried herbs in glass jars for holiday gifts!
Of course, you can also air-dry herbs the same way you dry flowers. Some herbs can be spread out in the sunshine but most require a drafty shade to maintain their color and nutrients.
- Gather stems into small, loose bunches.
- Secure the ends together with a rubber bands or twine.
- Hang upside down in a warm, dry, dark, well-ventilated place that’s out of direct sunlight.
- Cover them with a paper bag to keep the dust off.
- Herbs with smaller leaves, such as thyme, can be laid out on newspaper or on a rack to dry.
- For best results herbs should be fully dried within two to three days.
If humidity makes air-drying impossible, dry them in the oven or use a food dehydrator.
Other Notes on Drying Vegetables
Never use a microwave oven to dry tomatoes and vegetables; it can’t provide the essential continuous, moderate heat and air circulation.
Store dried vegetables in an airtight containers or airtight bags, squeezing out all excess air. Store in a dry, cool location for up to six months.
Do you dry your herbs, vegetables, or fruit? Please share any comments or questions below!
Celeste Longacre

Introduction to Preserving
Freezing
Making Quick Pickles
Making Quick Jams: Refrigerator or Freezer Jam
Water-Bath Canning
How to Can Tomatoes
How to Can Pickles
How to Can Jam and Jelly
Pressure Canning
Drying
Salting and Brining


I'm wondering why I can't find a recipe for making sundried tomatoes packed in olive oil.
I have a dehydrator and have a ton of cherry tomatoes. I really want to long term can them packed in olive oil, just like the ones at the grocery store.
Would I need to do a water bath once dried and properly packed in the oil?
Do you have a recipe or advice?
Thank you in advance
Cecy
Hi, Cecy. While we at The Old Farmer’ Almanac do not have a recipe, you can search online for “make your own sun-dried tomatoes in olive oil” and get lots of ideas.
I grow my herbs and vegetables in pots, and I have a food dehydrator and drying tomatoes, I have done it, but the thing I learned, dry a lot of tomatoes because they do not make a lot of tomato dust. I also dry my herbs and make my herb mixtures. I also dry some of the peppers I grow, and others I cut up and de-seed and freeze, I then get them out of the freezer when I make chili cut them up, and add them to the pot. I grow about 14 kinds of peppers
I have dried herbs in my car. Temps were in the high 80's & 90's. I layed them out on newspaper and paper bags. It worked pretty well.
Can I dehydrate more than one kind of vegetable at the same time in the dehydrator ?
What about smoking meats as a way of preservation?
Any suggestions are appreciated.
Thanks Farmers Almanac for all you do...
Yes, you can dry different kinds of fruits or vegetables at the same time. Just make sure that each kind passes the test for being dry. It may increase the amount of time needed to dry all of a particular kind of fruit or vegetable. If you are drying soft vegetables and hard ones at the same time, because the soft vegetables need a lower drying temperature, use the lower setting until they are all dry, then boost up the temperature to the higher setting to continue drying the hard vegetables.
I use paper bags (the large grocery size) with wooden skewer sticks. Tie a bunch (approx 5 stems) of whatever herb together with cotton string. Put two skewers through the top of the open paper bag about an 1 to 1.5 inches from each short side of the bag. tie the herb bunch (same string the herbs are tied with) to the wooden skewer so the herbs are hanging in the bag. I put two bunches on each skewer. I put the bags in a room that is not used so much and not in direct sunlight. Doesn't take too many days for the herbs to dry out. I save the same bags to use over and over (and the same string and wooden skewers too). Works great and the dried herbs look much nicer than what you would buy at the store - and taste great :-)
Great tip; thanks for sharing, Al! What is your favorite way to use your dried herbs?
EASIEST WAY TO DRY OUT FRUIT, VEGGIES OR HERBS: Rinse and let sit on paper towel for at least 1 hour, remove from paper towel and place on Cookie Sheet (w/sides) lined with aluminum foil, Place on the backseat of a hot car with the windows rolled up, and let dry (takes just a few hours) -- No Humidity in there at all. It is so easy and very eco-friendly. Sliced mushrooms, herbs, and candied orange peel are the fastest to dry out. Wet fruit takes a bit longer but is well worth the wait. I turn tomatoes with their wet halves facing downward. So Very Easy !!!
Wow! What a great idea!!!