
Homemade jams in the pantry.
Make Quick Fridge Jam or Canned Jam
Interested in making jam this year? Take a look at how it’s done with our Jam-Making Guide for Beginners. Warning: Once you taste homemade jam, you may be spoiled! Also, see our 10 jam recipes using strawberries and other berries, stone fruits, and even tomatoes.
Making fruit jam is the easiest way to break into preserving. Why is homemade jam more delicious? Lots of reasons! You’re picking the fruit yourself at the peak of flavor, and you have control over what is in the jam and preserves. Plus, homemade jam is free from additives and chemicals!
We’ll show you to make both small, quick batches or bigger ones for pantry storage.
Read Next
Difference Between Jams, Preserves, Jellies, and Marmalades
In this guide, we’ll focus on jams, but you may be interested in understanding the differences.
- Jam is made with mashed-up fruit, but the end result is firm enough to spread on a piece of toast.
- Preserves use whole or large pieces of fruit; marmalade is a preserve, too, but with citrus fruit.
- Jelly is made from the juices of fruit that don’t break down well, such as fruit with seeds (grapes and apples are most common). Its texture is firm.
Jam and preserves are easier and more economical to make than jelly, since they are made of entire fruits instead of just the juice, and can be good either thick or slightly runny.
Preparing Fruit for Jam
Here are some basic tips that you can follow to make your own jams and preserves.
- Pick or purchase high-quality raw fruit when it is at its peak. Jam is NOT for your overripe and mushy fruits. Your end product is as good as the fruit you start with.
- Always wash your fruit (and veggies) under cold, running water rather than soaking them. This is especially important for berries because they bruise easily. Also, wait to wash your fruit until you are ready to preserve, to keep fruit from spoiling.
- Remove the stems, pits, or cores, if any. Peel, if necessary. Cherries and berries do not require peeling, while fruit like pears and peaches do.
- For jams, cut up or mash the fruit and for preserves, use fruit whole or cut them into large chunks. For jelly, cut, crush, or juice the fruit exactly as stated in the recipe.
Tips on Cooking Jam
- Make jam or preserves in small batches. This way, the fruit will cook quickly, and the color and flavor will be better preserved. Also, prepare only a single batch at a time. Doubling the recipe may cause your spread not to gel or have a soft set.
- For the perfect gel to your jam, use 3-parts fruit that is fully ripe, to one-part fruit that is slightly under-ripe. If all your fruit is fully ripe or for peaches and apricots (all examples of fruit with less pectin) add 1 to 2 tablespoons of lemon juice. The acid from the lemon juice will help the jam or preserve thicken.
- Jam is essentially fruit and sugar. In general, for every cup of fruit you use, add ¾ cup of sugar. For example, four cups of fruit makes a very manageable batch, so you would need 3 cups of sugar per batch—unless otherwise specified by the recipe. Measure the full amount of sugar listed in the recipe. Too little and the jam will not adequately gel nor preserve the fruit.
- To prevent a lot of foam from forming while cooking the jam, add an optional ½-teaspoon butter or margarine as soon as it starts. Otherwise, skim off the foam with a spoon before adding jam to jars.
- Scorching is more likely to happen to jams and preserves with longer cook times. To prevent scorching, stir your mixture often to constantly for 15 to 40 minutes, depending on the fruit’s cook time. Scorching can ruin an otherwise delicious jam or preserve, but is very easy to prevent.
- To test your jam to see if it’s done, dip a cold metal spoon into the boiling jam. Over a plate, turn the spoon on its side so the liquid runs off the side. The jam is done when it forms two drops that flow together and sheet or hang off the edge of the spoon.
For help translating a pound of fruit to the number of cups needed, see our Measuring Fruits chart.
Supplies for Making Jam
- We prefer to make jam in a saucepan with a flat, heavy bottom and high sides. This prevents boiling over. For best results, find a saucepan with a wide diameter. This extra surface area is needed for evaporation, which helps improve the gelling and end result.
- Glass jars with straight sides work best for jams and preserves, especially if you are freezing as they allow for food expansion that occurs during the freezing process. Ball Brand makes both Jelly Jars (8 oz) and Half Pint Jars (8 oz). For freezing, jams, jellies, and preserves, Ball® now makes an 8 oz plastic jar.
- For fruits with many seeds, such as raspberries and blackberries, you may need a sieve (or food mill) if you want “seedless” jam. In a saucepan, warm the crushed berries over medium heat until softened. Press the crushed berries through the sieve or food mill to remove the seed, and then proceed as written in the recipe.
Quick Refrigerator Jam
- Once your jam or jelly has cooked for the appropriate amount of time, ladle the hot spread into jars that are pre-warmed in a pot of simmering water. Cool the filled jars to room temperature. Place lids and bands on jars and label them. Refrigerate jam or jelly for up to three weeks or serve immediately to enjoy now.
Preserving Jam With Water-Bath Canning
- To store your jam in jars for up to 18 months (without refrigeration), you’ll need to process them in boiling water.
- With water-bath canning, you’ll need to leave ½-inch headspace when filling jars.
- As berries and fruit are high in acid, there’s no need to “pressure can.” For water-bath processing, you’ll need a large deep stockpot with a flat bottom, a well-fitting lid, and a rack that fits at the bottom or a water-bath canner. The canner should be deep enough to submerge your filled jars at least 1 to 2 inches above their tops. Read our page on water-bath canning, which includes a supplies list.
- Fill your pot or canner halfway with water, enough to cover the jars by at least 1-inch. Place your prepared jars of jams or preserves into the canner, cover with lid, adjust the heat, and bring water to a rolling boil.
- Process according to your recipe, only counting time after the water is boiling. Turn off heat, remove the lid, and wait at least 10 minutes. Remove the jars and place on a rack or kitchen towel on the counter.
- Cool jars for 12 to 24 hours, then check the seals. Label and store your jars to enjoy all year.
- Jams can be stored for up to 18 months as long as the lids are properly sealed.
Recommended Processing Time
For hot-pack jams in half-pint or pint jars without added pectin in a boiling-water container:
| Altitude | 0-1,000 feet | 1,001-6,000 feet | Above 6,000 feet |
|---|---|---|---|
| Processing Time | 5 minutes | 10 minutes | 15 minutes |
Jam Making FAQ
- Why won’t my jam set? Cook it a few minutes longer, as you need to evaporate more of the water in the fruit.
- What if my jam has scorched? Taste the jam and if it still tastes fine, move to a different pot and keep cooking. Stir constantly!
- What if I ran out of fruit for the recipe? It’s fine to add another fruit, but be sure to keep it all to the same ratio.
- What if the seal on my jar broke? You must store the jam in the fridge. If the seal broke in the pantry and you’re not sure when it broke, you need to throw away the jam.
- What if my jars have some bubbles or mold? Unfortunately, this is a problem, and the jars weren’t sealed properly. You need to throw away this jam.
Homemade Jam Recipes
Now that you are a little bit more familiar with the art of making jams and preserves, try your hand at these delicious recipes.
Note: ALWAYS follow the specific directions on the recipe for the right balance between ingredients. For example, if you wish to use less sugar, find a recipe that lets you reduce the sugar amount or use an artificial sweetener without compromising the gelling of the product. If your recipe uses pectin, follow the directions and boil for the exact amount of time specified in the recipe.
Prize-Winning Strawberry Jam
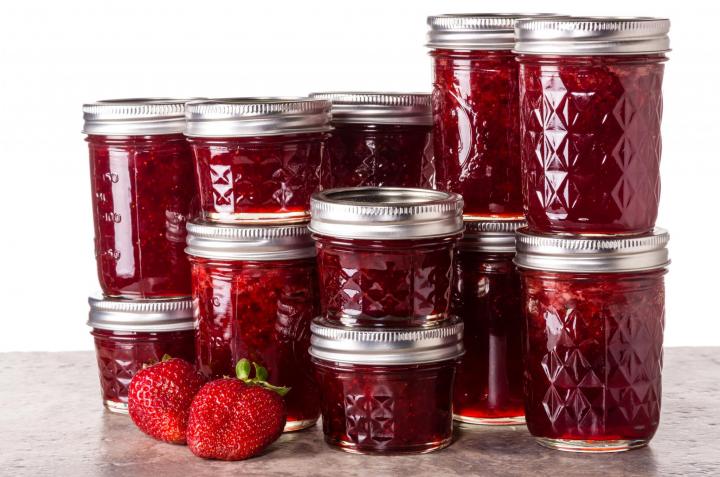
Credit: Zigzag Mountain Art/Shutterstock.
Blueberry Jam
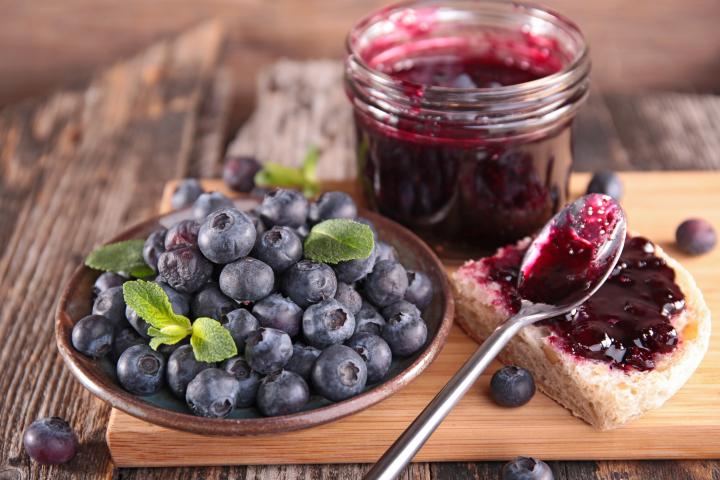
Credit: Margouillat/Shutterstock
Pearadise Pear Jam
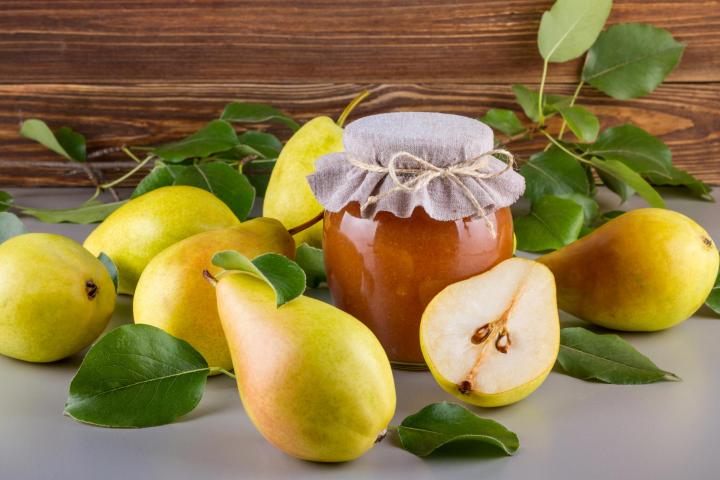
Credit: Rustamank/Shutterstock
Blueberry-Rhubarb Jam

Credit: Torok-Bognar Renata/Shutterstock
Kiwi Jam
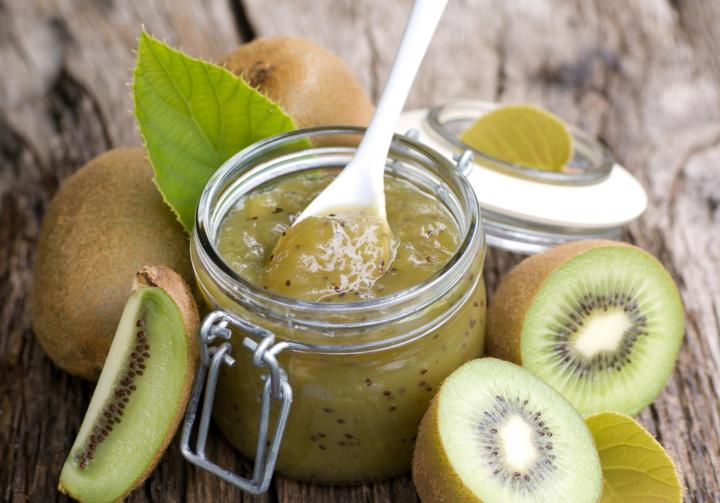
Credit: Christian Jung/Shutterstock
Peach Jam
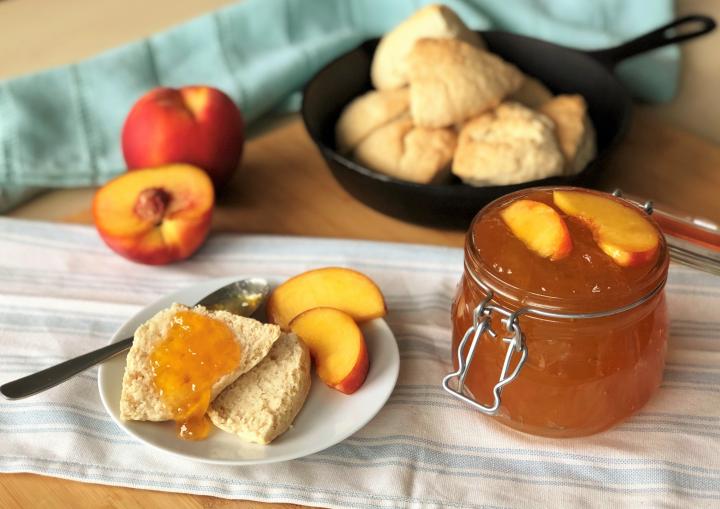
Credit: Sam Jones/Quinn Brein
Ginger-Pear Preserves
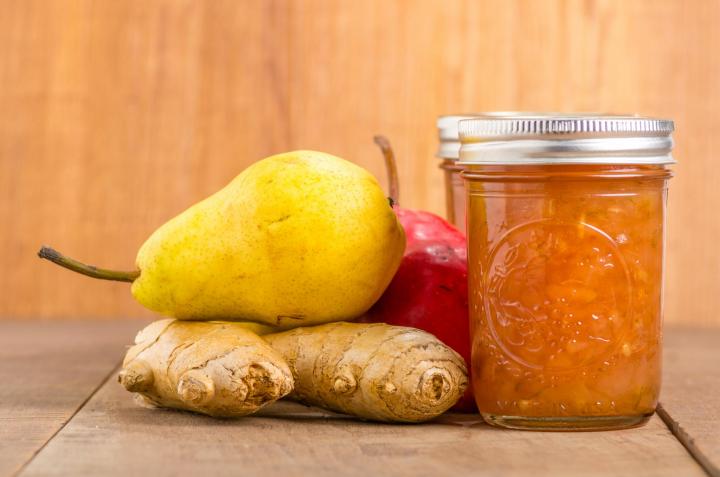
Credit: Zigzag Mountain Art/Shutterstock
Blackberry Jam
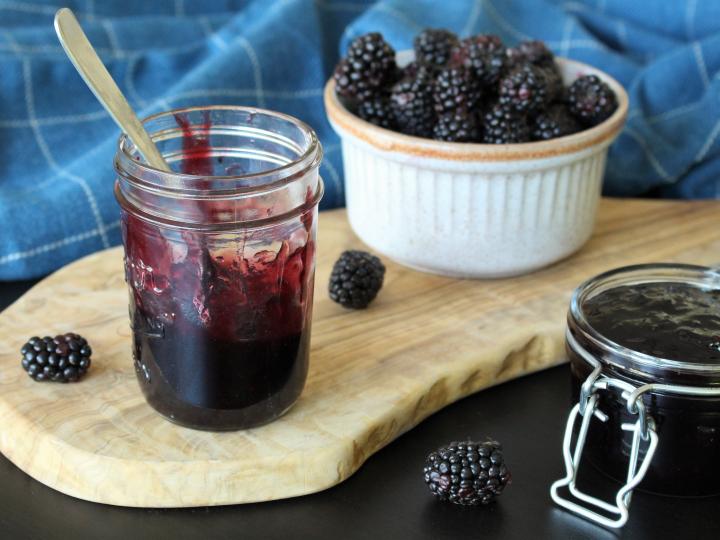
Credit: Sam Jones/Quinn Brein
Tomato Jam
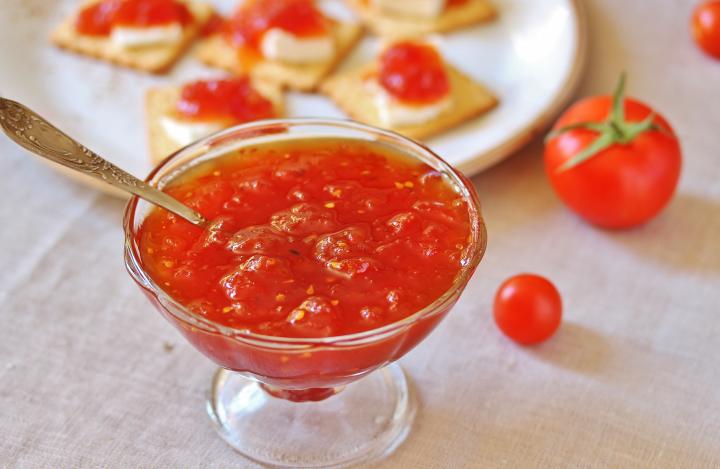
Credit: Lyudmila Mikhailovskaya/Shutterstock
Rose Hip Jam
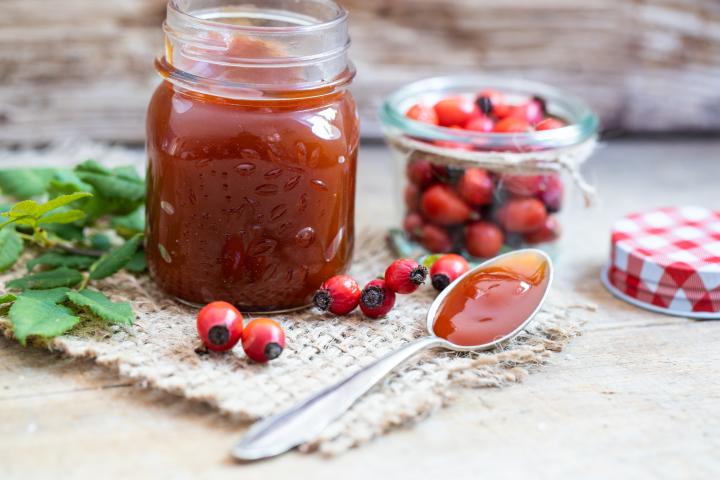
Credit: Sarah Biesinger/shutterstock
Give a homemade gift from your own kitchen. Cover the top with a circle of fabric that is 2 inches larger than the jar top. Secure it with several turns of a fine gold cord or ribbon. See ideas on how to dress up a gift jar.
This Guide was updated and fact-checked as of August 2020, by Christina Ferroli, PhD, RDN, FAND. If interested in nutrition counseling and education practice to make healthier choices—or, simply stay up-to-date on the latest food, nutrition, and health topics—visit Christina’s Facebook page here.
Catherine Boeckmann

Introduction to Preserving
Freezing
Making Quick Pickles
Making Quick Jams: Refrigerator or Freezer Jam
Water-Bath Canning
How to Can Tomatoes
How to Can Pickles
How to Can Jam and Jelly
Pressure Canning
Drying
Salting and Brining


ADVERTISEMENT
Thank you! This is a great collector's item for my file. Bless you
I really love the Berry + Fruit pictures which go with the Recipes; ty~)
Persimmon jam
Recipe calls for 2.2 lbs. How many cups pulp will I use?
Neighbor has a huge lychee fruit tree. Want to can jam. Can not find a recipe for water bath lychee jam.
I am looking forward to using these techniques next summer. Thank you!
On another note, could someone edit this article for typos, for example in Jam Making FAQ?
Greetings from Serbia in Europe I love your Almanac and very very interesting things I found in here ;) There is exact same way we preparing jam here .....Only housewifes have a special time of year (during august september and some part of october ) when they preparing not only a jam but also some other vegetables (like tomato paprika pickles cabbage etc ) for preserving during cold winter days
I just made a batch of strawberry jam and it seems a little thin. Will it thicken when it is totally cooled?
May I ask a question instead of commenting? For whatever reason, this year my raspberry crop is gigantic. I have successfully made 3 batches of jam and have at least enough berries for 4 more batches. I would like to freeze the berries and make more jam later, but here’s my issue. In the past when the berries are thawed I end up with almost equal amounts of berries AND juice. Do I stir the juice back into the berries and then measure the combination for the jam? Or just measure the berries and use the separated juice for something else? I do sieve a portion of the berries to cut down on the seeds and then measure. Am I careless in freezing the berries and that’s why I get all the juice/berry separation? When I use freshly picked berries I don’t have this issue, Help!
Here’s what we suggest for making jam from frozen berries: drain most of the juice, use pectin, and cook it after sugar is added for at least 4 minutes.
Make jelly from the juice!