
Learn All About Canning and Preserving Your Own Food
Ever been curious about how to can? From mouthwatering tomato sauce to crisp pickles to luscious jams, canning captures fresh produce at the peak of flavor—so you can store it through the winter! Learn how to can with our beginner guide!
What Is Canning?
Think of canning as a form of cooking. Instead of cooking one meal for immediate consumption, you are cooking food that you can save and store away for months! Why do this? Because canning allows you to capture the best flavors at the peak of season—to enjoy all-year long! Imagine the amazing taste of garden-fresh tomato sauce in the middle of winter.
Canning is a method used to preserve fresh food in jars using high temperatures to kill microorganisms and inactivating enzymes that could cause food to spoil. The heating process pushes air from the jars, creating a vacuum seal as jars cool. Without air, the bacteria, yeasts, and mold will not grow and food won’t spoil.
Read Next
The Two Canning Methods: Water-Bath and Pressure Canning
To can your produce properly and safely, follow one of these methods: water-bath canning or pressure canning.
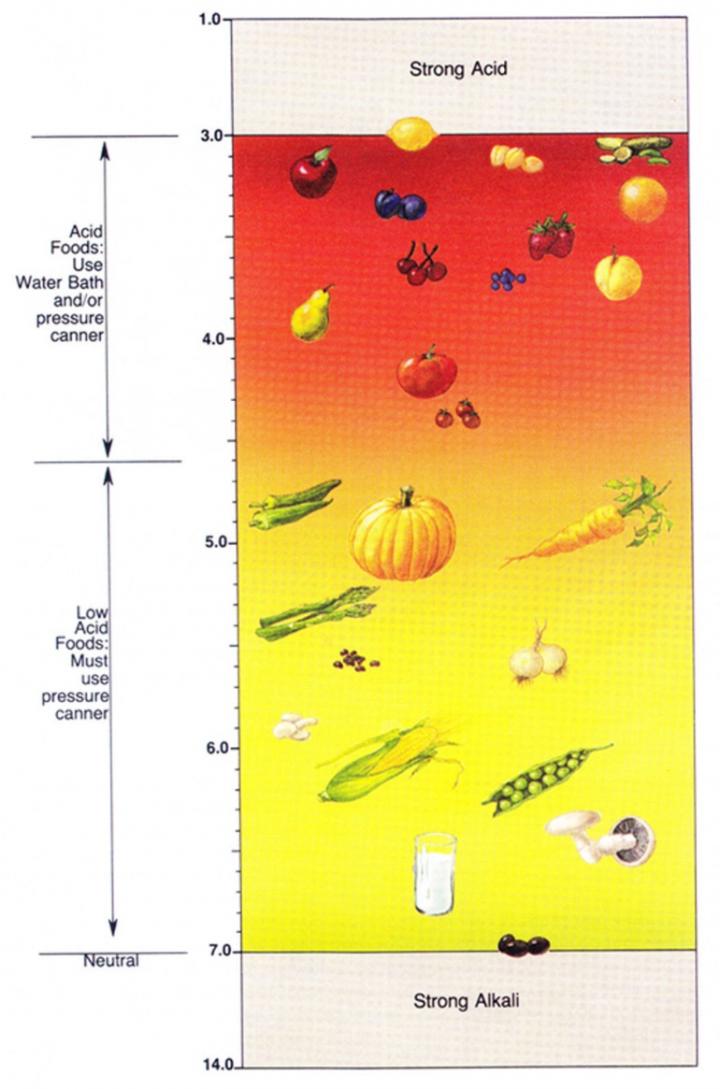
Which method to use? This depends on the acidity of the food you are canning: Is the food you are canning high or low in acid? In other words, does the food have a high pH or a low pH? A pH of 4.6 is the dividing line; a pH higher than 4.6 means less acidity (“low-acid foods”), and a pH lower than 4.6 means more acidity (“high-acid foods”).
We don’t expect you to know the acidity level of every food so we’ll list this information below.
All you need to know is: Low-acid foods must be processed using pressure canning, while high-acid foods may be processed using either water-bath canning or pressure canning. You must use pressure canning for low-acid foods to prevent bacteria and toxins—which thrive in a low-acid environment—from surviving. Safety first!
1. Water-Bath Canning
Water-bath canning is the simpler of the two canning methods, as it involves boiling your food in glass jars in a big pot of water. There are pots specifically designed for this—called water-bath canners or boiling water canners—that consist of a large pot, a rack insert, and a lid. However, large, deep pot will do, as long as you have a rack that fits inside it and a lid.
Water-bath canning is a lower-temperature canning process (212°F), which makes it safe ONLY for high-acid vegetables and fruits. (Remember that low-acid foods must be processed in a pressure canner.)
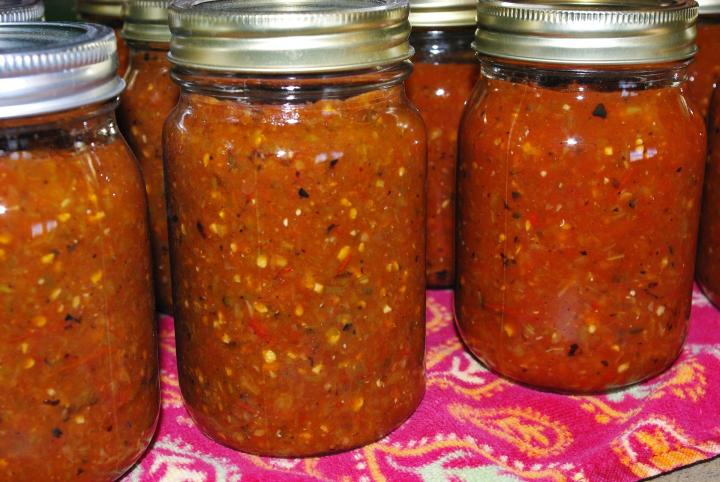
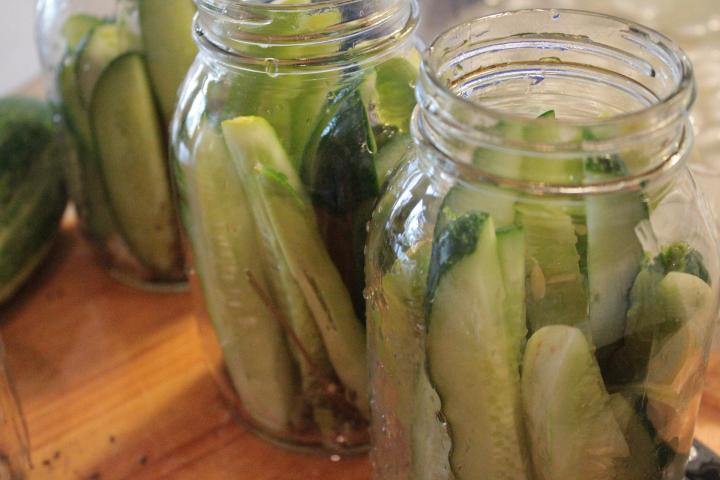
- High-acid foods include fruits, pickles, tomatoes, sauerkraut, relishes, jams, jellies, salsas, marmalades, and fruit butters. It’s the acidity of these foods—in addition to time in a boiling water bath—that helps preserve them safely without the use of high pressure.
- If it’s your first time canning, start with the boiling water bath method! Make some pickles or a yummy berry jam!
Water-bath canning is not as big of an investment as pressure canning—and is more straightforward. Let’s call this “no pressure” canning!
To learn more about water-bath canning, see: Water-Bath Canning: Supplies and Getting Started
2. Pressure Canning
Pressure canning involves the use of a pressure canner, which is a device that consists of a large pot, a rack insert, and a fitted lid with a dial or pressure valve. The high pressure created inside the canner when it is heated allows the temperature inside to get much hotter (240°F) than it could in a water-bath canner. This kills off any harmful bacteria, toxins, molds and yeasts.
Low-acid vegetables such as green beans or corn MUST be processed at a higher temperature—240°F at sea level—to prevent the growth of bacteria, especially Clostridium botulinum. To maintain the higher temperatures for the proper length of time, you need to invest in a pressure canner which will get the job done.
- Vegetables that are low-acid include: artichokes, asparagus, carrots, corn, green beans, lima beans, mushrooms, okra, onions, peas, potatoes, pumpkin and winter squash (in chunks).
- Fruits that is low-acid includes: cantaloupe and watermelon. (All other fruit is high-acid including berries and cherries, grapes, nectarines, oranges, peaches, and plums.)
Pressure canning is also used to preserve low-acid foods such as meats, poultry, seafood, chili which also require a higher temperature to raise the heat inside the jars above boiling and long enough to kill harmful bacteria. Pressure canning can be fun and satisfying, but it does require a “canner” to get started and you need to follow direction—no ad-libbing!
If you’d like to preserve low-acid foods but don’t have access to a pressure canner, consider preserving them in other ways. Broccoli, corn, and green beans taste much better when frozen, and they will have better texture when prepared using your favorite recipes. For best results when freezing, blanch the produce briefly in boiling water, remove and cool down quickly in ice water, drain, and pack the produce in freezer bags or containers.
To learn more about pressure canning, see: Pressure Canning: How to Use a Pressure Canner
Canning Supplies
There are a few basic supplies which you’ll need in order to can at home:
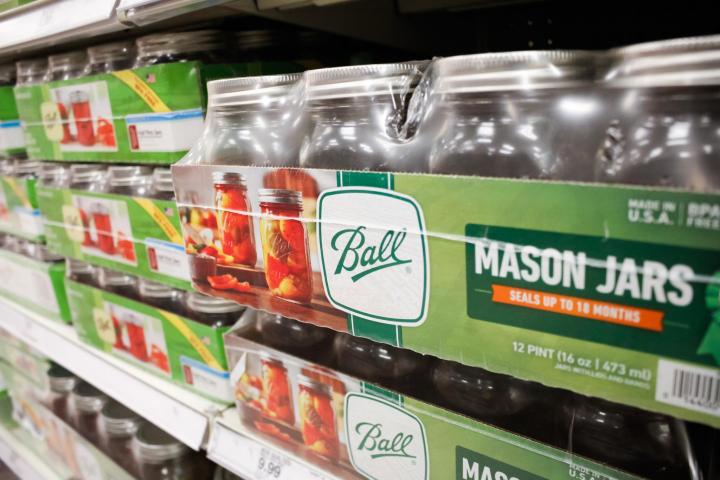
- Canning jars, lids, and screw bands: Only use clean jars without cracks or nicks in them. We recommend using the tried-and-true Ball brand mason or Kerr brand jars.
- Water-bath canner or pressure canner:
- For water-bath canning, it isn’t necessary to purchase a special water-bath canner as long as you have a pot that has a fitted lid and is large enough to fully immerse the jars in water by 2 inches—and that will allow the water to boil when covered. You’ll also need a rack that fits inside the pot or canner—a cake cooling rack would do.
- For pressure canning, only use a pressure canner made specifically for canning (Presto or All American) and not a pressure cooker.
- Jar lifter: Large “tongs” that help to pick up hot jars and place safely in the pot with hot water and take them out of hot water after processing.
- Ladle: A ladle helps to spoon food into canning jars.
- Funnel: A wide-mouth canning funnel make it easier to fill your jars without spilling.
Where to Find Canning Supplies
Many websites, hardware stores, craft stores, and other retail outlets sell kits that incorporate most of these canning essentials, sometimes along with other handy tools such as magnetic lid lifters, headspace-measuring tools, plastic bubble removers, and jar scrubbers—all the equipment needed to be successful.
Except for single-use lids, which you must buy new every year, you can reuse mason jars, screw brands, the water-bath canner, food mill, and stockpot for many years. You’ll often find these items in good condition at thrift stores, yard sales, or in the basement of a friend or relative who’s given up on canning. If you find a nice canner with a domed cover but no rack, you can probably find one that fits your kettle in a local hardware store, farm store, or online.
Make sure you check each jar, especially the rim, for small cracks or chips each time you use it. Also, don’t attempt to use a rusty canner. I’ve learned the hard way that rust spots may spring leaks during processing, causing the flame on my gas burner to flicker or dousing it entirely, and leaving me scrambling to find a substitute canning pot.
10 Tips to Know Before You Start Canning:
- Always use fresh produce that’s in peak condition. Canning is not for overripe fruits or vegetables because they are on their way to spoiling!
- Gather all your ingredients and equipment and make sure you have everything you need before you start. Halfway through the process is no time to be running to the store.
- Follow recipes and directions exactly. No improvising because your family’s safety depends on doing this correctly.
- Sterilize the jars by washing and then keeping them hot in a pot of boiling water until you are ready to fill them. Using the dishwasher will also get the job done without the pot of boiling water!
- Use real canning jars (Ball or Kerr), screw bands, and new lids when you can. Lids on the market today do not need to be heated to activate the sealing compound before placing on the jar top.
- When you fill the jars, do not fill to the very top. This is called “head space” and can vary depending on your recipe (1/4 inch or 1/2 inch). If you overfill the jars, the food may interfere with the lid’s sealing compound and your jars will not seal properly.
- Also, important is to wipe the jar rim and threads clean before putting on the lid and screw band. The band is tightened but only finger tight.
- Using the jar lifter, place each jar on the rack in the boiling water. Make sure that the jars are covered by at least 1 to 2 inches of water, cover with lid, and bring the pot to the boil. Start counting processing time once the water has returning to a boil.
- When processing time is done, turn off the heat and remove the lid venting the steam away from yourself. Remove each jar with the jar lifter and place upright and 1 to 2 inches apart on a cloth towel to cool. Let jars cool 12 to 24 hours.
- One sign that your jars have sealed properly is a “popping” or “pinging” sound” you hear as the jars cool. Jars that don’t seal can NOT be stored but rather place in the fridge and use within a few days.
- In general, your canned foods should last all year long, as long as they are stored in a cool, dry place. A broken seal is a sign air has gotten in. A bulging lid or a lid that seems corroded or rusty is also is a sign of spoilage.
- When you do open your cans, if you ever see mold or bubbles or a cloudiness, that is a sign that the seal popped and it’s spoiled. Do not eat!
Note: Guidelines for safe canning are always being updated. The National Center for Home Food Preservation is the trusted resource for canning regulations and more information.
Canning Safely
It’s important to know the food you’re planning on canning. More specifically, you need to know whether it is a low- or high-acid food, which dictates which canning method to use: water-bath or pressure canning.
The biggest concern is botulism poisoning. Botulism is an illness caused by the botulinum toxin, which is produced by Clostridium bacteria. These bacteria occur naturally in soil and don’t usually present a threat to people. However, they are a very hardy type of bacteria and thrive in low-acid, low-oxygen environments, like those created when we can foods. When food is canned improperly, the bacteria grow and produce their deadly toxin, botulin, making the food unfit for consumption. It’s critical that the environment inside the canned goods is inhospitable to the bacteria by using high heat (240° F) for low-acid foods or by high acidity to inactivate any toxin present.
If you are planning to pressure can, we also suggest that you have your pressure canner checked. Call your county extension office as many will check your pressure canner for a small fee.
Let’s Get Canning!
To avoid canning burnout, start with a small project at first. I love to can pickles. Most pickles need only 5 minutes processing in boiling water. Lift jars out, removing one jar at a time! Spread them out on a cloth towel or wooden countertop to cool. If you hear popping noises, it is the jars sealing. Once the jars are cool check the seal; the center of the lid should be depressed. If a jar doesn’t seal put it in the fridge to eat right away. The sealed jars can be labeled and stored in the pantry for winter.
The sight of those gleaming jars full of delicious food is very satisfying!
Ready to get started? See our beginner guides:
- Guide to Water-bath Canning (with recipes)
- Guide to Pressure Canning (with recipes)
This Canning Guide was updated and fact-checked as of July 2020, by Christina Ferroli, PhD, RDN, FAND. If interested in nutrition counseling and education practice to make healthier choices—or, simply stay up-to-date on the latest food, nutrition, and health topics—visit Christina’s Facebook page here.
Robin Sweetser

Introduction to Preserving
Freezing
Making Quick Pickles
Making Quick Jams: Refrigerator or Freezer Jam
Water-Bath Canning
How to Can Tomatoes
How to Can Pickles
How to Can Jam and Jelly
Pressure Canning
Drying
Salting and Brining


I want to know if I have to add any ingredients to the fruits before boiling.
Hi, Carmen. It all depends on the recipe you are following. We would suggest doing a search for the fruit you want to can, then choose the recipe that works best for you and the amount of produce you have.
The choice of preservation method (water bath or pressure) is also influenced by the acidity and sugar content of the marinade. With a marinade with a higher acidity or sugar content, many vegetables (which have low sugar and low acidity) can be canned in a water bath. Therefore, finding a good recipe is key. Am I thinking right?
Just a warning I've heard about on social media apparently the vinegar being sold now is 4% acidity and you need 5% acidity to can safely
Thanks for bringing that up! That is very important to note.
Those cheap lids didn't always seal. I use Those to make broth for my dogs' dry food.
When you finish processing with a pressure canner, do not Slide, but pick up and move the canner off of the burner to a cool burner on the stove and Leave it!
Best to take off the lid the next morning. Jars/produce will be fine. Surprisingly it will still be warm.
Whether hot water bath or canning, I put my jars on a large, wooden cutting board to cool.
Broth is Wonderful to make and add to recipes! I have made beef broth, pork broth, chicken broth and turkey broth. I freeze the bones and add old vegetables to it. You strain those out.
Most of the time your recipe calls for 1 pint of broth. Grocery stores sell it in quarts and many people have to dispose of 1/2 of it. Therefore, I can broth in pints or 1/2 pints.
Quarts can be difficult to hot water bath. Even my new a much better hot water bath canner still boils over.
Best 1st time vegetable to Can? Tomatoes. I have even eaten a 10yo jar of tomatoes that was misplaced. Always remove the lid and smell. Bad lids will buckle or not seal.
When Totally cool your screw tops will come off easily if you wiped the rim.
I Never add citric acid and have never had any of the 100's of jars of tomatoes go bad on me.
Amazon has plenty of lids.
Good luck finding canning jar lids. I haven't seen any in many months and no one seems to have an answer as to why they are un-available.
it has to do with self-sufficiency and the control of food. there is alot of sabotage going on with power and control. like henry kissinger said "control food,control people.
it is sad
god bless
I use the water bath method for canning tomatoes. Just to make sure that the tomatoes are acidic enough, I always add a teaspoon of citric acid per quart. I like to sterilize my jars in the oven. After a through washing in dish soap and warm water, I preheat the oven to 300 degrees and heat the jars for about 30 minutes before filling.