
Canning Whole Peeled Tomatoes (Crushed Tomatoes)
Here’s how to can tomatoes (whole peeled tomatoes) using easy water-bath canning. Enjoy that garden-fresh tomato taste all year long and use it to make fresh spaghetti sauce, lasagna, chili, soups, and stews. Anyone can do this! Here’s how to can your tomatoes—using just tomatoes and lemon juice!
Please Note: This canning whole tomatoes guide uses easy water-bath canning. You can certainly use a “canner” if you have one, OR you can use a large deep stockpot with a flat bottom and lid.
Making canned tomatoes is a tradition that families remember years later—and can even pass down to the next generation. Save a couple of days in August or when tomatoes are at their peak, and enjoy preserving summer in a jar!
Read Next
If you are growing your own tomatoes, it’s important that you pick the tomatoes when ripe (not overripe). But if you are buying tomatoes, purchase tomatoes a few days in advance of processing day and allow them to ripen at room temperature. Farmers really don’t have the luxury of waiting until tomatoes are at peak ripeness, as the fruit becomes too easy to bruise at this stage, and tomatoes continue to ripen in the box or on the counter with the potential to spoil.
Harvest when the tomatoes are ripe and no more. The USDA recommends avoiding using tomatoes picked from dead or frost-killed plants.
Safety First!
Canning, while requiring knowledge, is not that difficult. However, we must add a safety precaution: Canning must be done right.
Improper canning techniques can lead to the growth of the bacteria, Clostridium botulinum, which produces a toxin (botulin) that causes botulism, which is a deadly illness. To prevent this bacterium from growing and releasing botulin in your canned goods, you need to lower the pH of your canning mixture - in other words, the canning mixture must be made acidic using lemon juice, citric acid, or vinegar.
High-Acid vs. Low-Acid Tomatoes
In the past, tomatoes were considered a high-acid food, which meant that they could be canned without the addition of an acid. However, we now understand that the acidity of a tomato depends on its variety and its ripeness, which makes it impossible to know for sure, if it is high- or low-acid. Therefore, tomatoes should always be treated as a low-acid food when it comes to water bath canning, and acid must be added to each jar of tomatoes and tomato products for safety’s sake.

How to Can Tomatoes: Crushed Tomatoes Recipe
This recipe is for “crushed tomatoes,” which resemble halved tomatoes in flavor and texture. They’re ideal for sauce, soup, and stew recipes.
While you may be tempted to add other ingredients, it’s best to stick to this recipe until you really know how to can, as it has been tested for safety, and it is a good introduction to canning at home.
How Many Tomatoes Do I Need?
To make 1 quart of crushed tomatoes, you’ll need about 3 lbs. of tomatoes (for 1 pint, about 1.5 lbs.). If possible, use a scale to measure out exact amounts. Or, if you don’t have one handy, know that three baseball-sized tomatoes or eight plum tomatoes equal about 1 pound. A typical water-bath canner holds seven-quart jars or nine-pint jars at a time.
Ingredients
- 3 lbs. tomatoes per quart jar (1.5 lbs. tomatoes per pint jar) Tomatoes should be free of cracks, spots, and growths
- Salt (optional)
- Bottled (not fresh) lemon juice or powdered citric acid
Supplies
- Pot with boiling water; pan of cold water
- Pot for cooking tomatoes
- Slotted spoon
- Wooden spoon or mallet
- Paring knife and cutting board
- Water-bath canner (OR a large deep stockpot with a flat bottom, a well-fitting lid and a rack that fits at the bottom)
- Quart- or pint-sized canning jars and lids (as many as needed), screw bands, cloth to wipe the jars, jar lifter (jar tongs)
- Funnel and ladle
- Marker for labeling jars
1. Preparing the Tomato Mixture
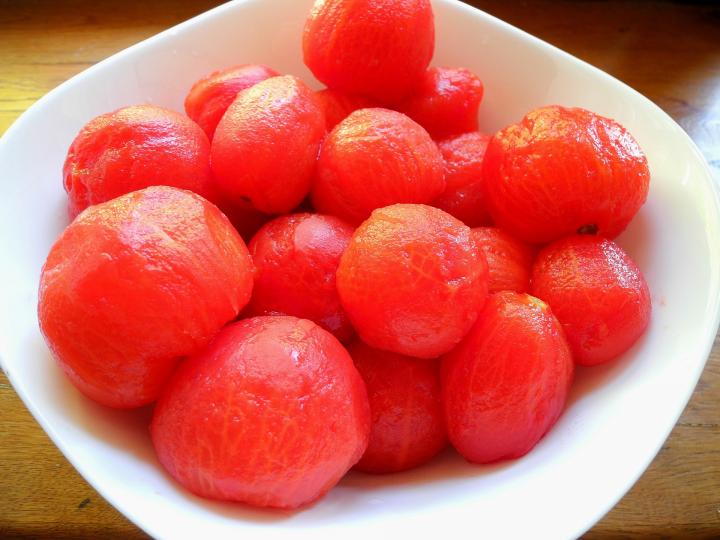
Set a pot of water to boil and thoroughly wash the tomatoes, removing any minor blemishes and forming an X on the bottom with a paring knife. Then, using a slotted spoon, dip the tomatoes (maybe three or four at a time) into the boiling water and leave until the skins slip off about 30 seconds.
Removing the tomatoes with the slotted spoon, they immediately go into a pan of cold water to cool down and then place on a clean plate while the rest of the tomatoes are processed.
Once all the skins are loose, I pull off the skin, and cut out the stem and tough part of the core. Placing the tomato on a cutting board, cut it into small pieces.
Then place approximately one-sixth of the tomato pieces into a large pot and crush them with a wooden spoon or mallet to liquefy them. Place the pot on a burner, setting it to medium-high heat. Heat and stir the tomatoes until they come to a boil, then add the remaining tomato pieces, gradually. These pieces don’t need to be crushed, as they will be softened by the heat and stirring. Once all the tomatoes are added, allow the tomatoes to boil gently for 5 minutes.
2. Canning the Tomato Mixture
Wash the canning jars and bands and set them aside—using your dishwasher makes this task easier.
Jars get used year after year, but lids can only be safely used once. The lids on the market today do not need to be heat-activated before use. Just make sure they are clean. Fill a water bath canner about ½ to ¾ full of water and set the canner on the stove to boil.
Next, line up the jars and add the acid to each jar. Use these measures exactly:
- 2 tbsp lemon juice or ½ tsp. citric acid in quart jars;
- 1 tbsp lemon juice or ¼ tsp. citric acid in pint jars.
It’s best to add the acid to the jars before adding the tomato mixture so that 1) you know for sure that you’ve added it, and 2) you don’t accidentally forget to leave room for them at the end!
- Also, add 1 teaspoon salt in the quarts or ½ teaspoon of salt in the pints for flavor, if you wish.
Once the water is boiling in your canner, you are ready to continue. With the jars lined up on the counter and the acid added, I ladle the hot tomato mixture into each jar, using a funnel to prevent spilling. Be sure to leave ½ inch of head space in each jar.
Next comes a VERY IMPORTANT step—it’s absolutely critical to wipe off the top of the jar with a cloth before putting on the lid. Any tiny particle of food left on the rim could cause a jar to not properly seal. Pop on the lid, adjust the screw band until finger tight, and prepare for processing.
3. Processing the Jars
Once the jars all have the lids and screw bands on, carefully place them in the water bath canner using the jar lifter.
Make sure that everything continues simmering while you are filling the canner and that there is at least 1 to 2 inches of boiling water above the top of the jars. Put the cover on the pot, bring to a boil, and start timing the processing.
 Source: National Center for Home Food Preservation
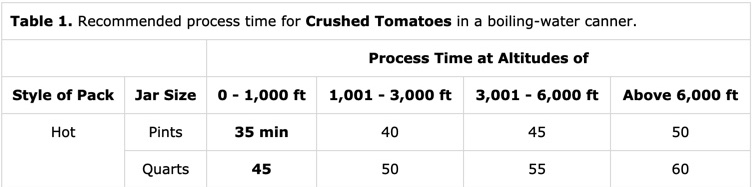
Note: Processing takes longer at higher altitudes, so consult this table to see how much time is required in your area. A small battery timer is handy for this. After cleaning up the accrued dishes, I take a break and read while my jars are dancing away.
Being mindful of the steam, check on your jars about halfway through the processing time to ensure that they are still submerged, boiling, and with at least 1 inch of boiling water covering them. Add more boiling water, if needed.
Once the timer dings, I turn off the stove and very carefully take the top off of the pot venting the steam away from me. With a nice wooden trivet or a cloth towel on the table or counter nearby, I slowly take out each jar using the jar lifter and place each jar apart to cool. Be sure that the jars are not located in a draft, as a cold breeze can crack the jars at this point. This is also why I move them slowly.
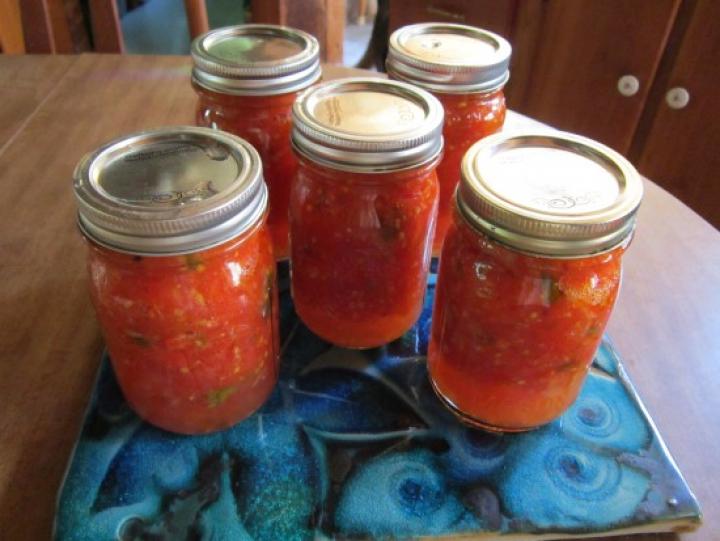
Once all of this has been accomplished, I generally call it a day. There will be a noticeable (and reassuring) “pop” as the individual jars cool and seal. I look lovingly at my beautiful trivet of summertime bounty, and I wait until the next day to finish the job.
The jars are cool by morning (or within 12 to 24 hours). I take off the screw bands (carefully) because they sometimes get food on them and leaving them on makes them rust. I test each lid by gently pressing down. Any that give or flex did not seal correctly. Refrigerate any that did not seal immediately.
The screw bands get washed and put aside for next year. I label each and every lid, this way you won’t have to scrub any labels off of the jar because the lid gets tossed anyway with the year and the contents. Into the pantry go the canned tomatoes to await use in tomato soup, stews, American chop suey (I cook the elbows right in the mix), or anything else I decide to make during the long winter months. Yum!
Learn More
- If you need more advice on how to can your vegetables or are looking to can more than just tomatoes, see our Water-Bath Canning Guide and Pressure Canning Guide.
- For more information, see the National Center for Home Preservation.
- In addition to canning tomatoes, you can also dry tomatoes in the oven or the sun. Whatever you choose, good luck making the most of your tomato harvest!
This Canning Guide was updated and fact-checked as of August 2020, by Christina Ferroli, PhD, RDN, FAND. If interested in nutrition counseling and education practice to make healthier choices—or, simply stay up-to-date on the latest food, nutrition, and health topics—visit Christina’s Facebook page here.
Celeste Longacre

Introduction to Preserving
Freezing
Making Quick Pickles
Making Quick Jams: Refrigerator or Freezer Jam
Water-Bath Canning
How to Can Tomatoes
How to Can Pickles
How to Can Jam and Jelly
Pressure Canning
Drying
Salting and Brining


ADVERTISEMENT
Do you put new lids on the cans after checking to see if the canned lids sealed? I am confused about the lids- screw lid, etc
Hi, Julia. You can reprocess the tomatoes within 24 hours if the lids did not properly seal. You will need to use new lids. Check the jars as well to make sure there are no cracks. If the jars are the problem, you can put the contents into new jars and reprocess.
I canned 9 quarts of tomatoes & did not add lemon juice or anything acidic. Will they be okay or do I need to pitch them?
Oh no, Barbara! To prevent bacteria from growing in the canned tomatoes they need an acid added. But if you just canned them, we would recommend using them right away. If they are canned from last year’s crop, we would not take the chance.
I use to always just put salt in mine. I have never had them spoil and kept some for several years they still were just as pretty when I used them as they were when i put them up . I do now though put lemon juice in them now but just because it is recommented to
Your photo shows green in the tomatoes, but not in your recipe. Did you add basil or green peppers?
I have never canned before and I am excited to try it this year! We use canned tomatoes from the store every week so I thought I would start with canning tomatoes.
The canning pot I plan to use holds 7 quart jars. I would like to can more than this. How do I do that? Is it like cookies, were I prepare the dough and bake one sheet at a time keeping the rest of the dough in the bowl in the fridge until it’s time to bake the next sheet? Do I prepare the tomatoes and fill 7 jars and process them, keeping the prepared tomatoes somewhere until it’s time to fill another 7 jars? Or do I fill all the jars and put the lids on and then process them in batches?
Thanks for your help.
Is it still recommended to heat the canning jars ? before adding the product to be canned . I see it's no longer recommended to heat the lids any more . Thanks for you reply .
help, I just canned 38 qts of tomatoes. the last jar I grabbed because I thought I had enough to fill it and I know I forgot to add the citric acid. I completed the task and realized one jar did not get the citric acid. the variety of tomatoes is Mariana and pony express. I am hoping these are of adequate enough acid to make this jar safe. I cannot find information about the acidity of different varieties. I feel like I will play Russian roulette with my tomatoes. I know the chances are slim but do you know if this variety will suffice with the acid level. I know heirloom tomatoes are low acid and also san Marzano. any information you have will be appreciated.
Adding the acid to all processed tomatoes is a must! Please do not use the jars that didn’t get citric acid added.
Reference from Michigan State Extension article: “Acidifying your home canned tomatoes: Tomato varieties have been changed through the years and as a result, many now have milder flavor and lower acidity than the in the past. Testing has shown that some current tomato varieties have pH values at or above pH 4.6; a few have values of pH 5 or even higher. Adding the recommended amount of lemon juice (or citric acid) lowers the pH of all tested varieties enough to allow for safe boiling water bath canning. Acidifying all tomatoes now is recommended because it allows for safe processing in a boiling water bath canner (and for a safe short process in a pressure canner). To ensure their safety after being preserved, they must be acidified as part of the food preservation process and they must be acidified whether you are using a boiling water bath canner or pressure canner.”