
Tomatos growing in the garden.
How to Grow Your Best Tomatoes Yet
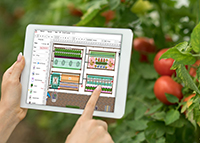
Become a better gardener! Discover our new Almanac Garden Planner features for 2024. It’s easy, fun, and free to try!

There’s nothing quite like the taste of homegrown tomatoes. But they aren’t a plant that you can just leave to grow. Some knowledge and care is required in order to avoid common pitfalls. We’ll run through 10 tips and tricks for trouble-free tomatoes.
1. Choose the Right Variety
It may seem obvious, but the varieties you grow need to be suited to your climate. Choose cool-climate varieties for regions with shorter growing seasons and hot-climate varieties for very warm regions in order to ensure they can still produce fruit in summer.
Some tomatoes are more susceptible to disease than others, so look out for variety descriptions that promise good resistance to diseases such as blight. You may also want to seek out varieties known to give an early harvest, heavy yields, and, of course, superior flavor—or all of the above!
Read Next
Let’s review four criteria:
- Climate: If you live in a northern, cooler climate, your tomatoes may have a limited time to turn red. Look for varieties that are for cool climates and short seasons, such as ‘Early Girl’ (matures only 50 days after planting); most other short-season varieties will be cherry tomatoes. There are also tomato varieties that are heat-tolerant and best for hot Southern gardens, such as ‘Heatmaster’ and ‘Arkansas Traveler’. See Bonnie Plants’ Tomato Chooser to find the variety with the traits that fit what you’re looking for.
- Type of tomato: Do you want tomatoes for pasta and sauce? Or, a great slicer? Or bite-sized? Romas, plum, or “paste” tomatoes are excellent for cooking because they contain plenty of flesh for sauces. Beefsteaks are chunky and juicy, so they are great in salads and on burgers. Cherry tomatoes have the sweetest taste and are wonderful as snacks, and for children. See our post on growing cherry tomatoes!
- Growing habit: Tomatoes are either determinate or indeterminate. Learn the difference and remember that indeterminates must be staked early to avoid disease!
- Determinate or “bush” varieties stop growing at about 3 feet tall. These compact plants fruit all at once, and tend to be good for making sauce or canning (when you’d want a lot of tomatoes all at once). Most bush tomatoes like a cage and some are well suited to pots.
- Indeterminate varieties will keep on producing fruit throughout the season until the plant is killed by frost. These plants get quite large and will definitely need some kind of tall supports (at least 5 feet), so stake, or cage plants early. If fruit and foliage sprawl across the ground, they will be more prone to disease, and your harvest will be affected. Indeterminates are great for salads and sandwiches, since they produce fewer fruit at a time, but for a longer period of time.
- Disease-resistance: Tomato names are usually followed by capital letters that stand for resistance to certain diseases. Pay attention to these letters, especially if you have had one of these diseases in your climate before. If you live in a temperate climate with lots of moisture, consider blight-resistant tomatoes. Hybrid examples are ‘Iron Lady,’ ‘Defiant’, ‘Mountain Magic’, ‘Mountain Merit’, and ‘Jasper’. Heirloom examples are ‘Lemon Drop’, ‘Matt’s Wild Cherry’, and ‘Mr. Stripey’ (also called ‘Tigerella’). ‘Jasper’ is a tasty red cherry. See our article on avoiding blight with the right tomato.
Read more about choosing the right tomato variety.
2. Provide Heat and Full Sun!
Tomatoes are heat-lovers. Be careful not to plant tomatoes in the ground too soon. Your soil temperature must be consistently over 60 to 65 degrees Fahrenheit (15 to 18°C). Warm the soil with black plastic a couple of weeks prior and protect seedlings from the cold with sheets or row covers.
Tomatoes LOVE sunshine! A position in full sun (that means an average of at least 6 hours a day) gives the best results in most areas. Sunshine is like water, and they’ll soak it up and produce more fruit! Also, make sure your tomatoes aren’t too crowded so the sunshine can reach their lower leaves. Plant seedlings (small plant) 30 to 48 inches apart, with rows set 48 inches apart.
- If you are planting from seeds. If you are seeding yourself, it is critical to provide strong, direct light. (Note: If it’s after your frost date, it’s too late to sow tomatoes from seed. Buy transplants instead.) Northern gardeners should use grow lights 14 to 18 hours a day or seedlings will be spindley. Learn how to start tomatoes from seed.
- Planting seedlings or transplants in the ground. If your seedlings were grown indoors or in a greenhouse, do not just set starter plants in the cool ground. Outdoor tomatoes need to acclimatize to outside conditions to avoid cold shock. If the plants have been inside a greenhouse, harden them off over a period of two weeks. Begin by leaving plants outside for just a couple of hours a day, then gradually increase the length of time they spend outside, avoiding windy days. Bring plants under cover if temperatures threaten to drop below 40 degrees Fahrenheit (4°C). Plant outside only after all danger of frost has passed.
3. Provide The Right Growing Conditions
- Add plenty of organic matter before planting. Quality garden compost or well-rotted manure, applied lavishly, can supply enough nutrients to last the entire season and will help retain moisture—a lifesaver during the heat of summer! Two weeks before planting your tomato plants outdoors, beef up that soil! Dig into soil about 1 foot deep and mix in aged manure or compost.
- Tomato plants also need space – not only to reach their full potential, but to encourage a good flow of air between plants, which should help to reduce the threat of disease. In most cases, this means leaving at least two feet (60cm) between plants.
- Finally: Don’t plant tomatoes in a garden bed that’s grown the same plant family (for instance, potatoes, eggplants, or peppers) within the past two years.
4. Plant Deeply and Provide Support
Most plants need to be planted at the same depth they were growing at as a seedling or young plant. But not tomatoes! When you plant tomatoes, plant a little deeper than they come in the pot, all the way up to the bottom few leaves! Tomatoes root along their stems, so this trick helps them develop stronger roots.
Tomatoes can be planted a lot deeper because they can produce new roots anywhere along their stems. By planting deeper, we can create sturdier, more resilient plants that are primed to thrive. Plant deep at every stage: when transferring seedlings into their own pots by sinking them right up to their lowest leaves and again when planting them into their final growing spots. Don’t be afraid of dropping plants quite deeply into their planting hole—or removing a few low branches to do so. It feels counterintuitive, but you really will get superior plants because of it!
With leggy transplants, dig a trench and lay the stem sideways, bending gently upward. Snip or pinch off the lower branches and cover with soil up to the first set of leaves. This extra root growth will produce a stronger, more robust plant.
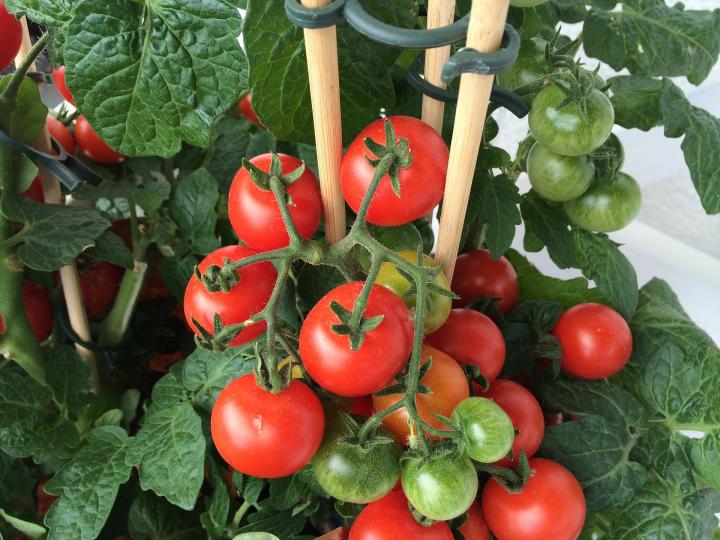
Tomato plants naturally sprawl. It’s one of the reasons they produce roots from their stems—it enables them to draw up more moisture and nutrients wherever they touch the soil to fuel growth. But fruits left in contact with the ground soon spoil, which is why we train them up off the ground.
A sturdy stake may suffice for determinate or bush types of tomatoes, which don’t grow so tall. But indeterminate or vine tomatoes need to be supported along their entire length, and usually need regular tying up, too. Use strong bamboo canes, garden twine stretched taut, or tall tomato cages to keep these plants fully supported.
Learn how to support your tomato plants with cages and stakes.
5. Mulch Your Tomatoes
Don’t forget to add a blanket of mulch! It helps to conserve moisture (tomatoes love their water!) and keeps soil-borne disease spores from being splashed up onto the plants. There are many good mulches to choose from—shredded pine bark, straw, shredded leaves, grass clippings, composted leaves, or even a thick layer of newspaper. Oddly enough, red plastic has been found to increase the fruiting of tomatoes by 12 to 20%. Read our Mulching Guide for more information.
6. Remove Leaves and Suckers
“To pinch or not to pinch?” is a debated question. All tomatoes have suckers or side shoots that form between the main stalk and the side branches during the early growth of their plants (the crotch joint).
- You definitely do not want to pinch determinate (bush) varieties, or you will have only a few fruit clusters. Since determinates bear fruit only on the ends of their branches, never clip them off, or you won’t get any fruit at all!
- However, most gardeners do pinch indeterminate tomatoes (the type that keeps growing). You can pinch out the side shoots or suckers when they are young and tender. The best time is first thing in the morning when the plant is turgid. Just snap them off with your fingers.
The pros to pinching: Most gardeners pinch weekly, letting one or two suckers grow so each becomes a leader with leaves, flowers, and fruit of its own. Some experts, like Mel Bartholomew (who invented “Square Foot Gardening”), remove all suckers. Many sources emphasize pinching of lower suckers and the oldest leaves from the bottom of the stem. This reduces fungus problems because the leaves are usually shaded by the rest of the plant and nearest to the soil. Spraying weekly with compost tea also seems to help prevent fungal disease. Learn more about compost tea.
The cons to pinching: Pinched plants have larger tomatoes and bear earlier, but they also have fewer tomatoes overall. Over-pruning can cause sunscald—a yellow sunburned patch that eventually blisters. Unpruned plants yield about twice as much fruit as pruned ones do, but it will take longer for the fruit to ripen. Pruning also affects flavor. The more foliage a plant has, the more photosynthesis takes place, which produces more sugars in the fruit. The excess foliage shades the fruit and insulates it from the summer heat, making it ripen more slowly and improving the taste.
Bottom-line: Experiment. Of course, if the foliage on your plants is so thick that no fresh air can reach the center of the plant, it definitely needs to be pinched. If your indeterminates are reaching for the stars, you can also top them above the highest blossoms to keep them in bounds and encourage green fruit to ripen.
7. Water Consistently?
Watering is one area where getting it right counts! Juicy tomato plants need 1 to 2 inches of water per week. But not all at once. Aim for consistent moisture as plants are establishing, and then, once they begin to set fruit, let the soil or potting mix just about dry out between waterings. It’s okay for the foliage to show early signs of wilting before watering, but don’t push it too far.
Inconsistent watering—seesawing between dust-dry then sodden soil—encourages water to rush into the ripening fruits, causing them to split. Water-stressed plants remove calcium from the fruit and send it to the shoots to keep the plant growing. Along with uneven moisture, excessive nitrogen, and high soil acidity contribute to blossom-end rot, a very common tomato problem.
The best time to water is in the morning when plants are at their most receptive to moisture. Water deeply. A soaker hose is an efficient solution; just position the hose in the garden and pile mulch up and over the hose.
8. Feed, Feed, Feed
The tastiest tomatoes are gleaned from plants that have access to all the nutrients they need.
Besides prepping the soil with organic matter (compost), most gardeners also apply a slow-release organic fertilizer to the soil at planting time, or apply regular liquid feeds using a product specifically formulated for tomatoes (which often has extra calcium).
We all have little secrets up our sleeves, too, for giving tomatoes a boost!
- One gardener I know adds a handful of bonemeal to the soil (which adds phosphorus and calcium). Note: pH testing is important because if your soil has a pH of 7 or higher, bone meal will be relatively ineffective. Bone meal with high-nitrogen soil additives can also help balance out high-nitrogen fertilizers like rotted manure.
- Another gardener crushes up eggshells and adds them in and around your planting holes for added calcium and to avoid blossom end-rot. (See more about this below.)
- Another popular trick is to add a pinch of Epsom salts to the soil. Added early in the season, Epsom salts can increase germination, early root and cell development, photosynthesis, and plant growth, as well as prevent blossom-end rot.
- Some folks side-dress the plants with a dose of liquid seaweed or fish emulsion or feed their tomatoes compost tea to keep heavy-feeding tomato plants happy. Soak one part of organic compost in one part of water, let it sit for 24 hours, filter the “tea,” and use it to nourish plants.
Just stay away from high-nitrogen fertilizers unless your plants have yellowing leaves. Too much nitrogen will cause lush foliage growth but give you little or no fruit. If the leaves on your plant are purple, they are calling for more phosphorus. This is the most important nutrient for fruit production.
9. Defend Against Disease?
- Blossom-end rot is a common complaint typically caused by a lack of calcium in the fruit. There are some myths that eggshells can solve this problem. However, BER is due to irregular watering, such that the plant get the minerals circulated efficiently, causing problems at the fruit end of things. Regular watering, in most cases, is the best way to avoid BER. However, as a general soil amendment, adding crushed-up (preferably pulverized into dust) egg shells DOES certainly help to add calcium to the soil - more as a precaution over time. However, the very best way to avoid BER is just regular watering, together with the application of a purpose-sold organic liquid tomato feed or something similar.
- Blight is a far more serious threat. This disease can lay waste to an entire crop within days. Good airflow will help reduce problems, as will watering at the base of plants to avoid wetting the leaves. Many gardeners even remove the lowest leaves specifically to improve airflow and minimize splashback when watering. Laying a mulch of clean, dry organic matter such as straw can also reduce splashback. If blight is always a problem in your area, then you may find you can only successfully grow tomatoes in a greenhouse or under other protection.
- Then there are the tomato hornworms! They can strip foliage with ruthless efficiency. They’re also annoyingly good at camouflage! Do what you can to pick them off as you come across them, or deal with them once and for all by heading out at night with a blacklight or UV light, which will show them up as clear as day—or rather, clearer than day!
Pro Tip: Defend against disease with aspirin! This little pill stimulates an immune response. Dissolve roughly 600 mg of aspirin for each gallon of water, then spray it on your plants. They’ll think they are under attack and will up their defenses for the remainder of their lives, making them less susceptible to real attacks, including blight! Not only that, but spraying aspirin onto your tomatoes is said to improve their taste and even their vitamin C content. It will even make plants more tolerant of drought and cold.
As you grow your tomatoes, you may run into some other problems. Tomatoes will attract pests and diseases, but if you keep an eye out for them, you can avoid many problems. Learn more about tomato diseases and disorders. And also see how to think ahead and troubleshoot tomato problems.
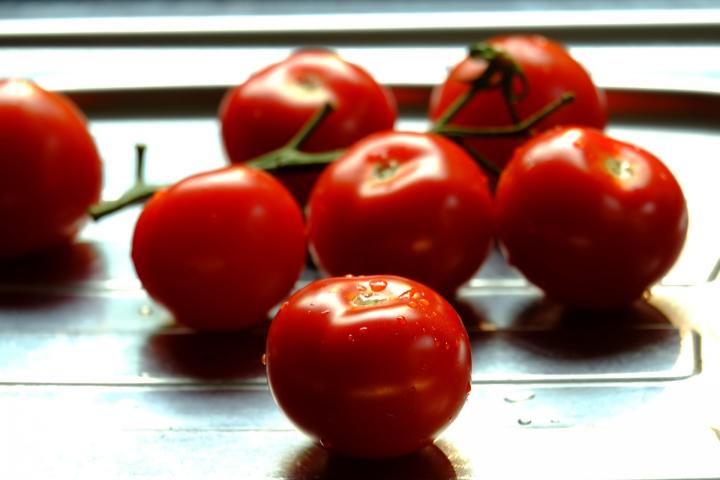
10. Harvest For Maximum Flavor
Harvesting tomatoes is an art in itself. You can harvest once the tomato is red and gives slightly to the touch. Don’t wait until it’s soft! Or you can actually harvest earlier when the tomato is half green and half pinkish-red (called the breaker stage) and ripen off the vine with no loss of flavor, quality, or nutrition.
- If you harvest a vine-ripe tomato, pick in the afternoon if you can. The warmth of the sun will have developed all those rich aromas, and if you’ve watered in the morning, the fruits will have had time to really concentrate that flavor.
- If you harvest earlier at the breaker stage, this could lighten the fruit load on the plant and reduce the chance of cracked fruit. This may be helpful in areas with extreme heat. Tomatoes held at cooler temperatures will ripen slower if you don’t want to harvest (and eat) too many at the same time. You can speed up or slow down the process by raising the temperature to an optimum eighty-five degrees or lowering to a minimum of fifty degrees.
Don’t store tomatoes in the refrigerator—that’ll just kill the flavor. At room temperature, tomatoes will keep for 4 to 7 days. Partially ripened tomatoes should not be refrigerated either; refrigeration stops the ripening process. Keep them on the countertop and aim to eat, cook, or process them within the next few days!
Video: See Simple Steps to Growing Masses of Tomatoes
Here is the Almanac’s complete Tomato Growing Guide for everything you need to know about planting, growing, and harvesting tomatoes!
What is your favorite tomato variety?
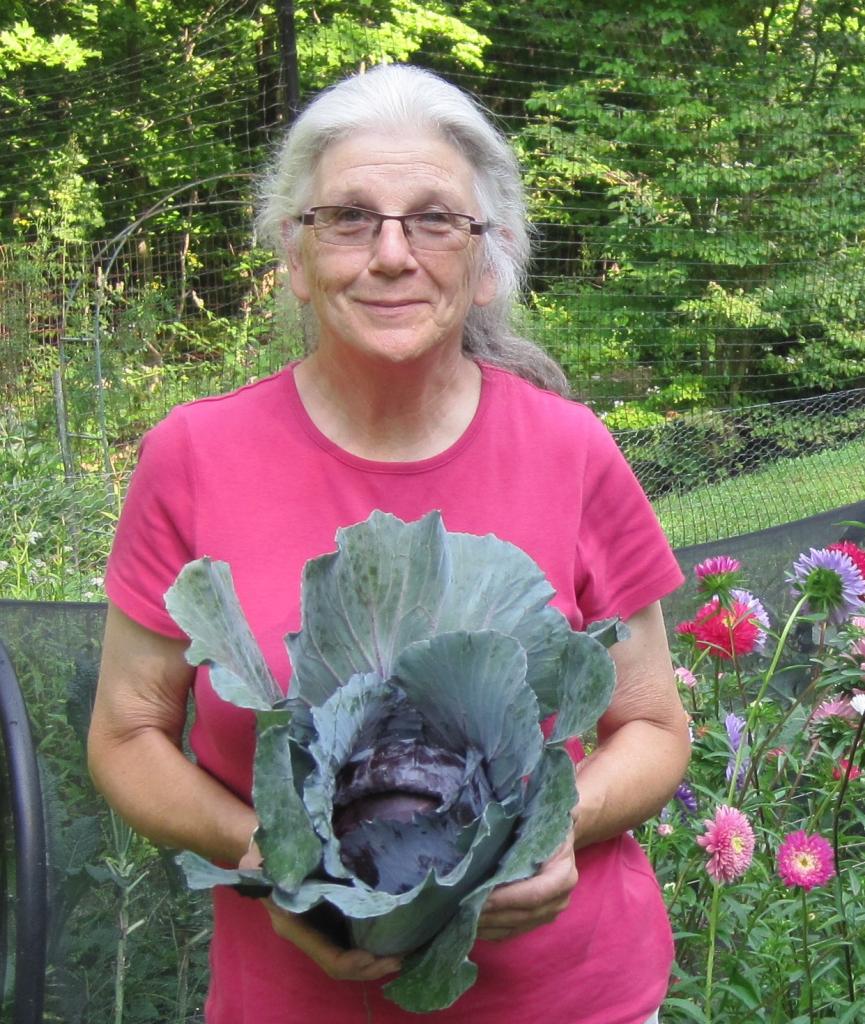
Robin Sweetser


ADVERTISEMENT
Make the letter J with the root and plant in the evening. Check soil for grubs and install a paper cup around base. Put a brown bag over plant and remove after the sun comes up. Finally in 1960, my grandfather used to put fresh horse manure in the fall before the next spring as not to burn the roots.
Fix your watering schedule, how often and how much affects calcium uptake. Soil should have enough calcium. Get your soil tested before adding something that is not needed. If there is calcium, then water will be needed to a good flow uptake in calcium.
"Correction to blossom end rot. This is caused by a lack of calcium uptake from the soil and resulting in little transfer to the fruits during dry weather. Too much water can interfere as well.
Blossom-end rot happens when a number of conditions come into place. The disease is especially prevalent when rapidly growing plants are exposed to wide fluctuations in water amounts. Calcium cannot be taken from the roots to the rest of plant and sustain healthy tomatoes."
https://extension.psu.edu/programs/master-gardener/counties/lackawanna/news/2016/wide-fluctuations-in-water-contribute-to-summers-blossom-end-rot-in-plants
Many educative information has been received from this article about improved tomato cultivation. If we leave chemical fertilizers and pesticides and move towards traditional farming, then in future we can be healthy by growing healthy food grains, fruits and vegetables.
yup if you want half eaten , bug infested, and lots of extra work.....thanks for modern ferts you will have a bounty of crops and extra to share...organic may be for those who have all day to care for their crops but for the most of us use fertilizers and insect controls, natural if you please, but don't over look the wonderful effects you get with modern farming methods. sure i use compost but i always use 13/13/13, bloodmeal, lime as needed and miracle grow mid to late season....
Hi! I am growing "sandwich tomatoes" as they are called. It's my first attempt at this. This video has been very informative and I will certainly try some these techniques. I live in Olive Branch, Mississippi (the mid-south). So any more tips for this region would be helpful. Thank you for the help!
I though I failed to pull off a sucker on a Jasper seedling that was gifted to me. I assume Jasper is the correct variety as it had produced vigorous uniform sized small fruit. I traced this "sucker" down to the bottom of the plant and it was actually growing out from the end of one of the first fruiting stems. At the very end of the fruit stem, it enlarges and takes a sharp 90 deg upward bend, and continues to vine. I just noticed the same thing happening on a yellow pear variety. This is the first year I have tried to keep up with pruning and the suckers. Is this normal and my tomatoes have just been too growing too wildly for me to notice in the past? I've taken some photos, but can't seem to link or attach photos.
I have tomatoes galore but they are green and not rippening am i inpatient or is there something i am doing wrong
Again, put green tomatoes in a brown paper bag and place on a open window sill, ripen quickly &. Check daily.
yes u are doing sum thing wrong....too many maters are green...it is called "fried green maters", other wise just wait, they will ripen or pluck em late season and store them in a box in layers and ck every few days and remove ripe ones...I have fresh maters as late as Jan the next year using this method....
It can seem like an eternity waiting for those luscious tomatoes to turn red but it will be worth the wait. You are not doing anything wrong!