
Freezing Spinach, Swiss Chard, and Beet Greens
Have more greens than you can eat? Freezing spinach and hardy cooking greens is so easy—and you can enjoy them all year long in soups, quiches, smoothies, and more! Here’s how to freeze leafy greens—spinach, Swiss chard, kale, and beet greens.
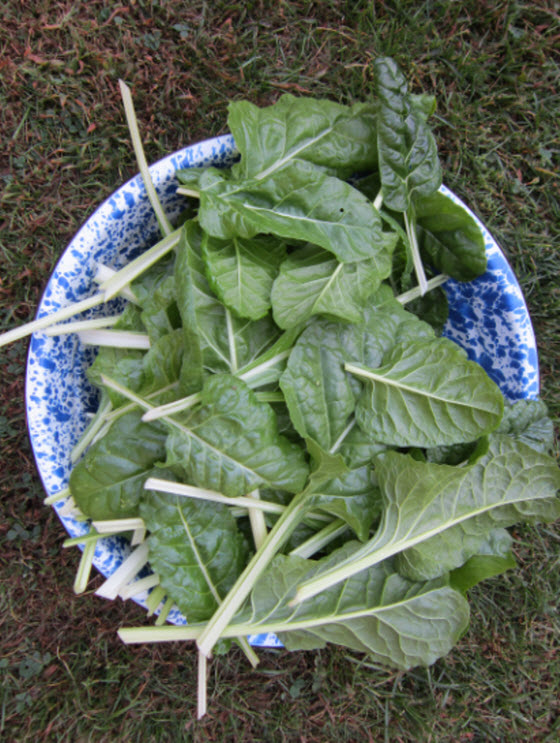
It doesn’t matter where you get your leafy greens—the garden, farmers’ market, farm stand, CSA, grocery store). As long as they are fresh, tender, and not wilted, you can preserve them.
You can freeze any hardy cooking greens; note that lettuce and tender salad greens are too delicate to freeze properly and is not recommended.
Read Next
If you are harvesting your own spinach and greens, pick them early in the morning before the heat of the day.
1. Wash the Greens
Select the tender leaves. Wash carefully in cold water to remove any dirt or debris. Sometimes, leafy greens can even have a bug hiding out in its leaves, so rinse more than once if insects freak you out.
- For spinach: Tear any larger leaves into small pieces, discarding the stems.
- For kale: Wash young, tender leaves thoroughly and cut off woody stems.
- For Swiss chard: Put into the steamer whole or tear smaller pieces away from the stems, placing the ribs aside.
- For beet greens: Treat like Swiss chard.
2. Blanch Greens
All leafy greens need to be blanched before freezing. Blanching slows or stops the action of enzymes that would lead to spoilage—and helps vegetables keep their bright color, flavor, texture, and nutrition. Plus, blanching wilts the leafy greens, making them easier to package into freezer-safe containers.
You’ll need a large pot that can hold a steamer basket, strainer, or colander.
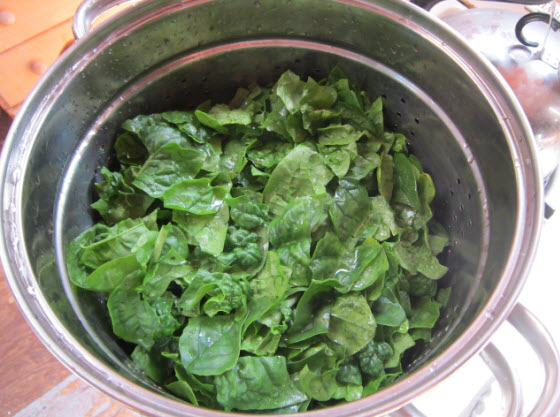
Fill the pot with water so that 1 to 2 inches of water is underneath the basket or colander. Bring the water to a boil. Place the greens into the basket or colander and cover the boiling water pot with a lid to steam-heat. Cook the greens until wilted—3 minutes for collard greens, 2.5 minutes for kale, and 2 minutes for all other greens.
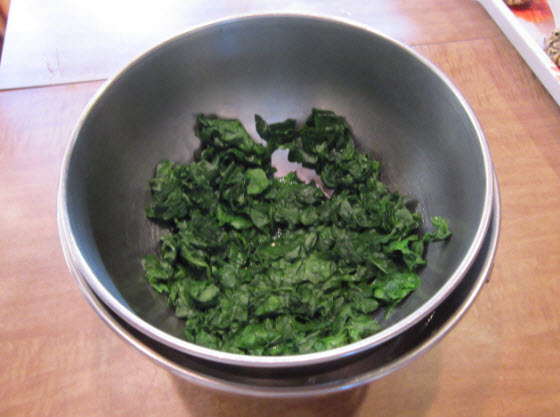
3. Plunge into Ice Water
The greens now need to be cooled quickly before being placed in freezer bags! Prepare a large bowl of ice water—near-freezing! You need to stop the greens from overcooking, or they will lose their vibrant green color.
In order not to lose their nutrients via leaching, the greens should be kept separated from the cooling water. It’s easiest to do this by placing the greens inside one bowl, which is then inserted into a larger bowl of ice water. Using the tongs, move them around until cooled down (2 or 3 minutes). Add more ice cubes to keep the water ice cold.
The last step is to drain and dry the spinach. A salad spinner is very useful for this purpose; otherwise, drain in a colander and dry the leaves by placing them on a towel. Fill the towel with leaves, then roll it up and gently squeeze to remove excess water.
4. Pack Greens into Freezer Bags
The dried spinach and greens are ready to be placed in freezer bags. Bags are best (versus containers) for greens because they remove air to avoid freezer burn. Remove as much air as possible before sealing bags. (If you have one, a vacuum sealer system works well with kale.)
Avoid over-packing bags. Flatten bags before sealing to create kale portions that thaw quickly.
Label your bags so you know when you put them in the freezer. You can keep spinach and greens for 10 to 12 months. See how long you can freeze foods.
How much you pack in each bag depends on how you think you’ll use it. If you’re unsure, pack about one cup of spinach per bag. You could pack in smaller sandwich baggies, but I would still put everything in a gallon freezer bag with thicker plastic.
Into the freezer, they go!

Your frozen spinach and greens can be nutritious additions to soup stock and labeled “soup.” In later months, these greens can be spread around at the bottom of a quiche, used in numerous recipes, or tossed with butter (and cheese) and made into a yummy side dish. Enjoy!
In later months, these greens can be spread around at the bottom of a quiche, used in smoothies or numerous other recipes, or tossed with butter (and cheese) and made into a yummy side dish.
Or, just saute fresh greens in olive oil with garlic. Before serving, top with crushed red pepper. Or, make pesto! The list goes on… Enjoy!
Learn more ways to quickly preserve vegetables and fruit.
Do you have any tips or tricks for preserving fresh produce? Share them with us in the comments.
Celeste Longacre

Introduction to Preserving
Freezing
Making Quick Pickles
Making Quick Jams: Refrigerator or Freezer Jam
Water-Bath Canning
How to Can Tomatoes
How to Can Pickles
How to Can Jam and Jelly
Pressure Canning
Drying
Salting and Brining


ADVERTISEMENT
Thanks for the article on freezing greens. I didn't see kale in the article. Would it be treated differently? How do you recommend freezing kale?
Yes, kale is great for freezing. Select young, tender green leaves. Wash thoroughly and cut off woody stems. Then blanch kale leaves for 2.5 minutes, covering the boiling water pot with a lid to steam-heat floating leaves. Then place leaves in very icy water for the same amount of time. Use a strainer to fish leaves from both boiling and ice water.
Dry leaves by placing them on a towel. Fill the towel with leaves, then roll it up and squeeze to remove excess water. Then put dried lake in freezer bags, removing as much air as possible before sealing bags. A vacuum sealer system works well with kale. Avoid over-packing bags. Flatten bags before sealing to create kale portions that thaw quickly.
Fozen kale is wonderful to add into soups, stews, quiche, and in smoothies. Or just saute in olive oil with garlic. Before serving, top with crushed red pepper. Or, make pesto! The list goes on…
I moved 2 year old June-bearing strawberry plants to a new raised bed this October 2014. Should I remove the runners shoots from the mother plant crown before covering with straw before the winter?
Cover with straw now and in early spring, when you remove the straw, remove some of the daughter plants so that it is not too crowded in the bed. If the small plants have rooted you can transplant them to containers or another garden bed. If you leave some of the small plants in the raised bed cut the runners from the mother plant. See our strawberry page at http://www.almanac.com/plant/strawberries for more information.