
Master green beans with our complete planting and care guide
Finally, the Perfect Garden Seeds—From the trusted Old Farmer’s Almanac!
Non-GMO, open-pollinated, high germination, sourced from American farms.


Planting
Beans grow best in well-draining soil with normal fertility and an acidic to neutral pH (6.0–7.0). They don’t typically need supplemental fertilizer because they fix their own nitrogen in the soil. However, particularly poor soil should still be amended with aged manure or compost in the fall prior to planting (or about a week before planting in the spring).
Beans don’t like having their roots disturbed, so set up any supports for pole beans prior to planting.
When to Plant Beans
- Beans grow best when direct-seeded outdoors. Sow any time after the last spring frost date, when the soil has warmed to at least 55°F (12°C). Don’t plant too early, as cold, moist soil will delay germination and could cause the seeds to rot.
- Tip: To get a head start on planting, place black plastic or landscaping fabric over your garden beds to warm the soil prior to sowing seeds.
- Do not start green bean seeds indoors. Due to their fragile roots, they may not survive transplanting. Plus, they’re such fast growers that there’s no real advantage to starting them early indoors.

How to Plant Beans
- Sow bush beans 1 inch deep and 2 inches apart in rows 18 inches apart.
- Sow pole beans 1 inch deep, placing them around supports.
- Tip: Plant pole and bush beans a little deeper in sandy soils, but not too deep. Seedlings cannot push through soil that is too deep, heavy, dense, packed, and/or mulched; they will break their “necks” in trying to emerge.
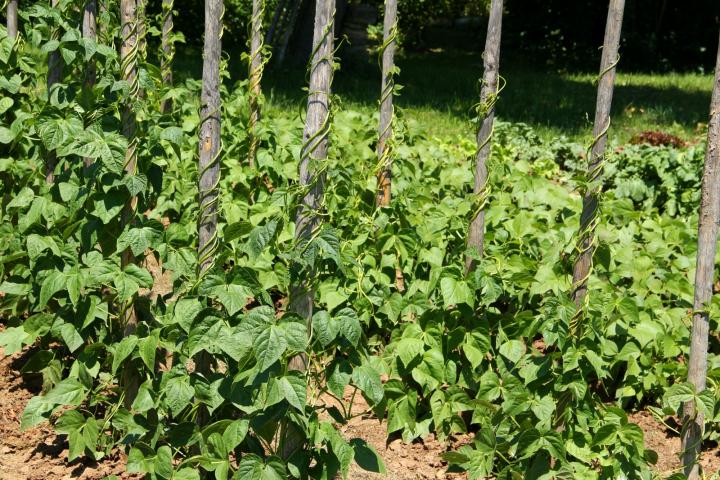
- For pole beans, set up trellises, stakes, or other supports prior to planting so that the plants’ fragile roots are not disturbed.
- One option is to create a teepee: Tie three or four (or more) 7-foot-long bamboo poles or long, straight branches together at the top and splay the legs in a circle. Then, plant three or four seeds around each pole. As vines appear, train them to wind up the poles. For more stability, wrap string/wire around the poles about halfway up, encircling the tepee; this gives the vines something to grab.
- Another easy support for them is a “cattle panel”—a portable section of wire fence—16 feet long and 5 feet tall. The beans will climb with ease, and you won’t have to get into contorted positions to pick them.
- For a continued harvest that lasts all summer, sow seeds every 2 weeks. If you’re going to be away and unable to harvest, skip a planting. Beans do not wait for anyone!
- Practice crop rotation (planting crops in different areas each year) to avoid the buildup of pests and diseases in one spot.
How to Grow Beans From Planting to Harvest
Growing
- Mulch soil around bean plants to retain moisture; make sure that it is well-draining. Beans have shallow roots, so mulch keeps them cool.
- Water regularly, about 2 inches per square foot per week. If you do not keep beans well watered, they will stop flowering. Water on sunny days so that foliage will not remain soaked, which could encourage disease.
- If necessary, begin fertilizing after heavy bloom and the set of pods. Avoid using high-nitrogen fertilizer, or you will get lush foliage and few beans. A side dressing of compost or aged manure halfway through the growing season is a good alternative to liquid fertilizer.
- Weed diligently but carefully to avoid disturbing the beans’ roots.
- Pinch off the tops of pole bean vines when they reach the top of the support. This will force them to put energy into producing more pods instead.
- In high heat, use row covers over young plants; hot weather can cause blossoms to drop from plants, reducing the harvest.
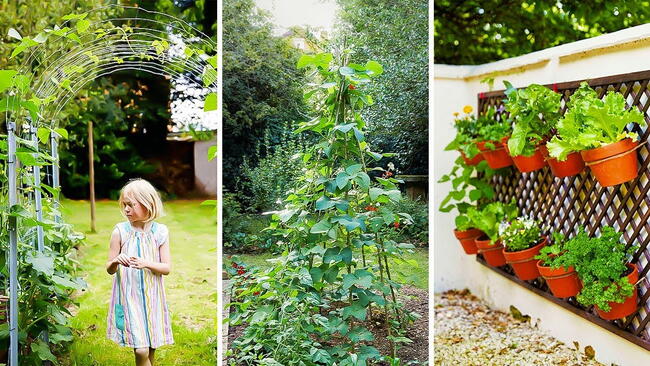
Growing Green Beans in Containers
You can also grow green beans in containers! An 8-inch-deep, 8-inch-wide container will hold one bush plant, while a 5-gallon pot will hold up to three bush or pole plants. For pole beans, plan to provide support in or immediately outside of the container. Fill the container with potting mix and rich compost.
Beans grow best when direct-seeded (not transplanted) into the soil, whether it’s in a container or the ground. After all danger of frost has passed, sow into warm (55°F or higher), moist soil. Put two beans into each hole between 1 and 1-1/2 inches deep. Eliminate the weaker one after germination by cutting the stem. (Do not allow two plants to coexist in one hole; neither will thrive.)
To care for your container of green beans, provide 6 to 8 hours of sun per day. Whenever the soil is dry, water to a depth of 1 to 2 inches. Fertilize with a low-nitrogen formula (5-10-10) diluted to half-strength to avoid excess foliage growth. Apply at planting time and when plants begin to flower.
Catherine Boeckmann


ADVERTISEMENT
I used to always direct seed beans (and peas) because everywhere I read said that they do not transplant well because their roots don't like being disturbed. I also read that they grew better when directly sowed and it was not worth it to use transplants. However, I was always discouraged about how long and irregular germination occurred. I would reseed in blank spots and I also lost some seedlings to birds which I would reseed again. Then I saw a video that described how successful it was to start beans and peas indoors and transplant them out in two weeks. The first year I tried it was an amazing success! I will never direct seed again. I get much better and faster germination - I do not waste seeds! When I transplant them outside, they are so heathy and really take off, no transplant shock and they are large enough that the birds don't bother with them. And I get a two week jump start on the season! Win/Win!
I agree. I'm a commercial grower and regularly plant many dozens of bean flats in late winter/early spring, using deep-cell flats designed for tree seedlings to give the roots plenty of room to grow. We transplant the plugs after 3-4 weeks in high tunnels, being careful to squeeze the starts up and out of the cells very gently. When the plants take off they often don't resemble the nice, tidy little bushes pictured in the catalogues, but their tangled mess yields good quantities, often by mid-May, giving us beans to sell at the markets weeks ahead of other growers. We also direct-seed beans in the traditional way giving us continued crops for July, August and even into late October if we don't have a cloudy autumn.
I don't understand the recommended watering rate.... "Water regularly, about 2 inches per square foot per week." should this read "2 inches per week"?
Has anyone planted Anasazi beans? If so would the planting be like other beans?
Thank you
Hi Linda,
We have not planted Anasazi beans before, but upon doing a little research there is a rich history behind this bean variety.
It’s best known for thriving in the Four Corners area of the Southwest U.S., but given its relatively short growing season it can be planted just about anywhere. You will want to wait to plant your seeds until the soil reaches at least 60°F because they will not do well in colder soil. Plant at a depth of 1/2 inch in loose, well-draining soil and cover lightly. Keep the soil reasonably moist until seedlings emerge.
It is a good idea to place a trellis next to your planting area or plant near a fence so your plants have support.
I planted bush beans in a raised bed and they sprouted and came up beautifully. Unfortunately, deer came into the yard and nibbled the tops of the bean plants. They also took the tops off my pepper plants. I'd like to replant, but am afraid I will have the same problem.
I'd recommend either sprinkling cinnamon lightly on the plant or using fishing line strung about 24 inches away from the plant at about a foot to 2 feet off the ground
I read that a fishing line strung around the garden about 24” above the ground will detour deer cause they feel something on their legs and they will leave before entering the garden
that's smart
The information is very useful for those who want to farm green beans. It has really helped me I intend to grow them.