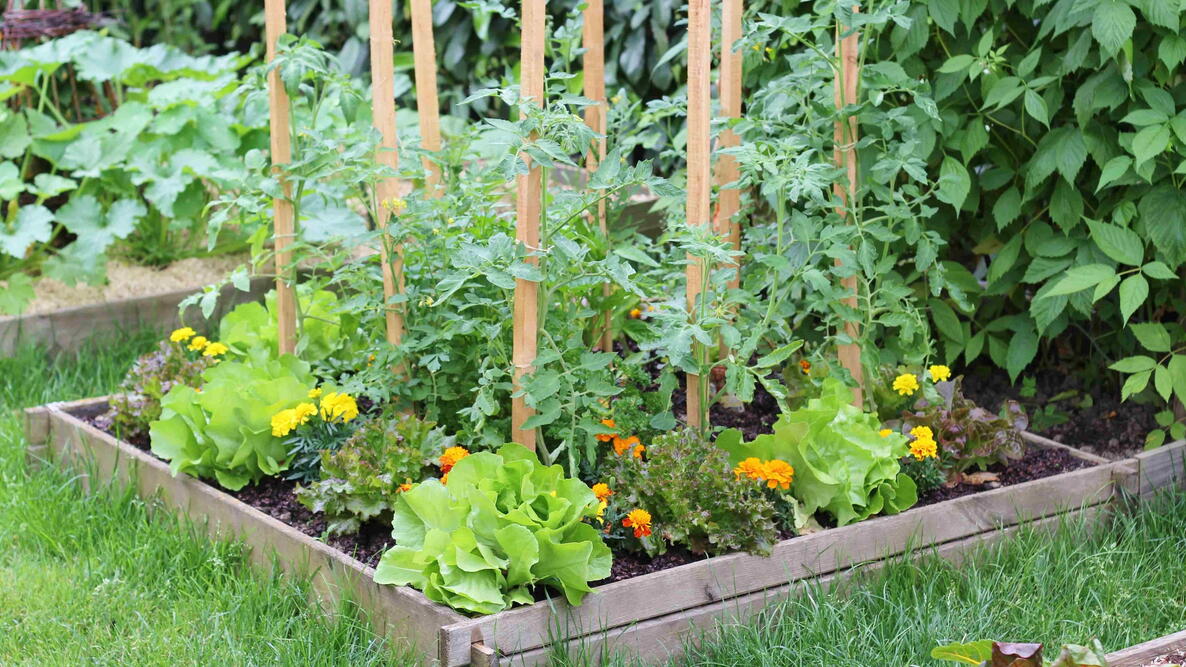
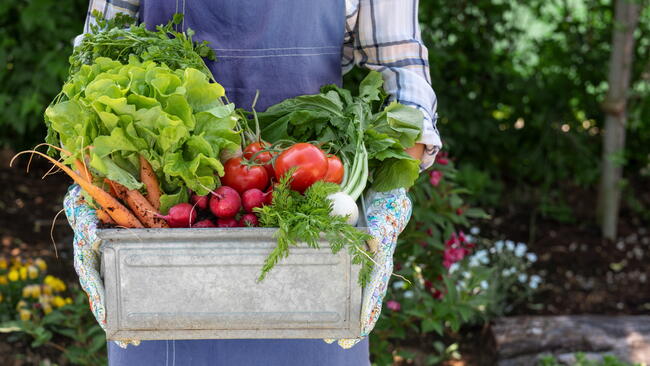
Caption
A simple 4×4 raised bed is a perfect starting point for beginner gardeners.
Starting a vegetable garden from scratch? You don’t need a big backyard—or any gardening experience—to grow your own vegetables. This beginner’s guide walks you through choosing a sunny spot, preparing the soil, planting your first crops, and caring for them until harvest.
Start small with a few vegetables you love to eat. A 4×4-foot garden bed or a few containers can be plenty for your first season. The seven steps below will help you get started with confidence.
How to Start a Vegetable Garden in 7 Steps
Here’s how to get started, from choosing a spot to harvesting your first vegetables.
- Choose a sunny location. Most vegetables need at least 6 to 8 hours of direct sunlight per day.
- Start small. A 4×4 or 4×8-foot garden is a manageable size for most beginners. If you’re short on space, you can grow many vegetables in pots or grow bags too.
- Choose easy vegetables. Grow crops you enjoy eating that suit your climate and growing season. There’s no reason to save space in your beds for vegetables you don’t like to eat!
- Prepare your soil. Clear the planting area and improve the soil with compost or other organic matter before you start.
- Find your planting dates. Use your local frost dates to determine when to plant each vegetable to get the harvests you want.
- Plant seeds or transplants. Seed packets and container tags should provide information about the spacing and planting depth. If not, we provide this information in our growing guides.
- Care for your garden. Water consistently, control weeds, watch for pests, and give your plants the care they need to thrive.
Here’s how to put each step into practice:
1. Choose the Right Location
Choose a spot with plenty of sunlight, good drainage, and easy access to water. A fairly level location will also make gardening easier. I learned the hard way that growing on a slope can make weeding and harvesting much harder!
How Much Sun Do Vegetables Need?
Most vegetables need 6 to 8 hours of direct sunlight daily, especially tomatoes, peppers, and zucchini. If your garden gets only 4 to 5 hours of sun, try leafy greens such as lettuce, spinach, or kale. They tolerate some shade, though they may grow more slowly.
Before planting, watch how sunlight moves across your yard during the day. I also keep an eye on how the light changes throughout the growing season. A spot that’s sunny in early spring can become much shadier once the trees leaf out!
What Else Makes a Good Garden Spot?
Besides sunlight, here are a few more things to consider when choosing your garden location:
- Good drainage. Avoid places where water collects after rain. Plant roots need both water and air, and soggy soil can lead to root rot.
- Easy access to water. Make sure your hose can reach the farthest corner of your garden. Otherwise, you may find yourself lugging a heavy watering can to and fro!
- Protection from strong winds. Windy spots can damage trellised beans and tall tomato plants. Strong winds can also make it harder for bees and other pollinators to visit squash flowers.
- Soil quality. Don’t worry if your soil isn’t perfect! You can improve poor soil with compost, as we’ll explain in Step 4.

2. Start Small: Choose Your Garden Size
It’s better to be proud of a small garden than be frustrated by a big one.
One of the most common beginner mistakes is planting too much at once. A small vegetable garden is much easier to water, weed, and harvest—and you can fit a surprising number of crops in it!

Which Garden Style Is Right for Me?
You can grow vegetables in the ground, in raised beds, or in containers. Here’s how to choose the right setup for your space.
- In-ground gardens: Grown directly in the ground. This is an economical option if you have suitable soil and enough space. These gardens are also the easiest to expand later on.
- Raised beds: Grow in a defined bed above the surrounding ground and are often framed out with wood, galvanized steel, rocks, or bricks. Raised beds drain quickly, and the taller sides can make tending plants easier on your back, but they cost more to build and fill.
- Containers: Grow in pots, tubs, or grow bags. This is a good option for patios, decks, and other small spaces. Containers need drainage holes, suitable potting mix, and more frequent watering.
How Much Space Do I Need?
The right garden size depends on what you want to grow and how much you hope to harvest.
For beginners, a few containers or a 4×4-foot bed is a great start. My first vegetable garden was a 4×8-foot raised bed with tomatoes, leafy greens, and herbs. I expanded it later when I wanted to grow more vegetables for canning.
Here are a few guidelines to help you choose the right garden size:
- Containers. A 12-inch pot can hold a few lettuce plants, while a tomato plant generally needs at least a 5-gallon container. Larger tomato varieties do better in bigger pots.
- Raised beds. A 4×4-foot or 4×8-foot raised bed is ideal for beginners. You can always add more beds as your garden grows!
- In-ground gardens. Start with a manageable 4×8-foot plot or similar. It’s easier to expand a small garden later than to maintain one that’s too big.
- Pathways. Keep garden beds no more than 4 feet wide so you can reach the middle from either side without stepping on the soil. Leave enough room between beds to walk and tend your plants.
Tip: Some vegetables need more room than others. Zucchini can spread several feet, while lettuce and radishes fit into small spaces. Learn how square foot gardening helps you make the most of a small garden.
Watch: 3 Things to Consider Before Starting Your Garden
3. Choose What to Grow
The best vegetables for a beginner garden are productive, easy to care for, and suited to your local growing season. They should also be edibles you actually want to eat!
Before I started my first garden, I took a good, hard look at my weekly grocery list and the vegetables I bought the most often. This helped me decide what I actually wanted to grow, but it’s also important to consider how much space different types of veggies need.
Easiest Vegetables for Beginners
For your first garden, choose just 3 to 5 vegetables. You’ll learn how each grows without feeling overwhelmed. Here are 10 easy vegetables to consider.
- Lettuce: A cool-season crop that grows quickly. Leaf lettuces like ‘Red Fire’ can be harvested a few leaves at a time, while romaine and other heading lettuces take longer to grow and are usually harvested all at once.
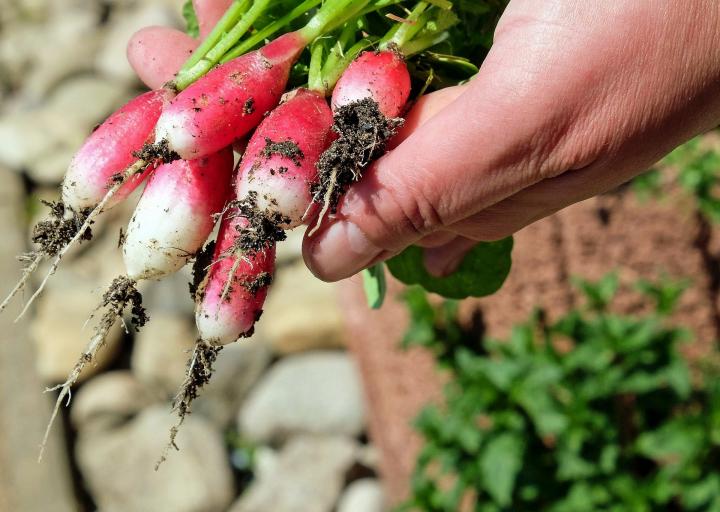
- Radishes: One of the fastest-growing vegetables, radishes thrive in cool spring and fall weather. Try quick-growing varieties like ‘French Breakfast’ and ‘Easter Egg.’ Larger ‘Watermelon’ radishes take longer to mature.
- Green beans: Bush varieties are compact and productive, while vining varieties can be trained on trellises to save space. I like to plant beans after my spring peas finish to keep my garden productive from spring through summer.
- Peas: Grow well in cool spring weather and can be trained on trellises too. Try planting radishes beneath trellised peas to use your space wisely.
- Swiss chard: A productive leafy vegetable, Swiss chard is a cut-and-come-again plant you can harvest throughout spring and fall. The colorful leaves add brilliance to gardens too.
- Tomatoes: Start with nursery-grown plants for an easier first season. Compact bush (determinate) tomatoes work well in containers and produce most of their fruit in a few weeks. Taller vining (indeterminate) tomatoes need support but produce over a longer season. One or two healthy tomato plants may be plenty for a small garden!
- Zucchini: A productive warm-season vegetable, zucchini plants need plenty of space to spread out. Harvest often, as the fruit gets massive fast.
- Beets: Grow best in cool conditions and need regular watering. Both the roots and greens are edible on these multi-use plants!
- Kale: A hardy leafy green that tolerates cool weather and can be harvested repeatedly. I’ve even harvested fresh kale leaves in midwinter in chilly Maine.
- Peppers: Start with nursery-grown plants and give them plenty of sun and warmth. Bell peppers may need staking, while compact sweet or hot pepper varieties work well in containers.
A Simple 4×8 Vegetable Garden Plan
Not sure how to arrange your vegetables? Sketching out a garden layout on some scrap paper can help you visualize where everything will grow. Place taller plants, like tomatoes, toward the rear or north side of the garden so they don’t overshadow shorter plants like lettuce.
Our 4×8 Vegetable Garden Layout for Beginners shows how to grow lettuce, Swiss chard, onions, early potatoes, bush beans, and nasturtiums in one manageable bed. The illustrated plan includes plant quantities, spacing, and a planting schedule.

You can build the layout as a raised bed or use the same dimensions in an in-ground garden.
Remember: You don’t have to plant everything at once! After harvesting spring peas, you can plant beans in their place. In many climates, you can grow another crop of radishes in fall, too.
For more ideas, browse our free vegetable garden plans and layouts.
4. Prepare Your Garden Soil
Before planting an in-ground vegetable garden, consider getting a soil test through your local cooperative extension service. It can reveal your soil’s pH and nutrient levels and help you determine what improvements are needed.
If you’re gardening near an older home or on land with an unknown history, ask about testing for lead and other contaminants. These aren’t included in every standard soil test.
Learn more about testing your garden soil.
Preparing a New In-Ground Garden
If you’re lucky, you may have inherited a home with a pre-made garden that just needs a topping of compost and a bit of weeding before you plant. However, if you’re starting with a completely “blank slate,” here’s a basic walkthrough for prepping your soil and starting a new bed.
- Mark your garden area. Use string, stakes, or a garden hose to outline the length and width of the bed you’d like to create.
- Remove grass and weeds. If you’re preparing your garden in fall, cover the grass with plain cardboard topped with compost. Over several months, the grass will die beneath it. Want to plant sooner? Remove the sod with a shovel or sod cutter, taking out the roots. Avoid simply tilling grass into the soil, as it may regrow.
- Loosen compacted soil if needed. Use a garden fork or tiller to loosen heavily compacted soil. Loose soil is important for all veggies, but it’s especially critical for carrots and other root crops, which can develop malformed roots in dense earth.
- Add compost. Spread about 2 to 3 inches of finished compost or fully composted manure over the soil and work it into the top 6 inches with a shovel or garden fork. If your soil test suggested other amendments, add them now.
- Rake the surface smooth. Use a rake to smooth the area out and remove any leftover weeds. Avoid walking on the soil, as compressed soil doesn’t drain well.
Tip: Don’t dig or work soil when it’s soaking wet. Wet soil compacts easily and can form hard clods as it dries.
Preparing Raised Beds
To start a raised bed, choose a sunny, level spot. Remove or smother the grass and weeds as described above, then install your raised bed frame. If the ground is compacted, loosen it with a garden fork so roots can grow into the soil below.
Fill the bed with a loose mixture of topsoil and finished compost, or purchase soil specifically blended for raised beds. You can buy it in bags or in bulk from garden centers. Avoid filling beds with compost alone.
How deep should a raised bed be? An 8- to 12-inch-deep bed works well for many vegetables when placed directly on the ground, where roots can grow deeper. On pavement or other hard surfaces, provide at least 8 inches for leafy greens and 12 to 24 inches for larger crops like tomatoes and peppers. Make sure excess water can drain away.
For more details, see our complete guide to preparing garden soil for planting.
5. Know When to Plant
Knowing when to plant is just as important as knowing what to grow. Planting dates depend on your climate and the vegetables you choose. Some crops prefer cool spring weather, while others need warm soil and frost-free conditions.
Find Your Local Planting Dates
Start by finding your area’s average last spring frost date. This helps you determine when tender vegetables can safely go outdoors.
Use our Frost Date Calculator to find the average frost dates for your ZIP or postal code.
Remember: Frost dates are estimates, not guarantees! Always check your local forecast before planting tender vegetables. If a late frost threatens, bring potted plants indoors or protect garden plants with frost covers.
When to Plant Each Vegetable
Your last spring frost date is a useful starting point, but not every vegetable should be planted at the same time. Seed packets sometimes include planting guidance, but they don’t always tell you when to plant in your climate.
For dates specific to your area, use our Almanac Planting Calendar. It tells you when to start seeds indoors, sow seeds outdoors, and move young plants into your garden.
Cool-Season vs. Warm-Season Vegetables
Vegetables grow best at different temperatures. Some are easy to grow from seed outdoors, while others benefit from a head start. For beginners, buying young plants (called transplants) from a nursery is often easier, especially for heat-loving tomatoes, peppers, and eggplants that need a long growing season.
- Cool-season vegetables: Peas, lettuce, spinach, radishes, carrots, and kale. Plant in early spring; many can also be planted for a fall harvest.
- Warm-season vegetables (young plants): Tomatoes, peppers, and eggplants. Plant outdoors once the weather warms and frost danger has passed.
- Warm-season vegetables (seeds): Beans, cucumbers, zucchini, and pumpkins. Sow directly in the garden once the soil warms and frost danger has passed.
6. Plant Seeds or Transplants
Now that your soil is ready and you know when to plant, it’s time to get growing! I love starting vegetables from seed because it’s inexpensive and gives me more varieties to choose from. But there’s no need to start everything yourself. Young plants from a nursery work well, too.
How to Plant Seeds Outdoors
Some vegetables, including carrots, radishes, peas, and beans, grow best when you plant their seeds directly in the garden. Here’s how:
- Check planting depth and spacing. Follow the seed packet instructions. Planting seeds too deeply can prevent them from sprouting.
- Make planting holes or rows. Use your finger or a pencil to poke small holes, or make a shallow trench for a row of seeds. Space seeds as directed on the packet. For larger seeds planted in individual holes, I sometimes add an extra seed or two in case they don’t all sprout.
- Cover and water. Gently cover seeds with soil and water lightly so you don’t wash them away. Keep the soil consistently moist until seedlings emerge.
- Thin crowded seedlings. Once seedlings begin growing, remove extras so the remaining plants have room to mature. I know it can be hard to remove perfectly healthy seedlings, but overcrowding leads to weak plants! Snip extras at the soil line with scissors to avoid disturbing nearby roots.
How to Plant Young Vegetable Plants
Whether you’ve started seeds indoors or purchased young plants from a nursery, here’s how to move them into your garden.
First, harden them off. Plants raised indoors or in a greenhouse need time to adjust to outdoor conditions. Place them outside in a sheltered, shady spot for a few hours each day, gradually increasing their exposure to sunlight and wind over 1 to 2 weeks. Bring them indoors if temperatures turn too cold. Learn more about hardening off seedlings.
When they’re ready to plant:
- Water the plants first. Moist roots are less likely to suffer stress during transplanting.
- Dig a planting hole. Make it slightly wider than the plant’s root ball. If you’re planting several vegetables, check their plant labels for recommended spacing.
- Remove the plant gently. I find that squeezing the sides of flexible plastic nursery pots helps release plants without damaging their roots. If using biodegradable pots, remove the bottom and any rim that would stick above the soil.
- Set the plant in the hole. Plant most vegetables at the same depth they grew in their pots. Tomatoes are an exception: You can bury part of the stem deeper to encourage additional roots.
- Fill and water. Gently firm soil around the roots and water thoroughly. Install cages or supports for plants that will need them, such as tomatoes.
Tip: Don’t rush tomatoes into the garden! Here in New England, I wait until nighttime temperatures are consistently around 55°F or warmer and the soil has warmed. Cold conditions can set these heat-loving plants back.
For more detailed instructions, see our guides to starting seeds indoors, sowing seeds outdoors, and transplanting seedlings.

7. Care for Your Vegetable Garden
Planting is only the beginning if you want your vegetable garden to thrive. But you don’t need to spend hours in your garden every day. Just a few minutes checking your plants, watering, and pulling young weeds can make all the difference.
How Often Should You Water?
Vegetables need consistent moisture, especially when seeds are sprouting, young plants are establishing roots, and crops are producing. Too little water can cause wilting and poor growth, but too much can lead to root rot.
Most established vegetable gardens need about 1 inch of water per week, including rainfall. But how do you know when your plants actually need watering?
Instead of following a fixed schedule, I always recommend checking the soil first. Push your finger an inch or two into the soil. If it feels dry, it’s time to water. If it’s still damp, check again the next day.
During hot, dry stretches, I may water my garden every day or two, but much less often during cooler or rainy weather. Plants in containers usually need more frequent watering.
A few tips to remember:
- Water in the morning when possible, before the heat of the day.
- Water at the base of plants rather than wetting the leaves to help prevent disease.
- Water deeply to encourage strong roots rather than giving established plants frequent, shallow sprinkles.
- Keep newly planted seeds consistently moist until they sprout.
Fertilizing Your Vegetables
Vegetables need nutrients to grow, but more fertilizer isn’t always better!
I always recommend adding compost or fully composted manure to the soil before planting. If your plants need additional nutrients, a balanced vegetable fertilizer is a good starting point unless your soil test recommends something different.
When should you fertilize? It depends on the crop. Tomatoes, for example, may benefit from another feeding when their first fruits begin to form. I prefer organic fertilizers in my garden, and I’ve found that heavy feeders like tomatoes may need additional nutrients throughout the growing season.
Always follow fertilizer package directions. Too much fertilizer can damage plants or encourage leafy growth instead of vegetables.
Mulching and Weeding
Weeds can be the biggest nemesis of new gardeners! One of the best ways to prevent them is to spread 2 to 3 inches of mulch over the soil once your plants are a few inches tall.
I find weed-free straw mulch works best in my garden, but compost is another option. Keep mulch away from plant stems to prevent rot.
Mulch won’t stop every weed, so check your garden weekly. Young weeds are easy to pull by hand or remove with a hoe. Larger weeds may need to be dug out.
And whatever you do, don’t let weeds go to seed! That makes weeding much, much harder.
Dealing with Garden Pests
You don’t necessarily need pesticides to keep garden pests under control. The trick is spotting problems early.
Check your plants at least once a week for holes in leaves, sticky residue, discoloration, or even seedlings that have disappeared overnight! Look underneath leaves, too, where insects often hide.
Deer and rabbits can make short work of a vegetable garden, so fencing is often the best protection. For insects, start by identifying the pest. Handpicking caterpillars can help, while companion planting with herbs and flowers may attract beneficial insects. If you need treatment, choose a product labeled for the specific pest and edible crop.
I personally never grow brassicas, like cabbage, broccoli, and kale, without protective row covers. When I’ve skipped them, cabbage loopers have riddled the leaves with holes! Lightweight insect netting helps keep the moths from laying eggs on the plants in the first place.
Tip: If your plants aren’t growing well, check the basics first: sunlight, soil moisture, drainage, and temperature. Not every problem comes from pests or a lack of fertilizer.
When and How to Harvest Vegetables
The ultimate reward of growing your own vegetables is harvest time! Knowing when to pick depends on what you’re growing, but don’t worry—it’s easier than you might think.
Cool-season vegetables like radishes, spinach, and lettuce grow best in spring and fall. Harvest them before they become tough or bitter in hot weather. Warm-season crops like tomatoes, beans, and zucchini produce during the summer. Watch the weather as fall approaches, since frost can damage tender crops.
Here are a few harvesting tips:
- Leafy greens (lettuce, kale, and chard): Pick the outer leaves first, leaving the center to keep growing. You can often enjoy several harvests from the same plant.
- Root vegetables (radishes and carrots): Harvest when roots reach the recommended size for the variety. Don’t leave radishes in the ground too long, or they can become woody.
- Fruiting vegetables (beans, tomatoes, and zucchini): Pick when they reach the right size and color for their variety. Harvest beans and zucchini frequently to encourage continued production. Use scissors or pruners when needed to avoid damaging stems.
Tip: Check your seed packet for estimated days to maturity, and don’t be afraid to peek at your vegetables as they grow!
For crop-specific harvesting advice, explore our Vegetable Growing Guides.
Have questions about starting your garden? Explore our guide to planning a vegetable garden, or share your questions and tips with the Almanac community in the comments below. Happy gardening!

Getting Started
Planning For a Garden
Planting a Garden
Plant Growing and Care
Harvesting and Storing Vegetables
More Like This
ADVERTISEMENT

As you say, this was a "last minute project"; sometimes these are inspired, sometimes they just make you tired.
You should have checked the pH of the soil before planting and, as you also say, primed the soil
While wood ash can be beneficial, too much can alter the nutrient values in the soil—and the nutrient values can vary depending on the type of wood.
It may be too late to amend the soil, but you can try. Get a pH test kit from a garden supply store and amend as indicated.
Next time, . . . well, we'll spare you that advice. You know what to do. Best wishes!
- « Previous
- 1
- 2
- …
- 10
- Next »

Comments