Quantcast
| Almanac.com
Photo Credit
NASA
Subhead

The Search for Exoplanets and Extraterrestrial Life

Print Friendly and PDF

The hunt for exoplanets that resemble Earth is today’s biggest astronomy obsession, the way “Canals on Mars’ was the headliner a century ago. We know that our galaxy is brimming with planets as researchers have already found thousands of exoplanets.

In the past year alone, a supposed “Earth twin” was found orbiting a star 1400 light years away. But if we dig deeper, the true hidden allure in the search for Earth-like planets is the tacit desire to find extraterrestrial life.

Another Earth

Planet Earth

We all know there’s just one planet with an Eiffel Tower and a MacDonalds quarter pounder. So why does “another Earth” have a familiar ring? 

The public adores the notion of “Earth-like planets,” and the hope of finding ET life is the engine driving that train. The honest-to-goodness major discoveries in that area were:

  1. The first exoplanet was found orbiting a star in Pegasus two decades ago. 
  2. Discovering thousands more of all kinds, letting us know our galaxy has at least 20 billion Earth-sized planets in comfortable regions.

Those are the important takeaways. 

The next potentially big news would be discovering either radio signals signifying intelligence or else free oxygen in a planet’s atmosphere, indicating plant life. Nothing else matters very much. Having Earth-size and a comfortable orbit isn’t enough to draw any conclusions about life.

As for life, perhaps we needn’t travel very far. We might want to fast-track a mission to Jupiter’s moons. At least two of them have warm, life-friendly, saltwater oceans!

Earth-Like Planets

In our present hunt for exoplanets—bodies circling other stars—some researchers consider a planet Earth-like if it orbits at the correct distance from its parent star to permit liquid surface water. After all, life begins in our own oceans, so water has stirring implications.

But when you hear or read that term, be aware that other astronomers call a planet “Earth-like” if it merely possesses a size similar to ours. Or it is smallish and has a moderate temperature, like Mars. 

Our first point, then, is that we ought to obtain lots more information before we truly get excited.

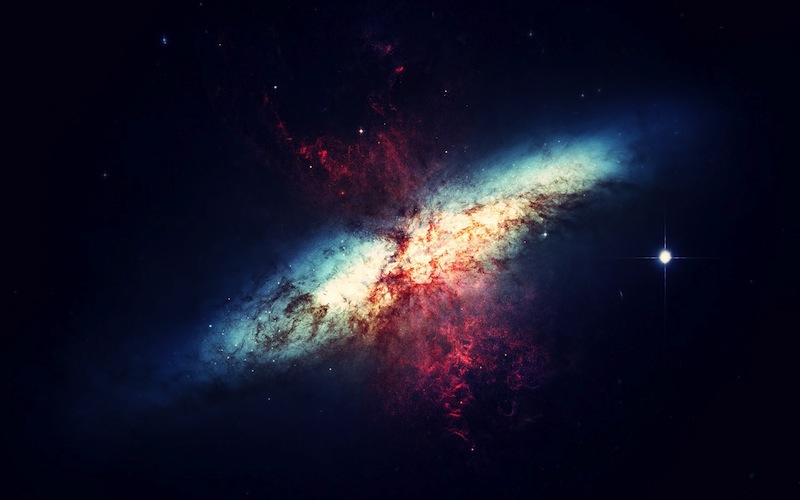
What About Kepler 452B?

In truth, this exoplanet, named Kepler 452b, has five times the mass of Earth, a 50% larger diameter, and twice our gravity. Not remotely an Earth twin. It’s a coin toss whether it even has a rocky surface instead of being a gas world like Neptune. It probably didn’t deserve the front page.


An artist compares Earth to this new planet (called Kepler 452b). Source: NASA

How Many Earth-Like Planets Are There?

Since we started finding planets in the 1990s, we know there are millions of Earth-mass planets in our galaxy’s comfort zones. However, back then, our technology could only detect huge bodies orbiting low-mass stars because we could only discover something if it were sufficiently tugging on its parent star to make it reliably wiggle.

So, we spotted lots of these giant planets and used simple logic. Nature always creates more small things than big ones. More minnows than whales. More viruses than linebackers. So, finding 500 Jupiters meant that many unseen Earths must be there too, and probably a fifth of them would lie at comfortable-temperature distances from their parent star.

Newer technologies soon let us find smaller bodies, and sure enough, Earth-mass planets have abundantly popped up. We’ve already cataloged over a thousand.

Now that we’ve discovered 5,616 confirmed exoplanets around other stars, we need to find one that’s Earth-like enough to have life. And finally, with the James Webb telescope, we have a realistic chance of accomplishing this.

But given all the possible curveballs of false Earths, what should you be on the lookout for? We’ve now reached the practical heart of the matter, which is: how to recognize the real deal.

What Makes Exoplanets Habitable?

You want the exoplanet to be not too hot nor too cold. But you shouldn’t care whether it matches Earth’s size.

You’re really looking for the announcement of air around that world that contains a very specific substance. That’s because life always changes its environment. A few types of molecules simply wouldn’t be there if life didn’t have a hand in the process.

Here on Earth, and probably everywhere else, the main one is oxygen. It’s an element that promiscuously likes to combine with almost anything. So, all our surface silicon has become a silicon-oxygen compound called silica, which fills our vast deserts. Our carbon shows itself mostly as carbon dioxide. With dozens of elements eagerly grabbing free oxygen, we might legitimately wonder how there’s any left to float around by itself to make up 21% of our air.

The only explanation is that something is continually replenishing it. Something’s creating and releasing oxygen in an ongoing process. That “something” is the enormous terrestrial plant and tree community including oceanic plankton, which takes in carbon dioxide, uses the carbon to create their crunchy bodies including tree trunks, and releases the oxygen nonstop.

If we detect oxygen in an exoplanet’s atmosphere, we can be pretty sure it’s a place with life or at least plant life. Other molecules would be good news, too, like methane and water vapor. But oxygen would sit atop anyone’s list.

Is There Another Planet Like Earth?

“Another Earth” cannot be something nearby. We learned that over a century ago. We know a lot about our solar system, and nothing around here even has a surface where anyone can breathe.

Most people assume life will be found on the surface of an Earth-mass planet because that’s where we live, and we’re not very imaginative. But the likeliest known place for life right now is on Jupiter’s moon Europa, simply because it’s the nearest place with subsurface oceans. Its seas are even warm saltwater. Yet Europa isn’t anywhere near our solar system’s “comfort zone.” So, our long-held opening-act assumptions already seem unduly limited in scope.

Much revolves around the issue of how common life might be.

Chromosomes and DNA are so complex, and the assembly of amino acids into proteins so intricate, the standard assumption that life is created by random chemical activity may seem as silly as it did to physicist Fred Hoyle in 1982 when he compared it with a tornado sweeping through a junkyard and assembling a functioning jetliner. 

On the other hand, the panspermia idea suggests that perhaps microbial life roams the universe hiding in meteoroid cracks and rains down on countless young planets, ready to propagate wherever conditions are favorable. In which case, life may be abundant.

The bottom line is an interesting disconnect: Most laypeople find the Earth-like planet search riveting, while some astrophysicists have told me: “Just in our own galaxy, millions of planets share our mass and temperature. If someone wants to seek out and create long lists of them, go right ahead.” It’s valid science.

But let’s jump ahead and do something here that, bewilderingly, no one seems to have thought of. Namely, anticipate the next move.

What’s Next

Picture of the galaxy

After finding atmospheric signs of life, the immediate problem becomes a very big one. Simply put, we’d be unable to obtain any additional knowledge. Through our greatest telescopes in space or on Earth, the clearest possible exoplanet image would show it as a single pixel, a dot.

No future instrument would let us get any sort of hint about what form the life there has taken. All plants? A mix like here? Any intelligent creatures? We’d need a space probe to go there to orbit or land and send back images and information. 

Alas, even a relatively nearby exoplanet would require thousands of years to get there. Until then, we’d know there’s life but all else would be speculative. Would that be fun? Or would it be impossibly frustrating?

This is why finding evidence of life – which will almost surely happen in our lifetimes – will predictably result in several thousand years of nerve-wracking inconclusiveness. I may be the only one here who’s somewhat dreading that first announcement and probably should see a therapist.

Subhead

Eco-Friendly and Compostable Pots for Seed-Starting

Print Friendly and PDF

Happily, we’re seeing more biodegradable planting pots. They make growing seeds easy, and the pots can go right in the ground! Here are 10 types of biodegradable pots—plus, see how to make your own!

As much as we would like to see plastic plant pots being recycled, tons of them end up in landfills and incinerators every year. That leads many of us to look for alternative containers in which to start our spring seedlings. In shopping, please note that there are three ways that eco-friendly pots are described:

  1. Plantable: This means that you can put the pots right in the ground, plant and all, and the roots will penetrate through the pot into the surrounding soil as the pot breaks down. 
  2. Biodegradable: These pots eventually break down and seem to disappear to the naked eye, but depending on what they were made of, they may leave harmful residues behind, so look for ones that are certified organic.
  3. Compostable: This is another category. These pots eventually break down into humus and leave no toxic residue. Some compostable pots take a long time to break down, though, so be aware that they are not actually considered plantable. It is best to remove the plants and add the empty pots to your compost pile to break down.

10 Types of Eco-Friendly Garden Pots

There are many types of pots to choose from, from paper to cow manure!

1. Peat Pots 

Peat pots have been around for years, but there is some controversy about how sustainable a product they are. Like oil, there is a finite amount of peat in the world. Even though it is considered by many to be renewable, it takes a long time. Peat develops at a rate of 1 inch every 15 to 25 years. Most of the peat used in the US is harvested in Canada. If you choose to use peat, the pots are totally plantable and come in a wide range of sizes and types, from Jiffy7 pellets to strips of square cells to individual pots.

ecopots_014_full_width.jpg
These Jiffy 7 pellets soak up water and expand into little plant pots.

2. Coconut Coir 

Coconut coir is starting to be used as a peat substitute. Once considered agricultural waste, the fibrous husks of coconuts are molded into pots or finely shredded and used as a planting medium. Coir pots are also plantable since roots can easily pass between the fibers.

ecopots_010_full_width.jpg
Coconut coir fiber is being used more and more to replace peat.

3. Feather Pots

Feather pots are another agricultural waste product. Poultry farmers in the US generate about 4 billion pounds of chicken feathers each year. A clean and sustainable source of the protein keratin, the feathers can be shredded and made into light, durable pots that can be composted when empty.

4. Fertilpots 

Fertilpots are made from a mixture of 80% spruce fibers and 20% peat. They are biodegradable but don’t contain any glue or binders and are certified organic. Plant roots can penetrate the sides of the pot so they can be planted pot and all. They are made in France, so they do have to travel to get to a US distributor in PA. They are available from Johnny’s Selected Seeds.

5. Eco-Forms 

Eco-Forms are containers made from grain husks - primarily rice hulls - and starch-based binders, which are heated and pressed to make them hold together. They make a range of pots, from practical ones for professional growers to dressy-looking ones in many colors for home gardeners. These pots will last for 5 years and can withstand freezing and thawing. They are not meant to be planted in the ground, but they are biodegradable and can be composted. They are made in China.

6. EnviroArc 

EnviroArc is a biodegradable pot from Australia. It is made from bamboo pulp, rice hulls, wheat straw, and cornstalks - all organically grown on their own farms. These pots last 18 to 24 months but will break down in less than 6 months when composted. They offer a wide range of sizes and colors.

7. Western Pulp 

Western Pulp makes a molded fiber pot from recycled paper. These are heavy-duty containers, and tender plants will not be able to push their roots through them. You are advised to gently tear away the pots from the rootball before planting, then compost the container. They are made in the USA but are not certified organic.

ecopots_011_full_width.jpg
It is easy enough to make your own paper pots from old newspapers. Wrap the strips around any size cylinder you choose like this juice glass.

8. Paper Pots

Paper pots are not a new idea; for years, many of us have been making our own pots out of old newspapers. Strips of paper can be wrapped around a cylindrical form and folded over on the bottom to form a little cup. These can be filled with soil and used to grow transplants for the garden. They are fragile, especially when wet, so try to avoid handling them too much. They can be planted pot and all and break down fast in your soil. Cardboard toilet paper and paper towel tubes can be turned into pots for seedlings, and fiber egg cartons can also be used.

ecopots_013_full_width.jpg
The roots of your plant will help hold the soil blocks together. This mold makes 4 cubes of soil at a time.

9. Soil Blocks

One kind of pot is no pot at all. Soil blocks are another old practice that is regaining popularity. Simply use a form to compress potting soil into blocks that can be used for direct seeding, transplanting, or growing cuttings. Care must be taken to keep the blocks intact until they can be planted. Forms of different sizes are available from Johnny’s.

ecopots_005_full_width.jpg
CowPots offers fertilizer and containers all in one.

10. CowPot

My favorite eco-friendly container is the CowPot. As a former dairy farmer, I applaud the innovative approach brothers Matt and Ben Freund of CT have taken to find ways to maximize the use of all that manure cows generate. Along with solar panels, they use methane gas from manure to power their farm. The liquids left over from that process are used as fertilizer, and the solids are composted and then molded along with recycled newsprint into plant pots. The pots can withstand about 3 months of use in the greenhouse but will dissolve within 4 weeks of being planted in the ground. Because of the nutrients from the manure in the pots, plants have been proven to grow larger than those grown in plastic. They are made right on the farm.

3 DIY Ways to Make Biodegradable Planting Pots

If you’re thinking about starting a lot of seeds, make biodegradable seed pots out of recycled materials. They’re easy to make, and they can be transplanted right into the ground when the time comes. Plus, they’re economical! Seed trays and pots can be expensive, and as they’re usually made of plastic, they’re not always very environmentally friendly. The good news is, that it’s easy to make your own from nothing more than egg boxes, toilet paper tubes, and newspaper.

Newspaper Pots

To make paper pots, you’ll need an old newspaper (not a glossy magazine, as this will take a long time to rot down and may be printed with inks containing traces of toxic heavy metals), a pair of scissors, and a jar or glass to use as a mold. Follow the instructions below to make your newspaper pot:

1. Cut your newspaper into strips about 1 inch (3cm) taller than your jar.
2. Fold a flap along the length of a strip, then unfold the flap to leave a crease.
3. Lay your jar on the newspaper at one end of the strip so that the open end sticks out.
4. Tightly roll the strip around the jar.
5. Holding the paper closed, turn the jar on its end.
6. Fold the loose ends of the paper in to create the base, and push them down.
7. Pinch along the edges to firm them up.
8. Holding the bottom flaps, pull out the jar and firm up the base.
9. Fold the top of the paper along the crease you made earlier – this creates the rim of your pot.
Once filled with potting soil, the pot will become more stable, but it’s best to also nestle your pots side by side in a tray to keep them secure once the paper is wet.

At planting time, dig a hole into prepared soil and plant your seedling, including the pot – the paper will biodegrade within a few weeks.

Toilet Paper Tube Pots

Cut toilet paper tubes in half for most seedlings, or leave them whole for plants that need more root space – peas, corn, and tomatoes, for instance. Alternatively, cut down paper towel tubes to the desired length.

Making a toilet paper tube seed pot is even easier than making a newspaper pot!

1. Cut four equally-spaced inch-long slits into one end of the toilet paper tube.
2. Fold the flaps down, alternating the tucks to create a strong interlocking base.
3. Fill with potting soil, and sow your seeds into it.

Set the tubes in trays so that they don’t fall apart as the cardboard softens. As the seedlings grow, their roots will help hold the potting soil together. You can also group pots together using string or rubber bands.

Cardboard tubes rot down more slowly than newspaper, but roots will find their own way out of the pot eventually. However, you can peel off the cardboard before planting if you prefer – it peels away very easily when wet.

Egg Crate Seed Trays

Using cardboard egg crates is the simplest method of all.

1. Cut off the lid.
2. Put the lid underneath the base for additional strength.
3. Fill the compartments with potting soil, and sow!

Be aware that the roots of some crops will soon become constricted in egg crates, so they should only be used for crops that will quickly be moved on or planted out.

When you’re ready to plant your seedlings out, egg carton cells are easily torn apart when damp. Make sure to also rip away the base of each cell to help the roots escape into the soil.

→ Learn how to start your seeds.

→ Learn more about plastic-free gardening.

Whatever you choose to raise your plants in, have fun watching them grow from tiny seeds into strong, healthy starts for your garden!

Annuals vs. Perennials
Subhead

And What Does It All Mean for You as a Gardener?

Print Friendly and PDF

Whether a plant is an annual, a perennial, or a biennial can be confusing! It all depends on the plant’s life cycle and, practically speaking, how long it lives! However, it can also depend on where you live.

Let’s learn about the difference between annual vs. perennial plants and why you might choose one for your garden.

What Is the Difference Between Annual, Perennial, and Biennial Plants?

Annual Plants are a type of plant that live for just one season. In that brief period, they germinate, grow, flower, and set seeds for next year’s plants—mission accomplished! Unless they self-seed, they will need to be replanted every year.

Perennial Plants are the mainstay of many gardens. Plant them once, and they will return each year, bigger and better, until you finally accept that they need to be reined in. Not all perennials have the same lifespan. Some, such as lupine, columbine, delphiniums, and heuchera, are short-lived, lasting only three to five years.

Biennial Plants take two years to complete their life cycle. Some of the most popular biennials include Forget-me-nots and money plants.

Comparison Chart

AnnualsPerennials
A type of plant that lives for just one season.A kind of plant that lives for two or more seasons.
1 Year2+ Years
Great filler plants to pep up a tired-looking landscape.
Annuals can give you instant color.
It is the best for containers, windowboxes, and hanging baskets.
Plant them once, and they will return each year, bigger and better.
Easy-going and will happily bloom in most situations.
Some of the long-lived perennials will last for generations if given proper care.
Zinnias
Marigolds
Cosmos
Poppies
Sunflowers
Calendula
Nasturtiums
Yarrow
Coreopsis
Coneflowers
Bee balm
Black-eyed Susans
Daisies
Phlox
Sedum
Goldenrod
Russian sage
Catmint

There are advantages and disadvantages to growing annuals versus perennials. Let’s dig into this interesting topic.

Annual Plants

Annuals live for just one season. However, they supply you with a wealth of blossoms all season long. They are great fillers to pep up a tired-looking landscape during a lull in perennial flowering.

Marigolds are an annual plant that will add bright splashes of color to your garden all season long.

Pros

Planting annuals allows you to change the look of your garden from year to year. Pastel pinks and blue flowers one summer can be replaced with hot reds and oranges the next! What fun!

If you are starting a new garden from scratch, annuals can give you instant color while the newly planted perennials and shrubs get settled in. 

Annuals are also great for cutting gardens, giving you tons of blossoms to enjoy inside and share with friends. They also are the best for containers, windowboxes, and hanging baskets. 

This hanging begonia will blossom all summer.


Popular Annuals

Many annuals are easily grown from seed:

  • Zinnias
  • Marigolds
  • Cosmos
  • Poppies
  • Sunflowers
  • Calendula
  • Nasturtiums

For more about the value of annual flowers, see this post.

Zinnias are a wonderful bright annual flower, perfect for cutting and bringing indoors, too!

Perennial Plants

Perennials are the mainstay of many gardens. Many perennial plants are easy-going and will happily bloom in most situations. Unlike annuals, very few perennials will bloom constantly. Pay attention to bloom times so everything in your garden does not blossom at once and then is done for the season, leaving you with a garden of leaves. Foliage can have interesting colors and textures, but we all love flowers!

Lupines are beautiful but short-lived perennials. They often self-seed to keep the patch going.

Not all perennials have the same lifespan. Some, such as lupine, columbine, delphiniums, and heuchera, are short-lived, lasting only 3 to 5 years before weakening and disappearing. 

If you have lost any of the short-lived perennial plants, it was not your fault. They are not programmed to last forever. On the other hand, peonies, daylilies, hostas, irises, and New England asters are just a few of the long-lived perennials that will last for generations if given proper care!

Daylilies are long-lived perennial plants, lasting for many years if they are happy.
Bees and butterflies will enjoy your asters as much as you do!

Popular Perennials

Look for popular, low-maintenance ones like:

  • Yarrow
  • Coreopsis
  • Coneflowers
  • Bee balm
  • Black-eyed Susans
  • Daisies
  • Phlox
  • Sedum
  • Goldenrod
  • Russian sage
  • Catmint

When shopping for perennials to add to your landscape, ensure they are appropriate for your location. Does it get the right amount of sun? What is the soil like? Some like moist soil, while others hate wet feet, and some, such as succulents and cacti, need dry soil. 

To be sure a perennial is hardy enough to survive the winter, it helps to know your hardiness zone. Go to this page to find your zone by zip code. Cold isn’t always a bad thing. Some plants actually need a period of cold to initiate bud formation. 

Peonies are difficult to grow in warm climates. They need a cold period to blossom.

Peonies, lilacs, and many fruit trees won’t bloom if they haven’t had a certain number of days below 32 degrees.

Lilacs won’t bloom in southern gardens, either.

In the South, it helps to know your heat zone as well since some plants like it hot while others do not. Developed by the American Horticultural Society, heat zones track the average number of days above 86 degrees. Find your area on this map.

When Is a Perennial Not Perennial?

Tender perennials and tropicals are often considered as annuals.

Sometimes, a plant that might be perennial in a warmer climate is sold as an annual since cold weather will kill it, and it won’t come back next year. Some examples are petunias, geraniums, lantana, or impatiens, and even some vegetables such as peppers are tender perennials.

Grow a hot pepper plant in a container you can bring inside for the winter.

They will survive the winter only if you bring them indoors and grow them as houseplants until the weather warms and they can go outside again.

Biennial Plants

Biennials are plants that take two years to complete their life cycle. The money plant (Lunaria) is a great example. In the first year, it was a rough-looking, ground-hugging plant. In the early spring of its second year, it sends up a tall flower stalk with lovely purple blossoms.

In its first year of growth (above), Lunaria could easily be mistaken for a weed. Lunaria doesn’t bloom until its second year (below).

Money plant flowers give way to flat circular seed pods that we let dry on the plant until late summer. The outer coverings can be pulled off, revealing the shiny silver inner membrane that holds the seeds. Gather the seeds to scatter where you want new plants, or let them drop from the old plant naturally. Next spring, the two-year process will start all over again.

Silver dollars make a nice addition to dried arrangements.

Popular Biennial Plants

Popular biennials include:

  • Forget-me-nots
  • Foxglove
  • Sweet William
  • Most hollyhocks.
Forget-me-nots are beautiful biennial plants between early spring flowers. They self-sow readily.

Our Advice

Don’t think of it as annuals vs. perennials! Grow a mix of annuals, perennials, and biennials to keep your garden blooming from early spring until frost. Making good use of the vast diversity the plant world offers is the key to having an interesting and colorful garden!

Caption

Harvested sunflower seeds

Photo Credit
KLSbear/Getty Images
Subhead

Harvesting and Roasting Sunflower Seeds

Print Friendly and PDF

Ever harvested your own sunflower seeds? I mostly give my sunflower heads to the chickens and birds, but you can also harvest seeds from homegrown sunflowers to roast and enjoy yourself! Here’s how.

Sunflowers (Helianthus annuus) are native annual flowers that come in many different colors and patterns. Some reach for the heavens with one thick stem, putting all their energy into a single giant flower. Others spread out with many branches, inviting you to pick them so that they can “come again.”

Many single-stem sunflower varieties are really quick to bloom, needing just 60 days from the seeding date to reach harvestability. Make sure that you are making the most out of your sunflowers!

Isn’t it amazing to think that these giant flower heads start from one little seed?!

About Sunflower Seeds and Oils

Sunflower seeds contain many nutrients, and the best seeds come fresh from the flower head. They’re packed with calcium, iron, phosphorus, magnesium, and potassium. However, they are very fragile once they have been removed from their shells, so always purchase them in the shell or from a refrigerated source.

Sunflower oil is one of the few vegetable oils that is fairly stable. I use sunflower oil in my mayonnaise. The truly stable ones come in a dark bottle, are cold-pressed, and are unrefined. Once opened, the bottle should be refrigerated to avoid rancidity.

sun-flower-2495159_1920_full_width.jpg

When to Harvest Sunflower Seeds

It’s important to recognize when the sunflower seeds are close to harvest. Here are the cues:

  • The large heads begin to droop and turn down. The backside of the head should turn yellow-brown. If it’s still green, it’s not close to ready.
  • The tiny petals covering the developing seeds have dried and fallen off, exposing tightly packed mature seeds. If most of the petals are still attached, leave the sunflower alone.
  • The seeds are hardened and turn black with white stripes. If they are still milky white, they are not mature. Pull a few seeds to see if they have developed.
  • The foliage has turned yellow.

While you wait for your sunflowers to mature enough to harvest, protect them from critters. Once you notice the petals wilting, cover the sunflower heads with brown paper bags, fine netting, mesh, perforated plastic bags, or cheesecloth. Use a twist tie or rubber band to secure the bag so the seeds don’t fall out. 

sunflower-man-gettyimages-1089522742_full_width.jpg
Image credit: Hirurg/Getty

How to Harvest Sunflower Seeds

It’s best to wait and let the seeds dry completely on the stem. Then, just cut the stem an inch below the heads.

But some folks want to beat the critters and dry indoors. In this case, cut the stalks about a foot below the heads when the outer seeds are mature and hang the heads upside down in a warm, dry place that is well-ventilated and protected from rodents and insects. Keep the heads covered as described above.

When the seeds are thoroughly dried (after a few weeks), dislodge them by rubbing two heads together, rubbing the seeds with your hand, or using a stiff brush. Dislodge them over a big bucket. Allow the seeds to dry overnight on a paper towel.

Eating and Roasting Seeds

Once dried, you can eat the seeds alone, mixed with dried fruit, added to salads, or even used in place of nuts for baking—store seeds in airtight glass jars in the refrigerator to retain flavor.  

Roast the seeds to enhance their flavor, lightly brown them on a cookie sheet in the oven at 300°F for about 15 minutes. We have also heard that many of our readers have successfully roasted sunflower seeds in the air fryer! Try this method by air frying them at 350° for 7 to 8 minutes and giving the basket a shake when they are halfway done.

You can eat the seeds on their own, or use them in your favorite recipes. We love incorporating our freshly roasted seeds into the Soft and Chewy Granola Bars and the Chicken Salad with Rice, Oranges, and Snow Peas

Seeds for Chicken Feed

I always give the seed heads to my chickens. As the seeds mature, I cut the heads off of the plants and, with a gloved hand, I rub the now dry brown “fuzz” off of the seeds. I then place them where they will dry. This includes my oven that has a pilot light and my picnic table when the sun is on it.

sunflowers-chickens-gettyimages-157439342_full_width.jpg
Chickens foraging in a sunflower patch.
Photo Credit: Pixelprof/Getty

Once the back is truly dry, I place them in bags upstairs. These I feed to the chickens when it snows. As they refuse to go outside during these storms, I give them some sunflower heads and a few pumpkins or squashes so that they will have something to peck on besides each other.

Sunflowers as Cut Flowers

Sunflowers also make excellent cut flowers. Many times, they do need to be wired so that their heads look straight ahead. Getting the wire from a florist, put it right through the thick neck, bringing it into the middle, then twist both sides down the stem. They generally like a prominent placement if you put them in a mixed bouquet. They definitely can capture the audience’s attention!

sunflowers-vase-1719119_1920_full_width.jpg

Occasionally, a sunflower will act like it’s on steroids. I guess that’s what happened to this one!

Every so often, a sunflower grows larger than life!

Learn more about how to plant and grow sunflowers by referring to the Almanac’s Sunflower Growing Guide

Subhead

Use Summertime Plantings to Fill Garden Gaps!

Print Friendly and PDF

By this time of year, the spring crop of radishes have likely all been picked; it’s too hot for snap peas, and the cilantro is blooming. Here are a few speedy vegetables to plant in early summer!

As you harvest any spring crops, do not let those gaps in the garden sit empty; they’ll only fill up with weeds! To get the most from your garden, break out the seeds and pop in a few wherever you find an open spot.

Here are some summer vegetables that don’t take too long to mature. In late summer, as your spring-planted veggies are winding down, these new recruits will still be going strong.

Vegetables to Plant in Summer

  • Bush beans are perfect for early- to mid-summer planting. Many varieties mature in 50 to 60 days and will supply you with tender new beans until frost takes them out in the fall.
bush beans with a hand holding them
Bush beans 
summer squash on the vine
Summer squash
  • Greens that can stand up to heat, like chard or kale, can grow in place of heat-sensitive lettuce and spinach.
radishes in the ground
Radishes
  • Radishes add pep to any meal. Many red radishes are ready to eat in as little as 25 days. For something different, try white daikon, watermelon radish, or black Spanish.
  • Root crops, including beets, carrots, turnips, and rutabaga, can be directly seeded in the heat of summer and will be ready in time for a fall crop. Maturing in the cooler days of fall improves their flavor. (Learn more about planting fall crops!)
  • Herbs like basil, dill, and cilantro don’t take long to grow enough leaves to pick for garnishing summer meals and can be planted at 2-week intervals throughout the summer. Nothing beats the flavor of dill on new potatoes, a chiffonade of basil on pasta salad, or fresh cilantro in your favorite salsa.
calendulas with bees on them
Bees and other beneficial insects will enjoy the calendula  flowers too!
  • Flowers are food for the soul—and the pollinators! If you have spots in the garden that need a dash of color, try planting edible flowers like calendula or nasturtiums. Their large seeds germinate fast.

Fill in all those spring gaps for a summer refresh!

Learn More

Primary Image

Spring Yard Care Really Counts!

Print Friendly and PDF
Body

No matter your weather, spring is peak time for yard cleanup! From pruning trees to crabgrass prevention, here are 10 tips to cover all you need to know now. There’s a right way to care for your yard, lawn, and garden beds in the spring months.

Lawn and yard care is all about being proactive. We put a lot into our home and property, so it’s time to refresh our memory on what’s next.

1. Prune in Late Winter and Early Spring

If you haven’t already done so, cut off any broken or badly disfigured branches caused by winter storms. 

Unwanted lower branches on all evergreen shrubs and trees should also be removed in late winter.

Most shrubs and trees are best pruned in late winter or early spring, but not all. Got flowering shrubs? When to prune a shrub depends mostly on when it blooms and whether it flowers on growth produced in the same or previous years.

  • Prune summer-flowering shrubs hard at the end of winter or very early spring BEFORE any new growth starts! They form their flower buds on “new” wood (i.e., wood that will grow this spring). Examples include butterfly bush, smooth hydrangeas, panicle hydrangeas, and roses.
  • Prune spring-flowering shrubs after spring flowers fade. Since they bloom on the growth of the previous season (“old” wood), you will be cutting off their buds and flowers if you prune too early. Examples are: azalea, forsythia, mophead hydrangeas, lilacs, and wisteria.

See our complete pruning guide to common shrubs, bushes, and trees.

2. Clean Up Leaves—Go Easy

Even if you cleaned up some leaves in the fall, there are many trees (such as oaks) that shed leaves (and broken or fallen branches) over the winter and well into spring. Now, let’s not go crazy as if we have to clean up every single leaf off our lawn to compete in the neighborhood beauty pageant. A little leaf litter helps our pollinators and wildlife survive the winter. 

Remove any debris or heavy piles of leaves or any layers of leaves. This invites mold, disease, and decay. However, don’t rake into wet ground. It’s best to wait until temperatures are reaching the high 40s or the 50s. If you have a compost pile (or want to start one!), add those leaves to the pile. Otherwise, just mow any thin layers of leaves in with the season’s first cut, and they’ll also break down and add organic matter and nutrition to the soil.

If you have perennial beds, wait to cut down those spent perennial stems until the weather has definitely warmed and it feels like spring is here to stay. So many beneficial insects (ladybugs, native bees) and predators (lacewings, parasitic wasps) are still “hibernating” in leaf litter or hollow plant stems. They will “wake” up as the weather warms and daylight increases. If you just can’t stand to wait, cut those spent plant stems and simply set them at the edge of your property or the woods. The native bees will thank you!

3. Address Aggressive Weeds—Early!

Deal with weeds in early spring. Invasive or aggressive weeds will only get worse as daylight hours increase during summer. As they grow, their roots will strengthen, and they will be very difficult to pull out.

The best way to minimize weeds in your lawn is through good cultural practices:

  • Do not mow too short
  • Allow mow clippings to return to the lawn
  • Skip spring fertilization
  • Do not over- or underwater
  • Devote some of your lawn to wildflowers

You may also choose to apply an organic or traditional “pre-emergent” herbicide. The best time to apply a pre-emergent is when the temperature in the top 1 inch of soil has been 55 degrees F for five consecutive days (often in March and April). Once the soil temperatures reaches 55 degrees, annual weed seeds begin to germinate. Once you can see weeds in your lawn, a pre-emergent herbicide is not effective.

If you see weeds emerge in the spring, spray a post-emergent herbicide (traditional or organic). Wait to apply broadleaf weed killer until late spring, after the weeds have flowered. (Often, this is 6 to 8 weeks after a pre-emergent herbicide.) Weed killers are most effective when applied evenly over the entire lawn.

gordons-broadleaf_0.png
See common lawn weeds to identify what’s most common in your yard!

A word on dandelions: A common perennial weed in early spring, dandelions can also be dug out by their roots—or, just enjoy their yellow blooms. If you maintain a yard without chemicals, you could always harvest dandelion greens when young and tender! Note: Snap off dandelion heads before they seed if you don’t want more dandelions next year.

4. Seeding Bare Patches—Carefully

Winter can reveal damage to your yard from pets, snow plows, and traffic. You may wish to re-seed some spots.

The conundrum is that if you’re using a pre-emergent herbicide in the spring for crabgrass, it’s nonselective and will deter grass seeds from growing, too; this is why fall is a better time to seed grass. However, if you just can’t stand those bare spots, try spot-seeding bare patches as early as possible (by April) before you apply any pre-emergent for crabgrass control.

Give seeds enough time to germinate and somewhat establish. If this is not possible, don’t skip the pre-emergent weed control. It is better to take care of the bulk of your yard; wait until fall to perform any turf repairs.

Before seeding, use a steel rake to scuff up the area. Loosen the soil. Scrape some compost into the area. Sprinkle grass seed on the spot. (Use a sun/shade premium mix, unless the area’s heavily shaded.) Keep the soil moist. Cover the seeds with straw matting or another material. Even grass clippings will do. You just want to cover the spot with some sort of material to hold seeds in place.

If you’re then applying pre-emergent herbicides, we would also fertilize any spots in the lawn early; in a few weeks shoots will grow and fill in the brown spots. If the brown patches are too big or you just can’t wait, sod is the better option.

5. Rake Away Thatch—Not ‘Til Dry 

It’s too early to talk about thatch, but we need to do it now because many folks do it way too early. When we say “thatch,” we’re talking about the matted areas that have died out; they can harbor snow mold. You don’t want more than 1/2-inch of thatch on the ground. A good raking will promote airflow throughout the grass, prevent disease, and help germination. It’s essential the ground and grass are dry enough, or you will do more harm than good raking up grass seeds. 

Rule of thumb: If footprints remain after walking, the grass is still too moist to de-thatch. That said, rake as soon as it’s dry and the grass is still brown; raking too late will harm healthy roots.

6. Do Not Fertilize Too Early

The best time for fertilizing is autumn; this helps build turf by giving grass plants the food they need to build up their root systems. 

However, many people also fertilize in the spring. Do not fertilize too early in the spring. This will divert the plant’s energy into leaf development too soon. Instead, the grass needs phosphorus for root development.

The best time for the first spring application in most regions is late spring (around May), just as the grass is beginning to grow green and you want to promote a lush, green lawn. Fertilize before the heat of summer begins and after the grass is growing nicely. A good feeding of 3/4 to 1 pound of fertilizer will allow the plant to rebuild its food supply. 

When you fertilize grass in the spring, apply lightly. Heavy nitrogen (N) fertilization is not good for the grass and can also lead to disease problems. A healthy lawn is a light, bright green color; if it’s darker, that means too much nitrogen (which will also run off into our water supply). Remember that you can always start lightly and add more until you get the right color.

Also, consider a mulching mower—which returns grass clippings back to the soil. This saves you time and energy, while also improving the condition of your lawn. Since grass clippings contain up to 90 percent water, the clippings dry up very quickly. It’s almost as if the grass clippings disappear. Plus, this returns 25 percent of the nutrients to the soil—a fantastic fertilizer.

7. Loosen the Soil—If It’s Compacted

Do you have flower beds?  After the winter, the soil in your garden beds may be completely compacted. Remove thick layers of leaves that cover evergreen ground cover beds. Thin layers of leaves in your beds can be left alone and simply mulched over later. They’ll break down and add organic matter to your soil. Then, loosen the soil to help oxygen reach the plants’ roots. You can use hand tools for small areas, but larger areas may benefit from tilling.

A grass lawn also gets compacted soil, especially if people walk on it. If you see patches of moss or signs of decline, we would advise aerating the lawn; this allows water and air to reach the root zone faster, resulting in new growth and increased root development. However, this is usually best done in the fall. Plan to rent a lawn aerator at your local home improvement store. If you aerate in the spring, it is important to core aerate before the soil temperature reaches about 55 degrees F. As it warms, you’re simply making room for and inviting, aggressive weed seeds to find a home.

Moss can also mean that your lawn is getting acidic. If you are growing grass, the goal is a neutral pH. Get a soil test (often free or done for a small fee through your local County Cooperative Extension office). If your lawn is acidic, you’ll need to apply lime to it; the Extension folks can advise you.

8. Redraw Beds—With a Garden Hose!

You may wish to redraw the boundary between your garden beds and grass in springtime. Wider beds mean less lawn care, too. Here’s a simple way to do it yourself: Use a garden hose to mark out a nice line for your garden beds. Then, along this bed line, take a sharp metal edger and drive it into the ground as deep as it will go. Dig all along the hose line and then remove the grass that’s there, creating a nice bed. Once done, fill up the bed with 2 to 3 inches of mulch (pine bark is a good choice)—or you’ll just get a bed of weeds! Then, you’re ready to transplant or plant perennial flowers.

Edging garden

9. Mow Grass—But Not Too Soon

Mow the lawn when the grass level reaches 2 to 3 inches tall. The lawn needs time to recover after winter. However, if the grass grows too long, it shades the roots, which allows fewer weed seeds to sprout. 

If you use a traditional lawn mower, spring is the time to clean (or replace) the filter and spark plugs. It’s important to sharpen the mower blade every month or two for a clean cut. When you just rip grass and leave it with open cuts, you leave your yard susceptible to fungi and disease. See more about lawn care.

If you’re interested in alternative mowers, consider a reel mower or an electric mower as a more environmentally friendly option. These mowers work best if your property is one-third of an acre or less. It’s important to mow your grass regularly, as it’s much more difficult to cut the grass if it gets way too tall (as many of us have experienced firsthand!).

Of course, we have to mention that there are alternatives to grass as well! Many folks are using more ground cover plants (such as sedum), walkways, and wider flower beds. There’s also a growing trend to add vegetable garden beds or to integrate edibles (herbs, vegetables, fruit) into your front yard. 

10. Mulch—Carefully

As with leaf removal, don’t mulch too early.  Be patient. There are also many beneficial insects and pollinators (e.g., soldier beetles, native bees, hummingbird clearwing moths) who overwinter in your garden, and smothering your ground with mulch is not helpful. Just hold off on mulching chores until the soil dries out a little and the weather warms.

We mulch once we have edged our beds and trimmed dead branches on our shrubs. Then add your mulch (or, replace your old mulch). We prefer a heavy mulch, such as hardwood bark mulches, over dyed brown wood chips. They are higher quality, last longer, and look better. Read more about the benefits of mulching.

Not everything on this list is necessary for every yard, but we think that we’ve covered most of what you need to know for spring!

Subhead

Check Out These Hosta Varieties!

Print Friendly and PDF

With Fall just around the corner, the sun is riding lower in the sky, casting longer shadows on the garden. One plant that welcomes the extra coolness and shade is the hosta.

Hostas is the unsung hero of the shady garden. There are 70 species of hostas and over 3,000 registered varieties, so you have lots to choose from. Though they do bloom, they are grown primarily for their beautiful foliage, which adds interesting texture and color to the garden all season long.

Types of Hostas

Many varieties have wonderfully fragrant blossoms, especially Hosta plantaginea known as the August lily. I have one called ‘Aphrodite,’ known for its extremely fragrant white flowers. Long after the other hostas’ blossoms have faded, their double flowers perfume the evening air. Even though August is over, my August lily is only in bud. Hopefully, it will blossom soon!

What do garden nuts do on their vacations? Visit other gardens, of course!

hosta_011.jpg

Every year, I pilgrimage to the NH seacoast to check out the plants at Prescott Park. They have a display garden that includes many All-America Selections plants and other well-marked favorites, allowing me to see how they’re holding up in this dry summer. It also has beautiful formal gardens and a special collection of hostas donated by Anna Kay of Birchwood Farms.

hosta_003.jpg

Even though it has been brutally hot and dry this season, most of the hostas look great. I am always intrigued by the variations of color and leaf shapes. The names also add to the fun. What would you call a hosta with thin leaves and serrated edges? How about ‘Hacksaw’? Another one with narrow leaves and ruffled edges called ‘Curly Fries’ was named the 2016 Hosta of the Year.

'Midnight at the Oasis' Hosta
‘Midnight at the Oasis’

Midnight at the Oasis’ has a cool, refreshing look.

Rich Uncle’ is gold with thick, large leaves that look like they have been quilted. ‘Paradigm’ is similarly textured but is gold with wide green edges.

'Clear Fork River Valley' Hosta
‘Clear Fork River Valley’

Clear Fork River Valley’ is also heavily quilted or corrugated-looking.

Other large-leaved varieties are called ‘Titanic’ and ‘Blue Mammoth.’ On the opposite end of the size spectrum are the tiny ones such as 10-inch tall, almost white ‘Vanilla Cream’ and 3-inch tall miniature hosta ‘Pandora’s Box.’ 

hosta_007.jpg
‘Eternal Flame’ 

My favorite has to be ‘Eternal Flame’ with its pointy, heart-shaped leaves. It has a feeling of movement.

Growing Hostas

Hostas require little care and are very long-lasting. An inch or two of compost spread in the spring before the shoots emerge will keep your plants well-fed. They are able to shade out most weeds, keeping maintenance to a minimum. Unfortunately, the moist, rich soil and cool shade that combine to bring out the best in a hosta also make the ideal environment for slugs. Hostas with heavily textured leaves tend to be more slug-resistant than smooth-leaved varieties.

Made in the Shade

To avoid the “hosta ghetto” look in your shady garden, plant them in combination with other shade-loving plants such as coleus, New Guinea impatiens, torenia, begonias, fuchsia, and sweet potato vine.

hosta_009.jpg

Hostas also are great to plant in combination with spring flowering bulbs because they will cover the tired-looking bulb foliage with their late emerging leaves. Since hostas die back to the ground in the winter they make excellent foundation plants for a shady deck or porch where ice and snow would damage shrubs.

Learn more about how to plant and care for hostas.

Do you love hostas? What is your favorite variety? Tell us in the comments!

Caption
Pac Choi
Photo Credit
Robin Sweetser
Subhead

Fall Vegetable Gardening Guide

Print Friendly and PDF

We love fall gardening! The heat is waning but the soil is still warm. There are just three steps to consider in planting a fall garden: when to plant, what to plant, and where to plant. Let’s get started!

Why Plant a Fall Garden

Fall gardening is much less stressful for many crops, shrubs, trees, and perennials. There are fewer weeds and pests, and it’s often rainier, so there is less need to water as often. 

  • In temperate parts of the country (USDA zones 4 to 8), planting can continue into November and December, especially crops like spinach, Swiss chard, broccoli, and kale!
  • In colder climates, some of these same vegetables are frost-tolerant. Many crops taste better after a frost or two.

As soon as your spring and summer crops stop producing, pull them and make room for all those delicious fall crops! There are just three steps to consider.

3 Steps to Fall Gardening Success

1. When to Plant a Fall Garden

Timing is everything. To plan what to plant in your fall garden, See our Fall Planting Dates Calendar. We’ve calculated your frost dates, backed out vegetable maturity dates (found on your seed packet), some time for harvesting, and other fall factors. 

Or, you can consult the Frost Dates Calculator to find the first fall frost date for your area. Where I live, it is around September 20, but often, it is another month before we get a killing frost. There is a lot of glorious gardening weather between now and then.

Even though the days are beginning to shorten, the soil is warmer than it was in May, so seeds that are sown now will germinate much faster.

lettuce seedlings

2. Which Vegetables to Grow

Here’s a list of good vegetables to plant in late summer to keep the garden going through autumn! Pay attention to which veggies are frost-tolerant and which are tender. 

  1. As the weather cools, plant crops that are cold-tolerant and mature quickly. Salad greens are fast and hardy; leaf lettuces are ready to cut in 45 to 50 days. Looseleaf and butterhead leaves can be harvested at just about any time in their development. Sometimes, lettuce seeds have difficulty germinating in hot soil, so I start my new baby lettuces in flats that I can keep well-watered and shaded until the plants are large enough to transplant into the garden. Some varieties of lettuce such as ‘Winter Marvel’ and ‘New Red Fire’ are more cold-tolerant than others. 
  2. A quick crop of radishes will be ready for the salad bowl in 25 days.
  3. Other root crops, like carrots and beets, will take longer but are worth the wait since they seem to get sweeter as the days get cooler.
  4. Fall-planted spinach does much better than spring-planted spinach since it matures during the cool weather it loves instead of struggling in the summer heat.
  5. Swiss chard is another hardy green that reaches an edible size in 25 to 30 days. Given some extra protection when frost threatens, spinach and chard can last well into fall. If well-mulched, in many parts of the country, spinach will winter over and give you an extra-early spring crop of the best spinach you’ve ever tasted!
  6. Broccoli and kohlrabi mature well in cool weather and will not be bothered by the cabbage moth larvae as much as spring-planted cold crops are.
  7. Kale is a winter staple. Try blue-green ‘Winterbor’ or pretty purple ‘Redbor’. They can be harvested long after other greens have been killed by cold weather.
  8. Bush beans take about 6 to 8 weeks to reach a harvestible size. The only problem with these crops is that they will be killed by frost unless you plan to protect them. If you live in an area with a long growing season, this will not be a problem.
  9. Snap peas and snow peas start to bear in 60 days, and peas that mature in cold weather seem especially sweet and crisp. Pea vines can survive temperatures down to 25 degrees.
  10. The real stars of the fall garden are the Asian greens. Quick-maturing varieties can be harvested in 45 days. Tatsoi, pac choi, mizuna, and napa are all in the brassica family. If given some protection, they can weather a frost and will last through a hard freeze.

Some Asian greens like hon tsai tai and mibuna are more closely related to mustard (also a brassica), which gives them tangy leaves that add a pleasant bite to an autumn salad or stir fry. Other greens such as arugula, mache, minutina, and claytonia can withstand quite cold temperatures, providing you with lots of interesting salads and cooked greens well into late fall.

Also, consider mixing up edibles with flowering annuals to bring autumnal interest to the garden! For example, combine ornamental cabbages and kales with flowering pansies and different salvias.

3. Where to Plant Fall Crops

Of course, you have to decide on where to put your crops. This is when you’ll be clearing out the summer crops that have died back or that you’re simply not using.  

You may have harvested your onions and garlic, so you have an open bed. Or, perhaps you’ve pulled diseased tomatoes, or the squash bugs have now taken over the squash bed. Clean up the beds and add some compost and kelp to feed the soil before planting the next crop. 

Caring for Fall Crops

Watering is probably your most important task for a fall garden. The air and ground temperature is already warm (unlike spring plantings).

  • It will be important to keep your seeds consistently watered. 
  • Adding mulch also helps water conservation.
  • If the heat and Sun in your area are too intense, consider a lightweight row cover. 

Fall can be a second spring! Freshen up the empty beds with some compost and get ready to plant your second garden.

Primary Image
Leo Zodiac Sign
Photo Credit
Sam Jones/Vaughn Communications

Enter the Lion's Den: A Complete Guide to the Leo Zodiac Sign

Print Friendly and PDF
Body

Have you ever wondered why your Leo friend is the life of the party or why your Leo partner craves the spotlight? Look no further than the stars! Leos, symbolized by the bold and courageous lion, are fire signs known for their radiant personalities, unwavering confidence, and natural leadership. 

This comprehensive guide explores the fascinating world of Leos, taking a look at their personality traits, strengths and weaknesses, likes and dislikes, and even compatibility with other zodiac signs.

The Leo Zodiac Sign at a Glance
ElementFire
DatesJuly 22-August 22
CompatibilityMost compatible with Aries and Sagittarius
Personality TraitsConfident, Generous, Loyal, Creative, Strong Willed
SymbolLion ♌

What are the Leo Dates?

Cancer is the fifth astrological sign in the Zodiac, originating from the constellation of Leo. Under the tropical zodiac, the Sun transits this sign between July 22 and August 22. If your birthday falls within this date range, you have a Leo Sun Sign.

The Zodiac Sign of Leo spans the 120th to 150th degree of celestial longitude.

Leo Signs

Leos, the bold lions of the zodiac, are fire signs that radiate warmth and passion.  Their ruling planet is the Sun, reflecting their confident and charismatic nature.  Symbolized by the lion, the king of the jungle, Leos are natural leaders who crave attention.  Their fierce independence and regal air mirror the lion’s powerful presence.

Leo Personality

As the leader of the Zodiac, you have the ability to light up a room. It’s as if your ruling planet, the Sun, has entered when you walk into a space. Others can be counted upon to notice.

As a young child, you may be shy. Your strong desire to be good at what you do may initially hold you back. When you feel threatened, you withdraw. Time and practice are your friends as you learn as you go.

You have the gift of gab and can often be found at the center of a group of people. Knowing instinctively which topics are interesting, you weave your stories with daring and excitement. Your sense of adventure provides you with abundant material to keep your audiences enthralled.

Sometimes, Leos have strong opinions, but also it turns out that your statements are usually correct! Leos are highly intuitive and able to analyze a situation and make a good call quickly. Beneath your sometimes headstrong personality, you have a loving, sensitive nature that they do not easily share with others. 

It’s critically important that your activities get noticed, and you need pats on the back as much as you need air to breathe. It might be a good idea to let your friends and significant other know this. As a culture, we are not necessarily very good with acknowledgments, but they are easy enough to do if asked.

You are also gifted with natural talents and abilities. Whether athletically, intellectually, or emotionally, the path (or paths) where you find this ease should be followed enthusiastically. 

You strive to be the best at what you do. Second-best does not appeal to you. You do not like jobs that have no potential for advancement, so it is best if you have a career.

You are adept at leadership and can inspire others to do their best, too. You may be able to come up with a business of your own utilizing your own abundant creativity. It’s important that you like what you do for a living as you feel that your life should mostly be fun.

Leo Personality Traits

  • Strengths: Confident, Outgoing, Generous, Loyal, Creative, Natural Leader
  • Weaknesses: Attention-seeking, Domineering, Arrogant, Struggles with Criticism, Impatient, Can be Stubborn
  • Leo Likes: Being the center of attention, Recognition and Praise, Luxury and Glamour, Creative Projects, Spending time with loved ones
  • Leo Dislikes: Rudeness and Injustice, Feeling Ignored, Boredom and Routine, Taking Orders, Disloyalty and Betrayal

Leo Astronomy

The constellation Leo, the Lion, is a majestic presence in the night sky. One of the largest and most recognizable constellations, it boasts the bright blue star Regulus, also known as the “little king.” Visible across most of the Northern Hemisphere, Leo reigns supreme in the spring. During late March and April, it reaches its peak visibility in the evening sky, dominating the northern celestial hemisphere. As summer approaches and nights grow shorter, Leo starts its descent westward, eventually becoming a faint sight in the autumn sky.

Leo Compatibility

Most Compatible Zodiac Signs

Aries. “When the Lion lies down with the Lamb” has biblical implications. You are quite similar, but each of you have your own distinctive place. Sagittarius will take you to places you never even dreamed of going.

Compatible Zodiac Signs

Aries and Leo. Gemini and Libra. Their air feeds your fire and keeps you dancing.

Famous Leos

Throughout history, there have been a number of politicians, historical figures, artists, musicians, and celebrities who were Leos. Some of these prominent Leos include:

  • Napoléon Bonaparte
  • Coco Chanel
  • Amelia Earhart
  • Barrack Obama
  • Henry Ford
  • Arnold Schwarzenegger
  • Meghan Markle
  • Bill Clinton
  • Tom Brady
  • Madonna

Learn More About Each Zodiac Sign

Aries | Taurus | Gemini | Cancer | Leo | Virgo | Libra | Scorpio | Sagittarius | Capricorn | Aquarius | Pisces

Primary Image
Caption

Attract hummingbirds with this list of plants that they’ll find delicious.

Hummingbirds Like These Plants Best!

Print Friendly and PDF
Body

Calling all hummingbird lovers! Discover the top hummingbird-attracting flowers, from perennials like bee balm to annuals like petunias. Check out our extensive list of hummingbird favorites with their nectar-rich, colorful flowers. See which kinds of flowers hummingbirds like—and will keep these tiny pollinators coming back to your garden!

The Best Hummingbird Flowers

For centuries, gardeners have been fascinated with hummingbirds’ beauty and aerobatics. These flying jewels are also mighty pollinators, bringing forth more flowers and food. Having hummers in your garden is a win-win.

To give a hummingbird food, give these tiny birds something sweet to eat! Brightly-colored flowers that are tubular tend to produce the most nectar.

These include perennials such as bee balms, columbines, daylilies, and lupines; biennials such as foxgloves and hollyhocks; and many annuals, including cleomes, impatiens, and petunias.

Here’s a list of flowering plants that attract hummingbirds. Choose varieties in red and orange shades.

Common NameLatin Name
Beard tonguePenstemon
Bee balmMonarda
Butterfly bushBuddleia
CatmintNepeta
Clove pinkDianthus
ColumbineAquilegia
Coral bellsHeuchera
DaylilyHemerocallis
LarkspurDelphinium
Desert candleYucca
IrisIris
Flowering tobaccoNicotiana alata
FoxgloveDigitalis
LilyLilium
LupineLupinus
PentasPentas
PetuniaPetunia
Pincushion flowerScabiosa
Red-hot pokerKniphofia
Scarlet sageSalvia splendens
Scarlet trumpet honeysuckleLonicera sempervirens
SoapwortSaponaria
Summer phloxPhlox paniculata
VerbenaVerbena
WeigelaWeigela

Hummingbird at purple flowers

Hummingbird Garden Ideas

Hummingbirds also need a habitat that will give them food, water, shelter, and security. Here’s what attracts hummingbirds:

  • Provide lots of space between plants to give hummingbirds enough room to hover and navigate from flower to flower.
  • Hummingbirds need shade. Herbs, flowering shrubs, dwarf trees, and vines can all be used to create an ideal tiered habitat from ground level to 10 feet or more.
  • Hummingbirds love water, especially if it’s moving. A gentle, continuous spray from a nozzle or a sprinkler hose is perfect for a bath on the fly.
  • Hummingbirds do not have a keen sense of smell and rely on bright colors to find their food. They are particularly fond of red and are often observed investigating feeders with red parts, red plant labels, red thermometers, and even red clothes on a gardener.

Note: Do not use red dye in a hummingbird feeder; there is concern that it may harm the birds. Instead, use plain, clear sugar water (1 part white sugar mixed with 4 parts water). The birds love it! If your feeder does not have red on it, attach a red label or other item to attract them. Learn how to make hummingbird nectar.

→ Find more tips for introducing hummingbirds to your garden here!

An often-asked question is, “Why do hummingbirds hum?” We can’t say for certain, but we suspect that it might be because they don’t know the words! All jokes aside, the real answer is that hummingbirds are capable of beating their wings up to 80 beats per second, producing a buzz audible to human ears.

Hummingbird at feeder

Fun Facts About Hummingbirds

Hummingbirds are one of the most interesting birds! Here are some fun facts about these little birds:

  • Bee hummingbirds are the tiniest of all birds, weighing less than an ounce and measuring only 2 inches long.
  • Their brightly-colored, iridescent feathers and quick movements make them appear to be living sun catchers—hence one nickname, “flying jewels.”
  • Hummingbirds have the unique ability to fly in any direction, even backward, with their wings beating up to a blurring 80 beats per second.
  • They can hover in mid-air when sipping nectar from brightly–colored flowers with their long, slender beaks.
  • While whizzing about the garden, hummingbirds expend so much energy that they must eat at least half their body weight each day to replace the calories that they burn up. This means eating almost constantly—from sunrise to sunset—and visiting over a thousand flowers every day.
  • You can hear the call of a ruby-throated hummingbird here.

→ Learn more about hummingbirds here.

Learn More About Hummingbirds

Do you have hummingbirds or other birds in your garden? Let us know in the comments below!